Introdução
Vá para o passo 1Dell says "no" to physics and threads a 13.3" HD display into an impossibly small laptop. We're talking something an 11" display should call home. "How?" you may ask—well, we're out to get you an answer. The early 2015 Dell XPS 13 is our newest bit of teardown tech—time to tear it open!
Who's first to find out about the latest teardowns? You are—if you follow us on Instagram, Twitter, or Facebook!


-
-
Our specimen of Dell's compact XPS 13 features:
-
13.3-inch "UltraSharp QHD+ infinity touch display" with 3200 x 1800 resolution
-
8 GB Dual Channel DDR3L-RS 1600 MHz "onboard" RAM
-
128 GB SSD
-
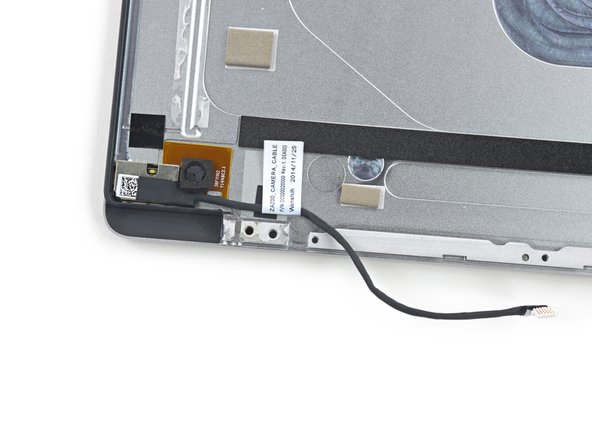
Plus, a little-mentioned webcam in the lower display bezel.
-
-
-
Dell folds space and time, packing 13.3 inches of laptop into an 11-inch form factor.
-
While Apple uses its spare inches to make the MacBook Air look thinner and more streamlined, the XPS is clearly a compact competitor.
-
And because it's the insides that count, we're impatient to get to the guts.
-
-
-
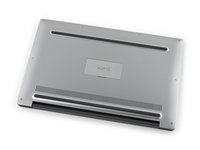
The bottom of the laptop is surprisingly bare of any warnings or model numbers... but what's under door number XPS?
-
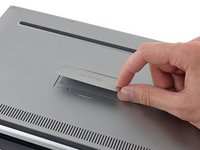
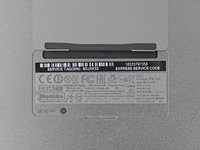
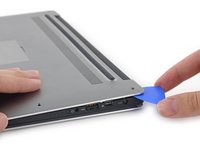
A bizarrely magnetized, "spring-loaded" flap hides the FCC and Service Tag markings...
-
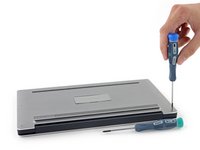
Not ones to cheat on our homework, we'll see how easy it is to get into the laptop on our own two spudgers first...
-
-
-
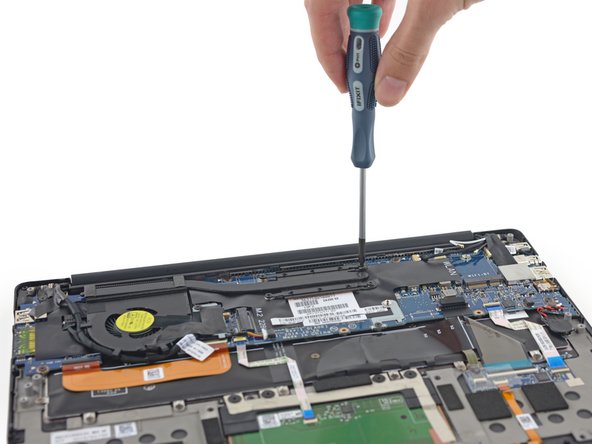
Setting aside the driver that handy label called for, we whip out a T5 and dispatch the case screws.
-
We spoke too soon—there are clips, too, and hefty ones at that. As we wrestle with the case, we're left wondering if Dell went for the trifecta: screws, clips, and glue?
-
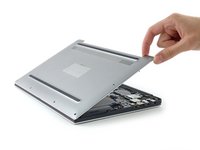
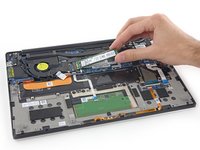
We finally remove the stubborn lower case, and it turns out that it was just some serious clippage fighting us. Definitely one of those "easier-when-you-know-how" opening procedures.
-
-
-
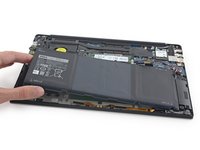
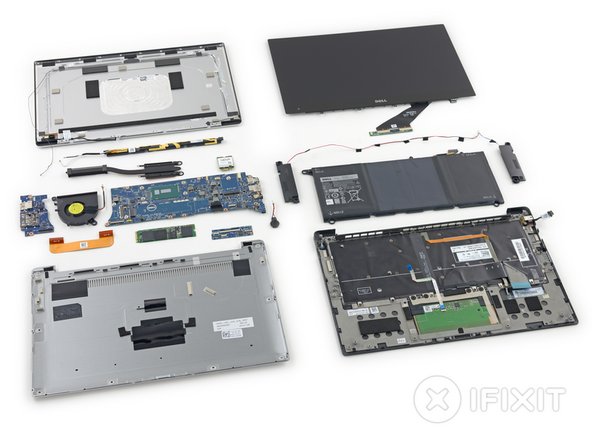
A solid aluminum lower case? Flat, paneled battery? Upper
logicsystem board with a single fan separating the main board from a smaller I/O board? -
At first glance, this looks like a prototype MacBook Air—a bit less polished than the current gen, but strikingly similar.
-
-
-
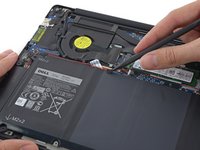
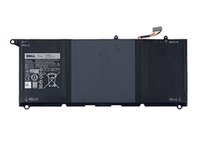
The battery connector is no easy pop-off top; it requires some precision spudgering to chase it out of its socket.
-
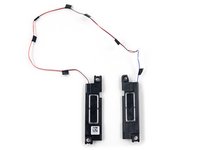
After that, it still isn't a perfectly clean getaway—the speaker wires are strategically taped to the battery in a half dozen spots, which we'll have to liberate to free the battery. (Admittedly, it could have been a lot worse.)
-
These same wires are trapped under the battery screws—so speaker replacement means battery removal. It looks like the XPS has some layering issues.
-
-
-
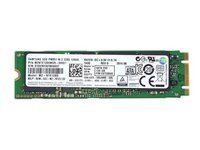
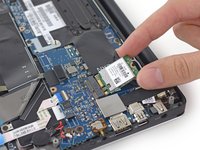
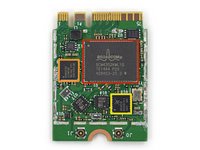
This particular XPS is packing a removable 128 GB Samsung PM851 M.2 form factor SSD.
-
2 x Samsung 431 K9CHGY8S5M-CCK0 64 GB TLC NAND flash
-
Samsung 428 K4P2G324ED-FGC2 512 MB LPDDR2 DRAM
-
Samsung S4LN045X01-8030 MDX controller
-
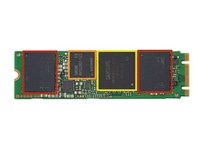
But wait, there's more! This SSD comes complete with an unremarkable underside.
-
-
Ferramenta utilizada neste passo:Tweezers$4.99
-
With tweezers in hand, we easily dispatch the wireless card grounding bracket.
-
Underneath, we find a Broadcom DW1560 Wi-Fi/Bluetooth 4.0 LE card, featuring:
-
Broadcom BCM4352KML 5G WiFi 2-stream 802.11ac transceiver
-
Broadcom BCM20702 single-chip Bluetooth 4.0 solution with BLE support
-
Skyworks SE5516 dual-band 802.11a/b/g/n/ac WLAN front-end module
-
-
-
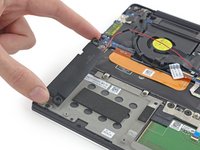
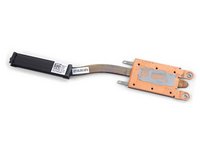
Time to get into some more exciting bits: eyes on the heat sink. Said sink looks awfully similar to that of the Early 2014 MacBook Air.
-
It comes complete with some crusty thermal paste. Yum.
-
-
-
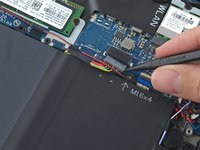
Tape, cables, and labeled connectors have been the defining characteristics of the XPS 13's guts. There are a lot of components, with a lot of connecting cables, and a lot of tape holding everything down.
-
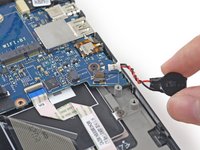
There's a small (labeled!) coin cell battery to keep the real-time clock running. We're expecting this sort of reaction when we reassemble the computer and power it back on.
-
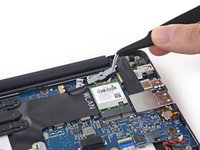
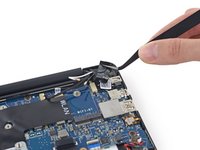
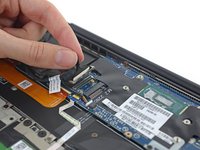
To get anywhere, we're going to have to disconnect the XPS's odd display cable.
-
Not only is it wrapped snugly around the fan, but, for some reason, it includes a branch to power the SD card reader on the I/O board.
-
-
-
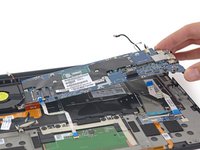
Full disclosure: Once we got inside the XPS, we sort of started cheating on our homework—by following Dell's service manual as a disassembly guide. What can we say, we love repair documentation.
-
So when we got to the bit instructing us to remove the system board to take out the fan, we were a bit confused, amused, and eventually miffed.
-
-
-
With the motherboard removed, let's take a look at what this XPS is packing:
-
5th Generation Intel Core i5-5200U processor (up to 2.70 GHz) with Intel HD Graphics 5500
-
Winbond 25Q64FVS10 64 M-bit serial flash memory
-
Microchip Technologies MCP23017 16-bit input/output port expander with interrupt output
-
Texas Instruments CSD97374Q4M high frequency synchronous buck NexFET power stage
-
Texas Instruments CSD87330Q3D synchronous buck NexFET power block
-
Texas Instruments TPS51624 4.5 V to 28 V, 1/2-phase step-down driverless controller
-
ANPEC APW8813/A DDR2 and DDR3 power solution synchronous buck controller with 1.5 A LDO
-
-
-
Mas chips, por favor!
-
Elpida/Micron J8416E6MB-GNL-F 8 GB (8 x 1 GB) DDR3L-RS 1600 MHz dual-channel RAM
-
Realtek ALC3263 audio codec
-
SMSC MEC5085 low power embedded flash
-
Texas Instruments SN74CBT3257C 4-bit 1-of-2 FET multiplexer/demultiplexer, 5 V bus switch
-
ON Semiconductor NCP4545 controlled load switch
-
-
-
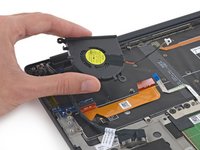
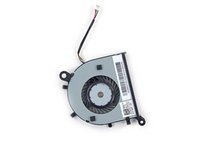
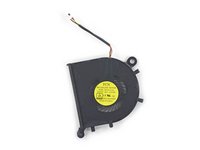
The XPS 13's
biggestonly fan. -
What can we say, it's a fan. It runs at 5 volts and 0.5 amps, for a whopping 2.5 watts of super-exciting centrifugal cooling power.
-
Without rubber mounting grommets, it may well develop a noise issue in the future. Needless to say, we don't want any of that jibber jabber.
-
-
-
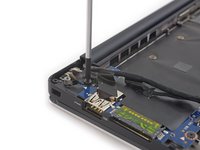
Alright, that's enough. This construction is more than a little ridiculous. Waiter! There's a screw in my tape!
-
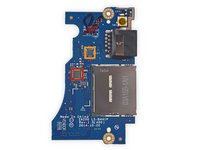
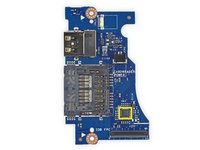
After some screwy disassembly, we free the I/O board and find:
-
Realtek RTS5249 card reader controller
-
Texas Instruments TPS2544 USB charging port controller and power switch
-
Parade PS8713B single port USB 3.0 repeater/redriver
-
-
-
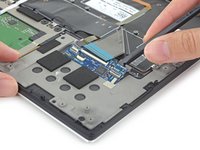
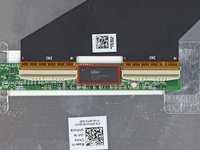
We scoop out the last* of the exciting** bits: an LED indicator cable, and this weird interconnect board!
-
* Technically we still have the trackpad, keyboard, and DC-in port.
-
** Author's discretion
-
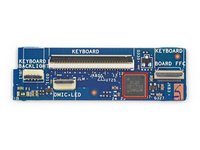
Living on the interconnect board and managing the keyboard, keyboard backlight, front LEDs, and dual mics:
-
SMSC (Microchip) ECE1117 multi-function BC-Link/SMBus companion device
-
-
-
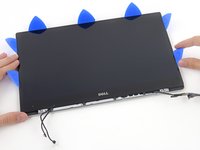
Enough dilly-dallying, let's get to the fun part. The new exciting feature that Dell is really trying to sell here: The ultra high def, infinity-edged touch screen display.
-
Wait did we accidentally get a MacBook display somehow? Déja vu...
-
The clutch cover comes off in much the same way as on a MacBook Pro, revealing a plastic frame of antennas.
-
-
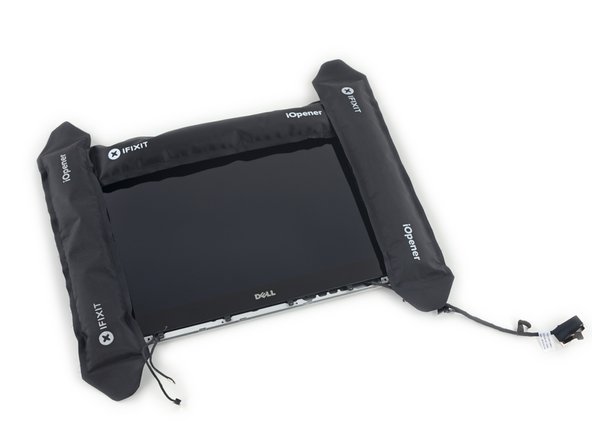
Ferramenta utilizada neste passo:iOpener$17.99
-
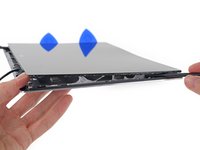
We're getting pretty good at prying up glass, so we've got some idea of where to start.
-
Step 1: Load up on heat. Use plenty of iOpeners. (Or one iOpener plenty of times).
-
Step 2: Pry gently in many places. Opening Picks are the ideal tool.
-
Step 3: ???
-
Step 4: The edges you just heated are nowhere near the adhesive you wanted to loosen. The adhesive is entirely under the LCD panel.
-
Step 4b: Apply plenty of heat to the back and pry slowly.
-
-
-
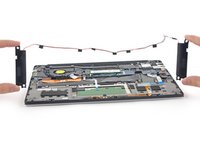
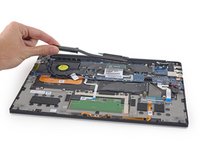
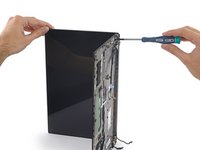
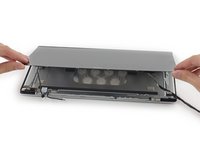
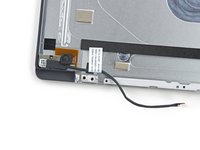
After painstakingly cracking the clam, we find a mysterious black thread running along the inside of the top case.
-
There's no mention in the service manual, but we're betting we just stumbled onto the easy way to get the LCD out—without the pain or the staking.
-
The thread is routed in a channel beneath the display adhesive—pulling along the side ought to slice right through and free the panel, like cutting clay off a block.
-
We can't say for sure if this works without taking apart another XPS 13, but signs point to an awesome repair Easter egg.
-
-
-
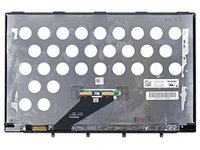
That's quite a Sharp display assembly!
-
Since we splurged for the touchscreen model, we had to find the digitizer control. Here it is, an Elan Microelectronics eKTH3915SUS.
-
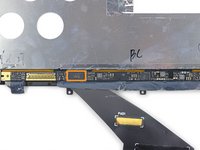
The display driver board lives under some foil tape at the bottom of the panel.
-
Novatek NT71394MB8 display driver IC
-
-
-
Dell XPS 13 Repairability Score: 7 out of 10 (10 is easiest to repair).
-
Service manuals are available online, for free. Thanks, Dell!
-
Once you manage to take off the bottom cover, all the parts are pretty easily replaceable.
-
Screws and connectors are labeled, aiding reassembly.
-
Moderate adhesive—except for the display assembly, no heat is required to disassemble.
-
The layering could be improved to make certain components easier to remove, but overall the modular design makes repairs cheaper.
-
Soldered RAM means you'll never be able to upgrade when things get slow.
-


55 comentários
This is a good example of what companies should do for us in the first place, Dell is by no means losing anything by giving away their service manuals, if you open the computer between the warranty period, you just void it and end of story. But after that time is gone, if you want to do your own repairs, you can do it without guessing or breaking stuff. I'm a hardcore Apple user & certified technician, but this one really got my attention, it's a nice looking laptop.
BTW, nice job from the guys from iFixit!
Exactly, Dell certainly does a better job at it than e.g. Apple.
jke -
There is no way to tell if you have opened up the device or not, since there is no warranty label or anything restricting you from opening it.
You can change the SSD, swap out speakers and battery and even replace your display for a touch screen and supposedly it will be still under warranty.
Well, if you show them that you have “modified it” by missing a few screws or showing signs of wear on the screws … well, THAT I can’t help you.
Dell’s pretty good on this side. I had never need to go to the repair shop. Once.
Considering that the SSD is flat on one side, would this fit since it has chips on both sides?
I don't have that SSD on-hand to test for sure, but it looks like the XPS has a totally standard M.2 port—with enough of a gap between the SSD and the mother board for chips on both sides of the SSD.