Introdução
As baterias do iPhone são projetadas para manter 80 % da sua capacidade por até 500 ciclos de carga, o que dura cerca de 18 a 24 meses para a maioria das pessoas. Depois disso, seu iPhone pode precisar ser carregado com muito mais frequência, e o iOS pode avisar que o desempenho foi afetado (ou seja, seu celular ficará mais lento). Use este guia para substituir sua bateria e restaurar o desempenho do seu iPhone como se fosse novo.
Se a sua bateria estiver inchada, tome as precauções adequadas.
Nota: Neste guia, o alto-falante é removido para diminuir a chance de quebra de uma tira adesiva da bateria. É possível remover a bateria do iPhone sem remover o alto-falante.
Nota: No iOS 17.6 e versões anteriores, seu iPhone pode exibir um aviso sobre a “autenticidade” da bateria após o reparo, mesmo ao usar peças originais da Apple. Se o seu iPhone funcionar normalmente, você pode ignorar o aviso com segurança. No iOS 18 e versões posteriores, autentique sua nova bateria usando o Assistente de Reparo da Apple.
Para um desempenho ideal, após concluir este guia, calibre sua bateria recém-instalada: carregue-a até 100 % e continue carregando por pelo menos mais duas horas. Em seguida, use seu iPhone até que ele desligue devido à bateria fraca. Por fim, carregue-o ininterruptamente até 100 %.
O que você precisa
-
-
Desligue o seu iPhone antes de começar a desmontagem.
-
Remova os dois parafusos pentalobe P2 de 6,8 mm na borda inferior do iPhone.
 Pergunte ao FixBot
-
-
-
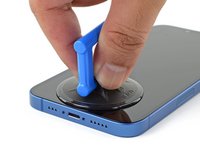
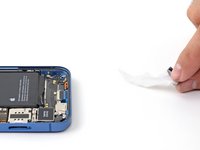
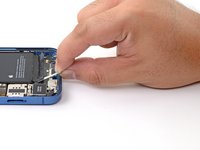
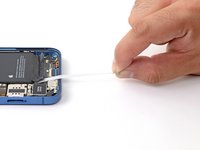
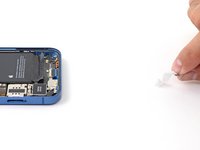
Meça 3 mm a partir da ponta e marque a palheta com um marcador permanente.
-
-
-
Coloque tiras sobrepostas de fita adesiva transparente sobre a tela do iPhone até que toda a superfície fique coberta.
-
Se não conseguir fazer com que a ventosa grude nas próximas etapas, dobre um pedaço de fita adesiva resistente (como fita adesiva vedante) na forma de uma pega e levante a tela com ela.
-
-
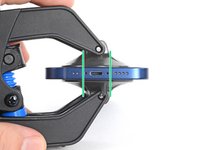
Ferramenta utilizada neste passo:Clampy - Anti-Clamp$24.95
-
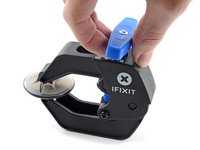
Puxe a pega azul para trás para destravar os braços do Anti-Clamp.
-
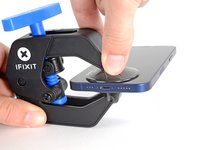
Deslize os braços pela borda esquerda ou direita do seu iPhone.
-
Posicione as ventosas próximo à borda inferior do iPhone - uma pela dianteira e a outra pela traseira.
-
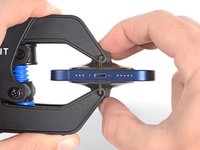
Aperte as ventosas uma contra a outra para aplicar sucção na área desejada.
-
-
-
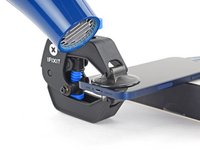
Puxe a pega azul para a frente para travar os braços.
-
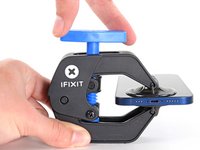
Gire a pega 360 graus no sentido horário até que as ventosas comecem a se esticar.
-
Certifique-se de que as ventosas permaneçam alinhadas uma com a outra. Se elas começarem a ficar desalinhadas, solte um pouco as ventosas e realinhe os braços.
-
-
-
Apoie o iPhone em algo sólido como um livro de capa dura, de modo que ele descanse paralelo ao piso sem que você precise segurá-lo com a mão; isso irá facilitar o trabalho nos próximos passos.
-
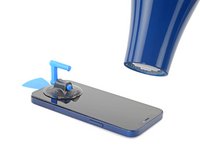
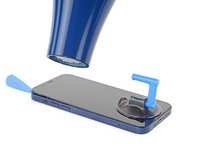
Com um secador de cabelos, aqueça a borda inferior do iPhone. A tela deve se sentir um pouco quente demais para ser tocada.
-
Aguarde um minuto para que o adesivo tenha a chance de se soltar e apresentar um vão.
-
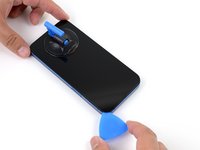
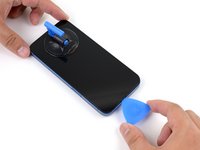
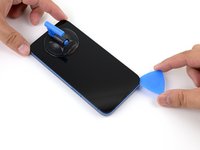
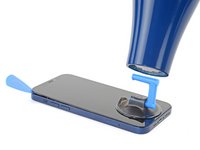
Introduza uma palheta de abertura sob a moldura plástica da tela quando o Anti-Clamp criar um vão suficientemente grande.
-
Pule as próximas três etapas.
-
-
-
Com um secador de cabelos ou uma pistola de ar quente, aqueça a borda inferior do iPhone até que a tela fique um pouco quente demais para ser tocada.
-
-
-
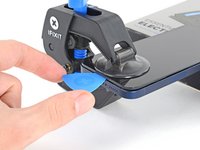
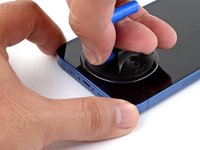
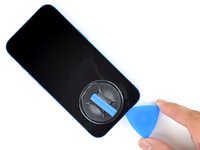
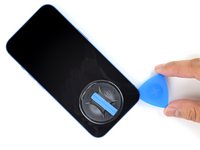
Se você estiver usando uma ventosa de sucção simples, aplique-a na borda inferior do fone, evitando a extremidade do vidro.
-
-
-
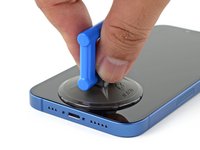
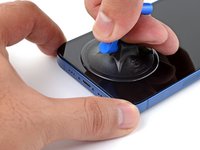
Puxe a ventosa para cima com pressão firme e constante para criar um pequeno vão entre a tela e a moldura.
-
Introduza uma palheta de abertura no vão abaixo da moldura de plástico da tela.
-
-
-
Aqueça a borda direita do iPhone (a borda com o botão LIGA/DESLIGA) até que a tela fique um pouco quente demais para ser tocada.
-
-
-
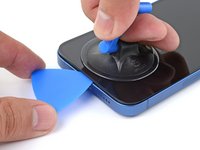
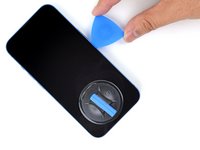
Passe a palheta ao redor do canto inferior direito do iPhone para cortar o seu adesivo.
-
Continue movendo para cima a ferramenta pela borda direita do iPhone até alcançar o canto direito superior.
-
Deixe a palheta no canto superior direito antes de continuar.
-
-
-
Aqueça a borda superior do iPhone até que a tela fique um pouco quente demais para ser tocada.
-
-
-
Passe a palheta de abertura ao redor do canto superior direito do iPhone para separar o adesivo superior.
-
Deixe a palheta no canto superior esquerdo antes de continuar.
-
-
-
-
Aqueça a borda esquerda do iPhone até que a tela fique um pouco quente demais para ser tocada.
-
-
-
Gire sua palheta ao redor do canto superior esquerdo da tela.
-
Deslize sua palheta até o canto inferior esquerdo da tela para separar o adesivo.
-
-
-
Se não removeu ainda a sua ventosa de sucção, faça-o agora.
-
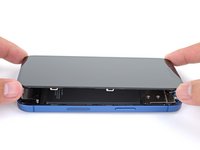
Vire o iPhone de modo que a borda direita fique virada para você.
-
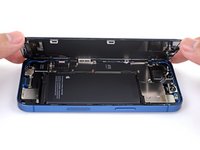
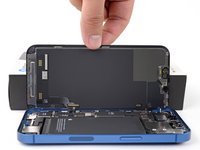
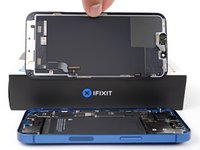
Abra o iPhone elevando o lado direito da tela e deixando o lado esquerdo embaixo, como se fosse virar a capa de um livro.
-
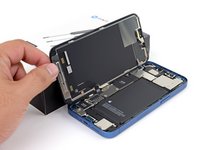
Apoie a tela em algo e deixe-a escorada enquanto executa trabalhos no telefone.
-
-
Ferramenta utilizada neste passo:Magnetic Project Mat$19.95
-
Use uma chave Phillips para remover os três parafusos de 1,3 mm que prendem a tampa do conector da bateria e da tela.
-
-
-
Use uma espátula ou a unha limpa para levantar o conector da bateria do seu soquete na placa lógica.
-
Dobre o conector levemente para longe da placa lógica para evitar que ele entre em contato acidental com o soquete e forneça energia ao celular durante o reparo.
-
-
-
Use uma espátula ou a unha para desconectar o conector do cabo da tela.
-
-
-
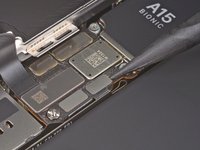
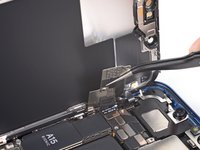
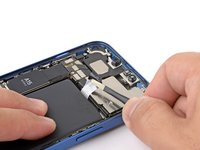
Remova os três parafusos que prendem a tampa do conector do sensor frontal:
-
Um parafuso Phillips de 1,7 mm
-
Um parafuso Phillips de 1,3 mm
-
Um parafuso Y000 de 1,8 mm
-
-
-
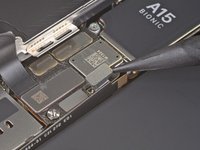
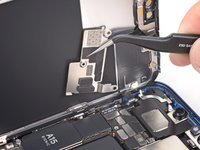
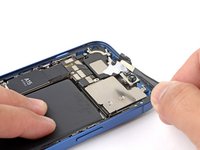
Incline a tampa para cima, a partir do centro do celular, até que o pequeno clipe perto da borda do dispositivo se solte.
-
-
-
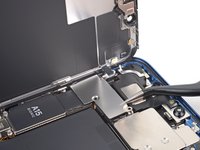
Use uma espátula ou a unha para desconectar o conector do cabo do conjunto de sensores frontais.
-
-
-
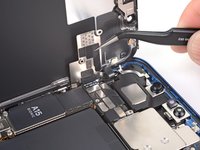
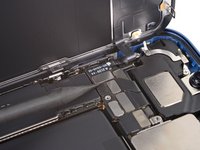
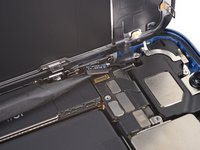
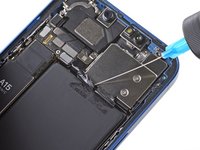
Use uma chave Phillips para remover os quatro parafusos de 1,7 mm que prendem o alto-falante.
-
-
-
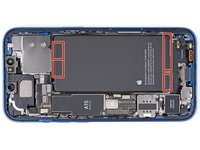
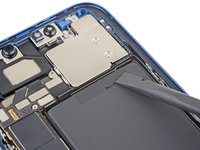
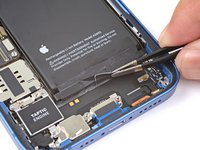
Cada tira adesiva possui uma aba preta na ponta, levemente colada à borda da bateria.
-
-
Ferramenta utilizada neste passo:Tweezers$4.99
-
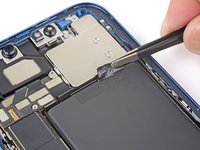
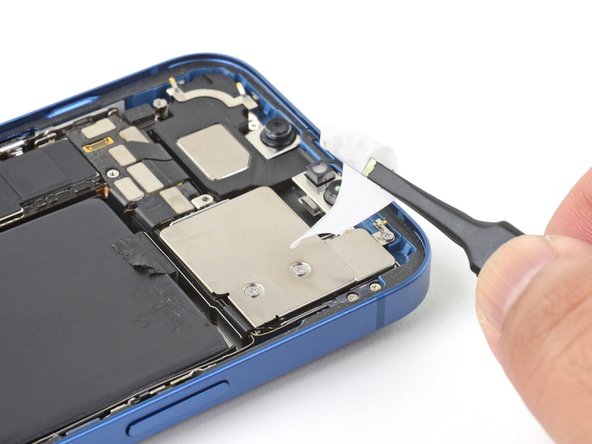
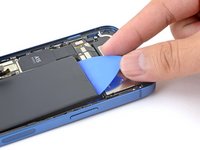
Use a ponta chata de uma espátula para levantar suavemente a borda da aba adesiva superior direita da bateria, para que você possa agarrá-la com uma pinça sem corte.
-
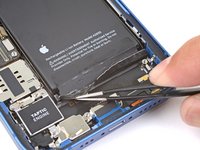
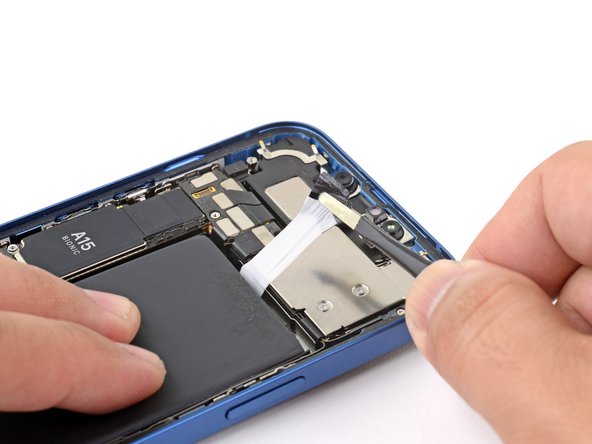
Puxe a aba adesiva da bateria para baixo para descolá-la da borda superior da bateria.
-
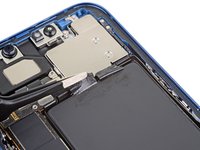
Repita o procedimento para a aba adesiva superior esquerda da bateria.
-
-
-
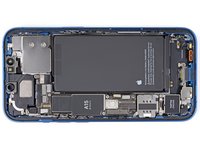
Descole as duas abas adesivas da bateria restantes para soltá-las da borda inferior da bateria.
-
-
-
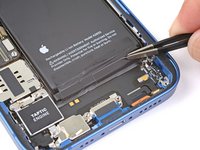
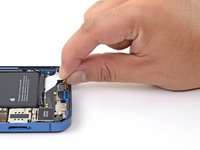
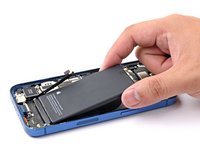
Segure a aba da extremidade inferior direita com os dedos e puxe-a lentamente, afastando-a da bateria em direção à parte inferior do iPhone.
-
Puxe com força suficiente para manter a tensão na tira, mas não force. Dê tempo suficiente para que ela estique e se desprenda debaixo da bateria.
-
Não pressione a bateria. Segure o iPhone firmemente pelas laterais.
-
Mantenha a tira reta e sem dobras. Tente puxar toda a tira de forma uniforme, em vez de puxar principalmente pelo meio ou por um dos lados.
-
Puxe em um ângulo baixo para que a tira não prenda na borda da bateria.
-
Se a tira adesiva se romper, tente recuperá-la usando os dedos ou uma pinça sem corte e continue puxando — mas não force nada por baixo da bateria.
-
-
-
Segure a aba de puxar inferior esquerda com os dedos e puxe-a para longe da bateria, na direção da parte inferior do iPhone.
-
Siga o mesmo procedimento da tira anterior: não pressione a bateria, mantenha a tira reta e sem rugas, e puxe em um ângulo baixo.
-
Se a faixa adesiva romper, tente recuperá-la usando os dedos ou uma pinça sem corte e continue puxando — mas não force uma alavanca por baixo da bateria.
-
-
-
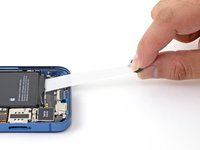
Use uma pinça sem corte para segurar toda a largura da aba.
-
Enrole a aba e a tira adesiva nas pontas da pinça sem corte.
-
Seguindo o mesmo procedimento anterior, puxe a aba superior direita para esticar e remover a tira adesiva. Tente não prender a tira adesiva em nada.
-
-
-
Coloque levemente dois dedos no centro da bateria para evitar que ela salte ao remover a última tira adesiva.
-
Use uma pinça sem corte para puxar e esticar a aba restante para remover a última tira adesiva que mantém a bateria no lugar.
-
Se você removeu todas as tiras adesivas com sucesso, pule a próxima etapa.
-
Caso contrário, continue com a próxima etapa abaixo.
-
-
-
Se você ainda estiver com dificuldade para remover a bateria, aplique algumas gotas de álcool isopropílico de alta concentração (90 % ou superior) sob a borda da bateria, na área da(s) faixa(s) adesiva(s) danificada(s).
-
Incline o celular para cima para que o álcool isopropílico possa escorrer em direção à tira adesiva.
-
Aguarde cerca de um minuto para que a solução de álcool enfraqueça o adesivo.
-
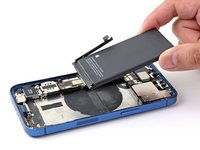
Use uma palheta ou a ponta chata de uma espátula para levantar a bateria suavemente.
-
-
-
Remova a bateria do iPhone.
-
Se houver algum resto de solução de álcool dentro do celular, limpe cuidadosamente com um filtro de café ou deixe secar ao ar antes de instalar a bateria nova.
-


Compare sua nova peça de reposição com a peça original — talvez seja necessário transferir componentes restantes ou remover as proteções adesivas da peça nova antes da instalação.
Para a remontagem de seu dispositivo, siga estas instruções na ordem inversa.
Após o reparo, dependendo da peça de reposição, você pode conseguir calibrá-la usando o Assistente de Reparo da Apple, disponível a partir do iOS 18. Atualize seu dispositivo, navegue até Ajustes → Geral → Sobre → Peças e Histórico de Serviço, toque em Reiniciar e Concluir Reparo e siga as instruções na tela.
Leve seu lixo eletrônico a um reciclador certificado R2 ou e-Stewards.
O reparo não saiu como planejado? Tente alguma resolução de problemas básica ou peça ajuda à nossa fórum de Respostas do iPhone 13.
Cancelar: não concluí este guia.
146 outras pessoas executaram este guia.
Um agradecimento especial a esses tradutores:
100%

Translation Bot está nos ajudando a consertar o mundo! Quer contribuir?
Comece a traduzir ›

17Comentários do guia
Does anyone know if the kit comes with the tools as well or are the tools sold separately
You have both options, you can buy only the battery (battery with adhesive strips attached) or you can purchase the kit (same as previous plus tools to replace the battery). I saw that the same tools in this kit are included with the iPhone 15 Pro battery kit so I only purchase the battery for iPhone 13 and used the tools from the other order.
Hello Ifiixit team,
Does Repair Assistant in ios 18, for iphone 13, detect ifixit battery as original?
It's unknown. The battery works (much better than the original, in my opinion), everything works fine one the phone but Repair Assistant says it's unable to determin if the battery is original. As a result, it does not show the date the battery was produced and the recharge cycles. But other than that, everything works fine.
Great product (for the price, battery was 1% when installed, everything works very well. I recommend this product! The guides and tools from IFixIT are much better than thouse offered by apple for self repair (as forced by UE regulations). Apple even sells a press for pushing the battery onto the adhesive strips, and another special tool for heating and removing the screen :D