
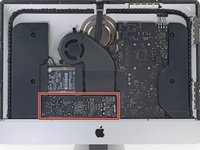
iMac Intel 21.5" EMC 2544 Blade SSD Replacement

Introdução
Ir para o passo 1Use this guide to replace Apple's proprietary blade SSD (AHCI/SATA).
This guide is intended for the higher spec iMac Intel 21.5" EMC 2544 models that are equipped with an SSD (Fusion Drive or blade SSD configurations).


-
Ferramenta utilizada neste passo:iMac Intel 21.5" Cardboard Service Wedge$4.99
-
Ferramenta utilizada neste passo:Plastic Cards$2.99
-
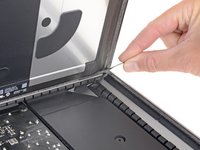
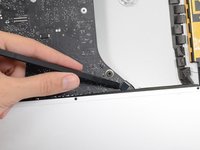
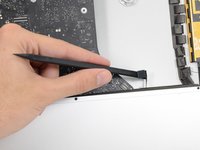
Starting from the top right corner of the iMac, wedge a plastic card between the display and frame.
John. May I contact outside of this posting for a question please? Thank you. Ted.
-
-
-
Remove the following five Phillips screws holding the lower support bracket in place:
-
Four 3.2 mm screws
-
One 1.7 mm screw
-
-
-
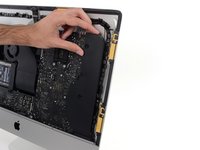
Remove the lower support bracket from the iMac enclosure.
Line up the screw holes and press on the bracket from the back to help the screws grab. If your fingers are too big, press with the flat side of your spudger. As long as there’s no gap between the bracket and the iMac’s frame, the screws should grab easily.
Line up the screw holes and press on the bracket from the back to help the screws grab. If your fingers are too big, press with the flat side of your spudger. As long as there’s no gap between the bracket and the iMac’s frame, the screws should grab easily.
-
-
-
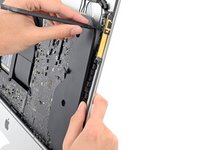
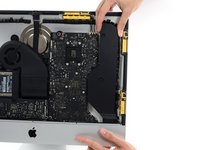
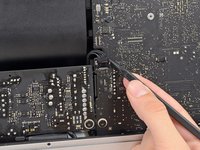
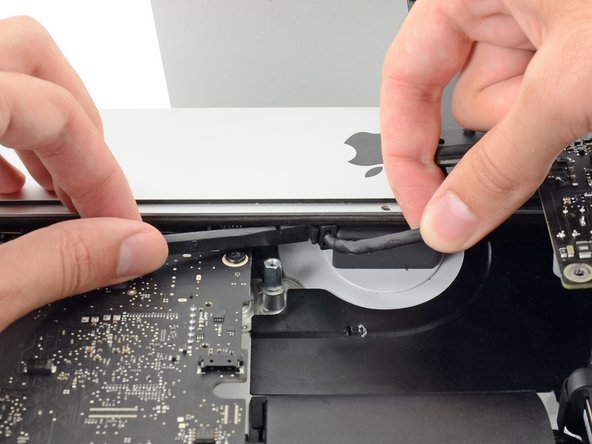
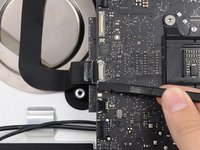
Use a spudger to loosen the right speaker cable's connector from its socket on the logic board.
-
Pull the connector downwards to remove it from its socket.
-
-
-
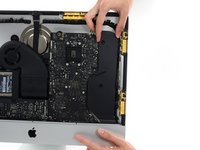
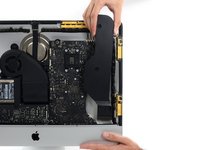
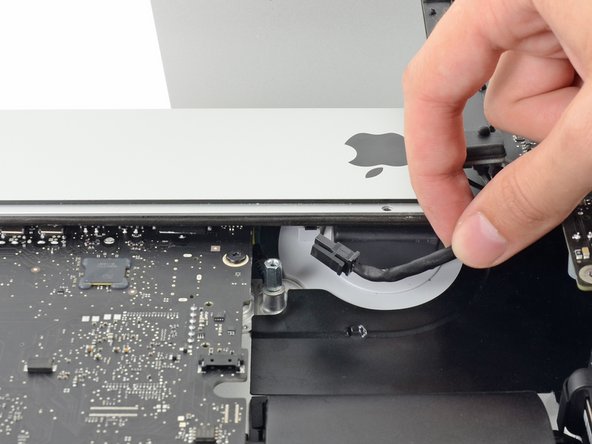
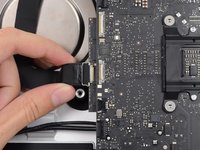
Pull the right speaker straight up about an inch, toward the top of the iMac.
-
Lift the right speaker straight up and remove it from the iMac. This may take some force, both hands and rocking the speaker right and left to get it out.
-
-
-
Remove the following screws securing the hard drive bracket to the rear enclosure:
-
Two 21 mm T10 Torx screws from the left-hand hard drive bracket.
-
One 9 mm T10 Torx screw.
-
One 27 mm T10 Torx screw.
Is there a special drive for this? Apple specs only one or two drives? I am planning a seagate SDHD. It has SMART, but may not be the right version. ANy comments/ recommendations?
Any 2.5” SATA drive should work, but you’re doing yourself a disservice if you don’t get an SSD. One with a dram controller, preferably. They are a bit over $100 for 1TB right now (Jan 2020).
-
-
-
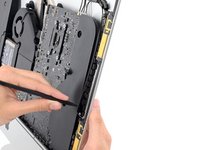
Use the tip of a spudger to push each side of the power button cable connector and gently "walk" it out of its socket.
-
-
-
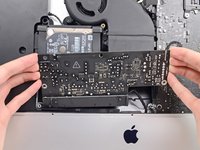
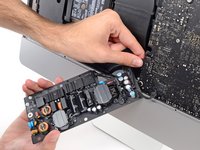
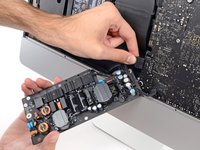
Remove the two 7.2 mm T10 screws securing the power supply to the rear enclosure.
In my experience a T10 doesnt fit in this screws! i just opened one of this imacs and both screws securing the power supply are T8 ´s !
-
-
-
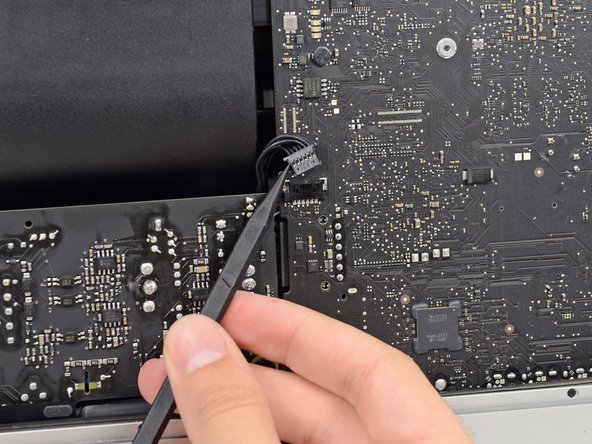
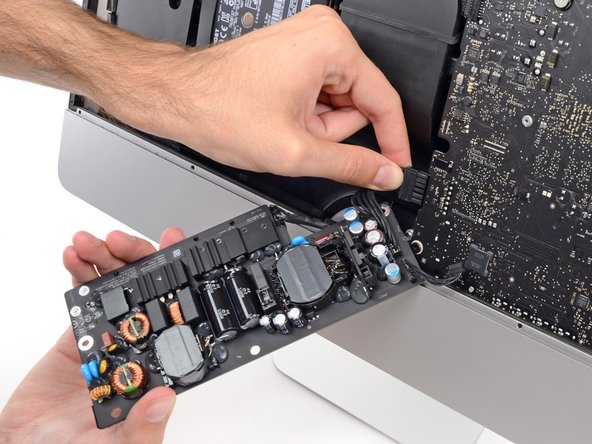
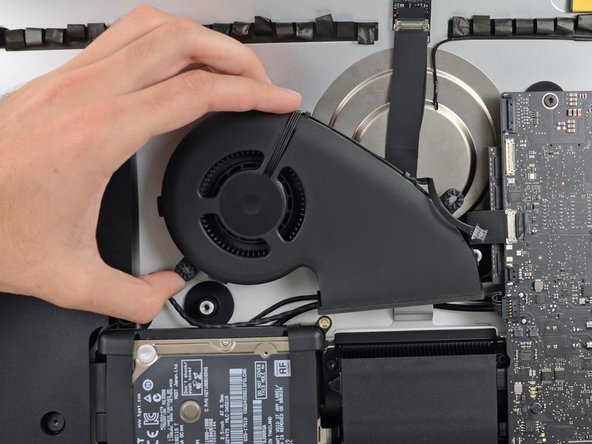
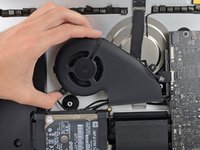
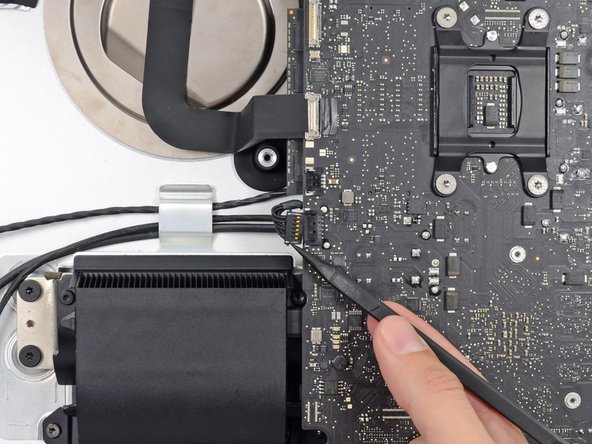
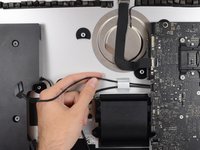
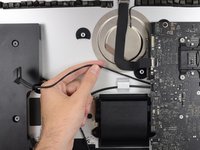
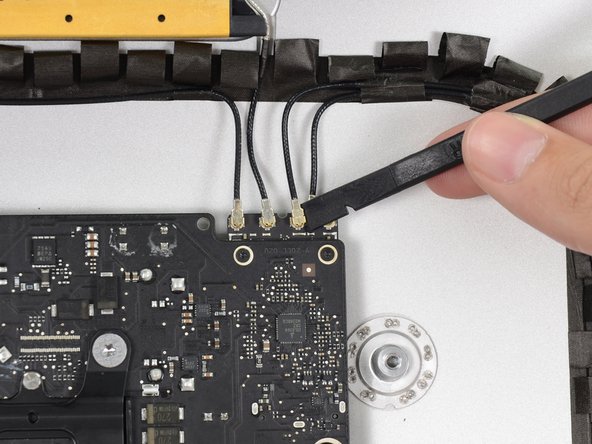
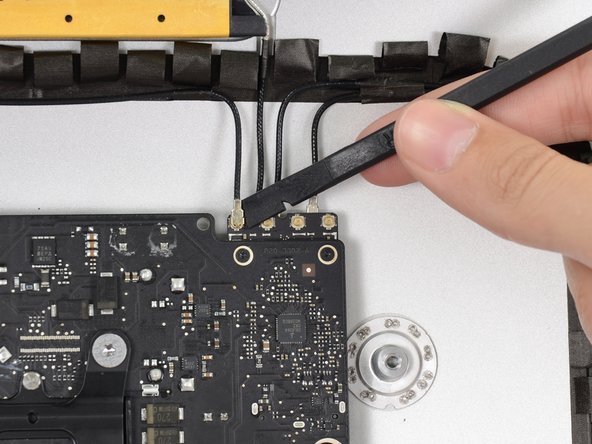
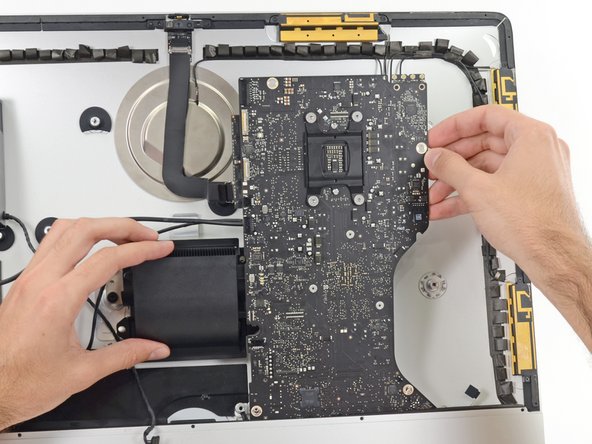
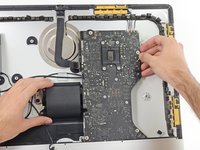
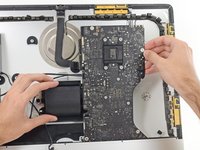
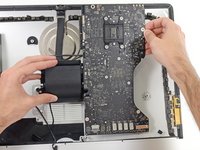
Gently pull the fan cable connector straight away from its socket on the logic board.
-
-
-
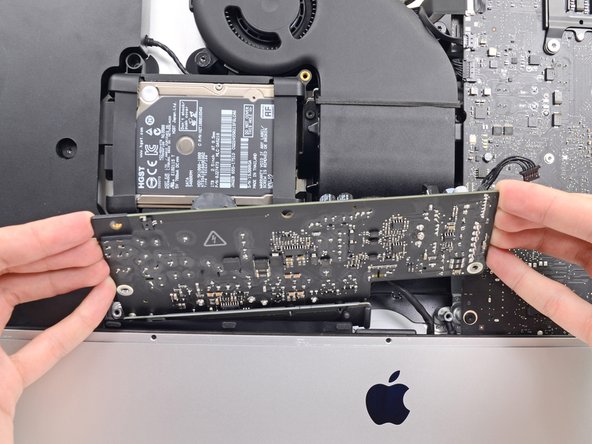
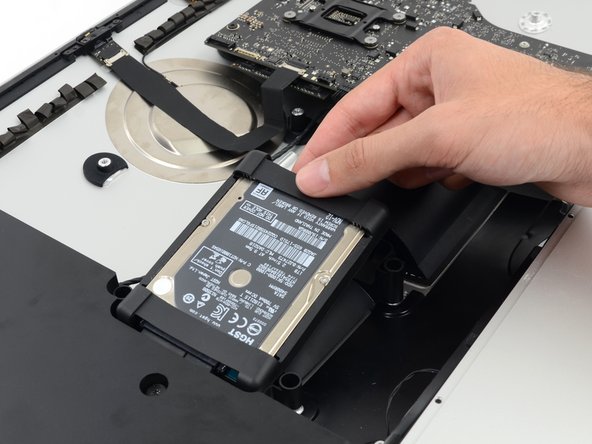
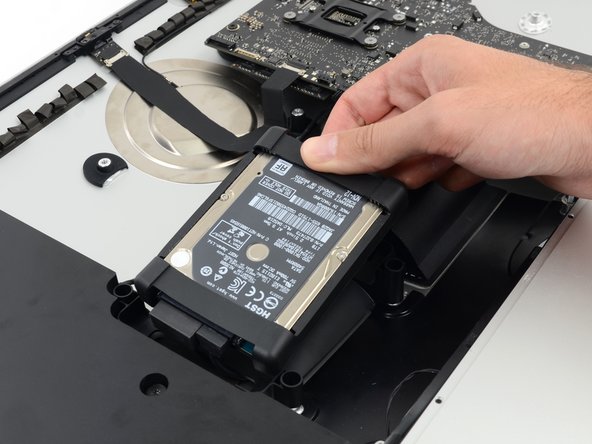
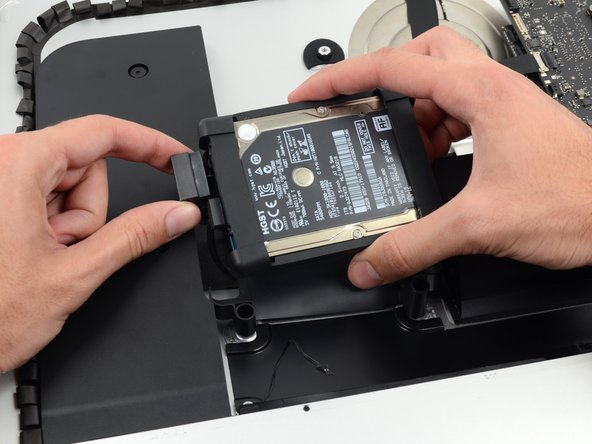
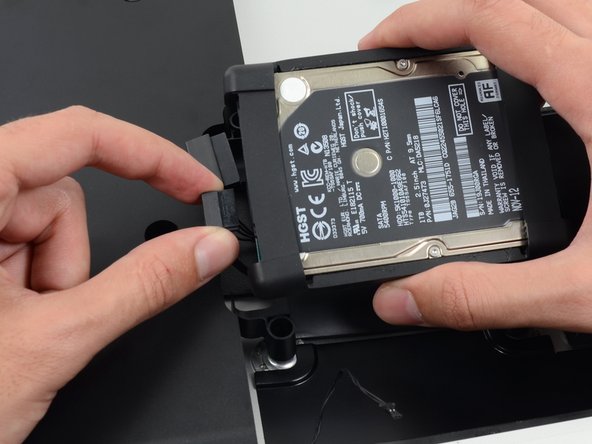
Lift the hard drive from the edge nearest the logic board and pull it slightly out of its recess.
-
-
-
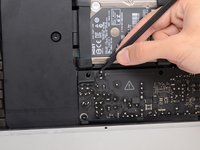
Remove the single 7.2 mm T10 screw securing the hard drive tray to the rear enclosure.
-
-
-
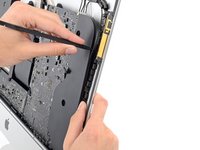
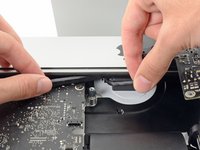
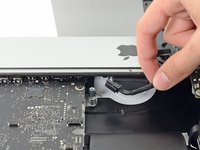
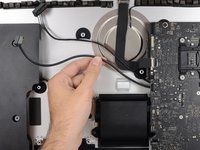
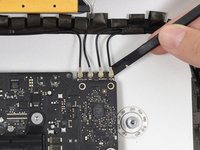
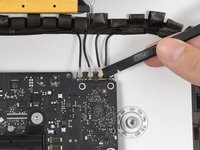
Push on each side of the left speaker cable connector with the tip of a spudger and gently "walk" it out of its socket.
-
-
-
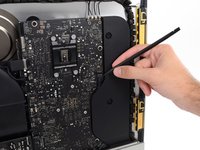
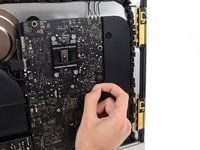
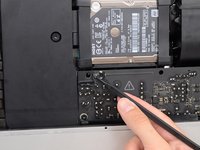
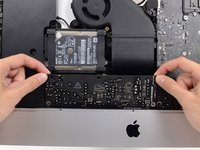
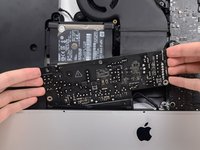
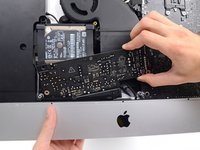
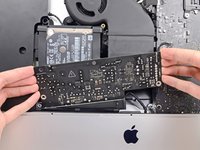
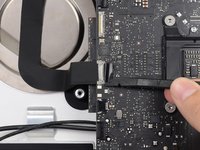
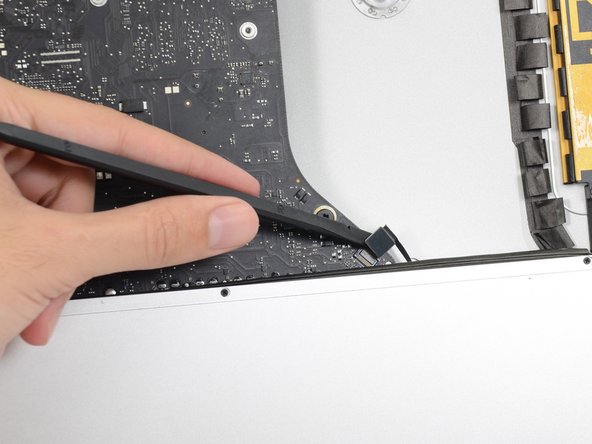
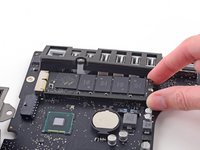
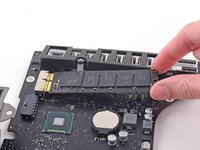
Remove the single Torx screw securing the SSD to the logic board.
@despondo - I really don’t recommend using m.2 SSDs in iMacs as they are a bear to open up to get to the SSD socket and many adapters/SSD sets are flaky!
If this is a system which has important work I would stick with either an Apple or OWC bade SSD. Yes, I know! You want something with more performance. Sometimes it doesn’t pay 😖I had wished Apple would have gone with the standards based M.2 SSD’s their greed set the course! The rub is Apple has other lines in their SSD’s these adapters and M.2 SSD’s don’t offer which will bite you when your drive gets full as the wear-leveling and housekeep functions use these lines.
As far as Samsung 970 EVO Plus drives you will need to update its firmware as they did have a few interoperability issues with macOS when used in MacBook Pro’s
Dan -
-
-
-
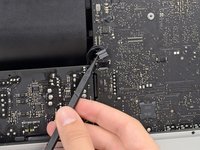
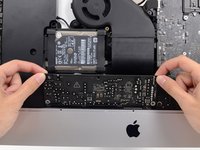
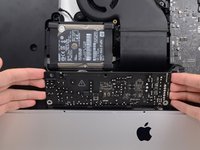
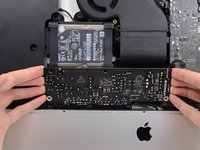
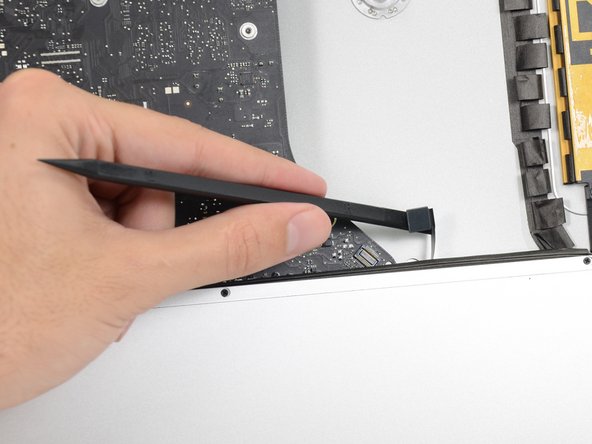
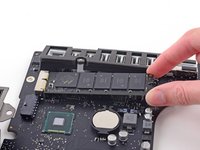
Slightly lift the rightmost side of the SSD and firmly slide it straight away out of its socket on the logic board.
This is a great guide! Just as a heads up for anyone still looking to upgrade their 2012 or 2013 iMac with an empty bay: The pictures show the SSD Apple used from 2014 forth, which is different from the blade SSD type used in 2012/13 iMacs, so don’t go shopping by the pictures! I reckon this is because the upgrade process is so similar for all tapered-edge-iMacs, it doesn’t really vindicate taking exact pictures each time :-). Anyway, this SSD here would be the one you’re looking for: https://eshop.macsales.com/shop/ssd/owc/...
This is a great guide! Just as a heads-up for anyone still looking to upgrade their late 2012 or early 2013 21.5” iMac (EMC 2544 and 2545) with an empty bay: The pictures show the SSD Apple used from late 2013 forth, which is different from the blade SSD type used in the aforementioned iMacs, so don’t go shopping by the pictures! I reckon this is because the upgrade process is so similar for all tapered-edge-iMacs, it doesn’t really vindicate taking exact photos each time :-). Anyway, this SSD here would be the one you’re looking for: https://eshop.macsales.com/shop/ssd/owc/...
-


To reassemble your device, follow these instructions in reverse order.
To reassemble your device, follow these instructions in reverse order.
Cancelar: não concluí este guia.
25 outras pessoas executaram este guia.
Gear Up For Future Repairs
Shop all


4Comentários do guia
Hi, is this model of iMac compatible with the Samsung 850 EVO 2.5"? You guys now it?
No! Apple has their own version of blade SSD’s. Review this great guide: The Ultimate Guide to Apple’s Proprietary SSDs
Dan -
In the RAM comments, I asked what upgrade I could do for the blade SSD. OWC blade (right connector configuration) in a higher size? I am putting in an SSD for the 3.5” and want the second dive (blade) as a second drive. Fusion is not wanted the 3.5” SD is faster. ANy spec for the installed blade SSD?
Not always. Early models lacked the connector completely, but models made bit later have the connector. I just successfully upgraded a 2012 iMac 21.5'' to M2 SATA SSD while still keeping the original 1TB HD
oldnwstf -