
PowerA Fusion Controller For Xbox One Motherboard Replacement
Introdução
Ir para o passo 1If your PowerA Fusion Controller for Xbox One (Model 1428680-01) isn’t turning on or working as expected, you may need to replace the motherboard.
The motherboard is often used as the foundation for many electrical devices and is responsible for both power allocation and communication between various electrical components. When the motherboard is damaged, some electrical components may not operate correctly due to a lack of power or communication.
Before using this guide, be sure to check PowerA Fusion Controller for Xbox One Troubleshooting to ensure that the problem isn’t coming from a different component.
Before beginning, make sure that the controller is not plugged into the console.
In step 3, it is necessary to solder the motherboard into place. Follow the instructions on how to solder and desolder here.
O que você precisa


-
-
Remove the nine 9.2mm screws with a JIS #1 screwdriver.
-
Remove the two bottom plastic grip covers.
-
-
-
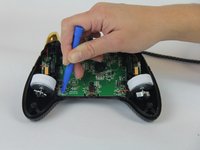
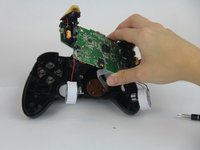
Take off the glue that is on top of the soldered joints with a sprudger.
-
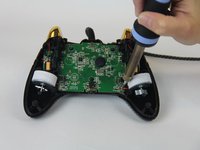
Desolder the soldered joints of the red and black wires that are connecting the vibration motors to the motherboard.
-
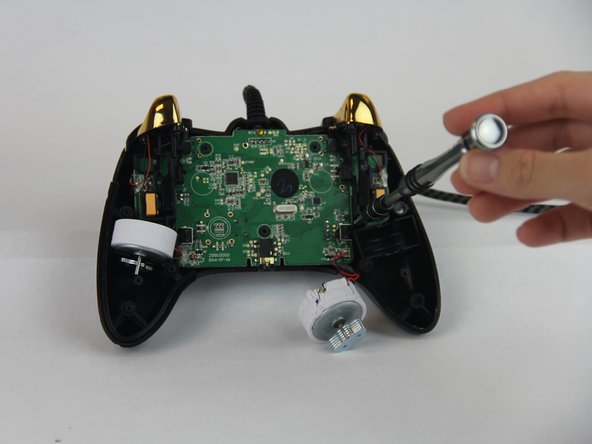
Remove the vibration motors and put them aside.
-
This guide will show how to solder and desolder connections.
-
-
-
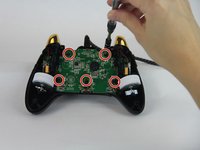
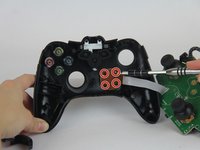
Remove the five 9.2mm screws with a JIS #1 screwdriver. Indicated by the red circles.
-
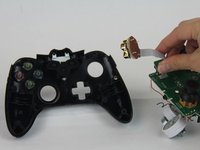
Lift the motherboard and let it hang.
-


To reassemble your device, follow these instructions in reverse order.
To reassemble your device, follow these instructions in reverse order.
Cancelar: não concluí este guia.
Uma outra pessoa concluiu este guia.
Equipe

USF Tampa, Team S14-G4, Boczar Fall 2017 Membro de USF Tampa, Team S14-G4, Boczar Fall 2017
USFT-BOCZAR-F17S14G4
4 Membros
Autoria de 5 guias