Motorola Moto Z2 Play Battery Replacement
Introdução
Ir para o passo 1Use this guide to remove and replace a dead or low battery in a Motorola Moto Z2 Play. If your battery is swollen, take appropriate precautions.
Before you begin, download the Rescue and Smart Assistant app to backup your device and diagnose whether your problem is software or hardware related.
Warning: Because of the strong adhesive securing the display, minimal clearance for inserting your tools, and high heat required, there's a good chance of accidentally damaging the display when removing it. If you intend to re-use the display, take serious care when heating and inserting tools to separate the display from the rest of the device.
O que você precisa
Fix Kit
Este kit contém todas as peças e ferramentas necessárias para executar este guia.
Peças
Ferramentas
Exibir mais…
-
-
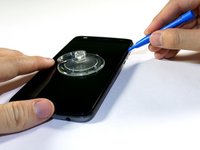
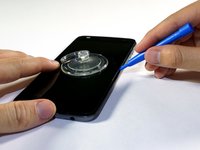
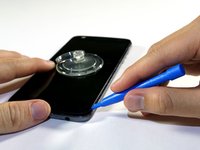
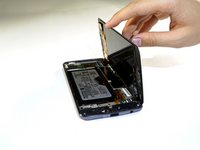
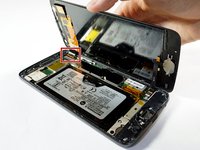
Heat the edges of your Motorola Moto Z2 Play screen for two to three minutes with a heat gun. You adjust the heat gun to 85 degrees centigrade, and be careful not to hold the heat gun on one position for too long; to avoid damaging, or "hotspotting" the LCD. The screen should be very warm, but not painful, to the touch. Reheat as necessary.
-
-
Ferramenta utilizada neste passo:Tweezers$4.99
-
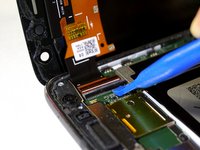
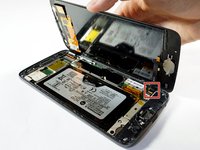
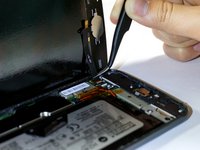
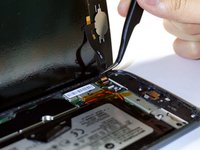
Identify the ribbon cable, located at the bottom right of the phone.
-
If present, remove kapton (orange) tape covering the cable connector.
-
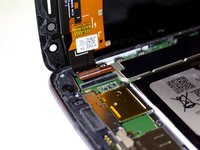
Flip up the small locking flap on the ZIF connector and use tweezers to slide the cable straight out of its socket.
-
-
Ferramenta utilizada neste passo:Tweezers$4.99
-
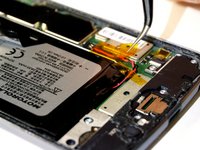
Remove the orange tape, located at the bottom right of the phone, using tweezers.
-
-
-
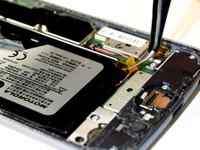
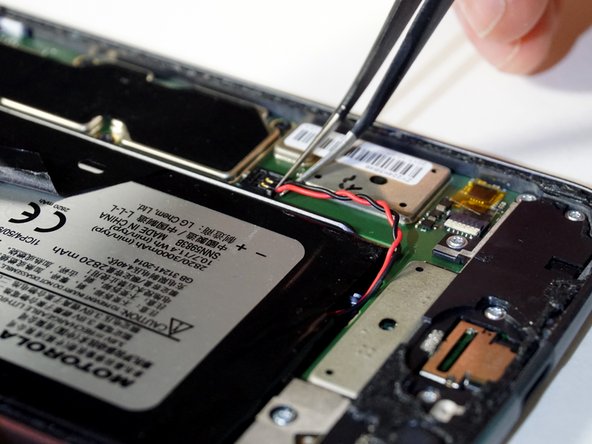
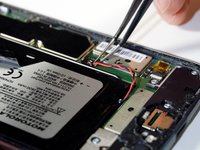
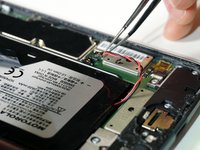
Detach the red and black battery wire by lifting up with tweezers.
What if the whole black box came off. I think i broke it! :( is this fixable?
-
-
-
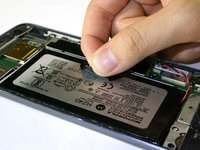
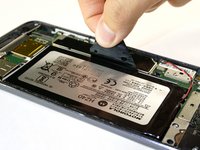
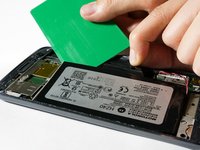
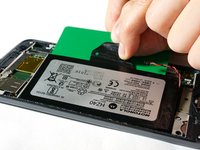
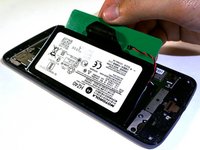
Lift to remove the battery from the device completely.
Why can't they just go back to the phones where you can snap off the back and simply replace the battery? I'm afraid to do it myself and Verizon won't do it for me. Now I have to find someone whom I will have to pay to replace a battery. This is ridiculous. It should not be so difficult to replace a battery and I should not have to jeopardize my phone to replace a battery. Why? Sorry, I just needed to vent. I miss simplicity.
I agree
I agree with both of you guys, but it’s the breaking point between performance, convenience, and safety. Older phones had batteries with hard protective casings that wouldn’t leave them vulnerable to pocket-fire if your keys jammed the battery.
Unfortunately, with phones getting more powerful(requiring a higher-capacity battery), AND slimmer, the protective casing for the battery is literally the casing on the phone. Look at the battery above; it could easily be pierced and dangerously vent.
I’m with you in wishing I could just pop a spare in, but those days have passed. =/
I suggest NOT to do this. Followed the directions exactly, with the slight deviation of my cable into the battery crumbling so I carefully pulled out the lose pieces with the tweezers and had NO problem putting it back together. My phone was WORKING with the exploded, puffy battery with NO deficits. Now? No charging (but checked it with the multi-meter so I know it is not the fault of the new battery). Only reaction I get is the phone making a vibrating sound when I plug it in to charge. Will NOT turn on. Will NOT react. F*CKED.
Without knowing what I was getting into I ordered a replacement battery, toolkit, and screen adhesive. Thanks to this guide I was actually able to remove the screen, replace the battery, and get it sealed back up relatively easily. Definitely nerve-wracking as I haven’t attempted anything like this before, but my phone was at the end of the battery life so I figured why not give it a shot.
Thank you for the easy instructions!
i followed the guide step by step, but unfortunately i touched the lcd in one place ... with the result that the screen went KO can i fix it somehow?
-
To reassemble your device, follow these instructions in reverse order.
After completing this guide, calibrate your newly-installed battery.
To reassemble your device, follow these instructions in reverse order.
After completing this guide, calibrate your newly-installed battery.
Cancelar: não concluí este guia.
38 outras pessoas executaram este guia.
11 comentários
Great instructions, clear and concise.
thank you
so now that I've heated the adhesive to get the screen off do I need to apply new adhesive? or simply reheat it?
Hi Eli,
The most ideal option would be to replace the adhesive. This ensures the best chance for your phone to stay sealed. You can re-use the existing adhesive and it may work well enough for awhile.
Pretty good guide altogether. The only thing I’d add is some more detail on the heating phase, as far as temperature, adhesive depth, strength etc. Don’t want someone putting a heatgun on max temp and using it on their screen for 3 mins, ya know?
Thanks for making it really straightforward though.
Total fail. Used an iOpener but could not judge how hot it needed to be to soften the adhesive nor how firmly it can be pried/pulled without damage. Ended up with multiple internal cracks in the screen. Tried finishing the repair anyway, couldn’t tell how far the flat-flex cables needed to be inserted into their sockets to make a good connection. Pix in the guide are not clear enough to tell, and I neglected to take my own photos.
Oh well, so much for repair. Kid got a new phone out of the deal, the Z2P is headed for the landfill.
Finished the guide , battery works well, only problem I encoutered was my own hastines with prying the screen out. On the right side near the fingerprint sensor i went too deep with the pryer and tore the flex cable. Now I am waiting for the new one. So I’ll update when it comes and I change it.
Can the battery be replaced with a larger one or is it too tight.
Great guide - thank you 😊


