
Lenovo IdeaPad Flex 5-1570 M.2 SSD Replacement

Introdução
Ir para o passo 1This guide will show you how to replace the M.2 Solid State Drive in your Lenovo IdeaPad Flex 5 1570 laptop. The solid state drive (SSD) is a storage device, which houses all the data on your device, from the filesystem to the operating system. Problems that you may experience from a faulty SSD are a corrupted memory or OS, difficulty starting the computer, or missing files. You may also run into a situation where your SSD becomes too full and you run out of storage space on your computer, which may prompt an upgrade. Replacing or upgrading the SSD in your device should alleviate any of these problems in a traditional laptop.
However, the Flex 5 1570 is capable of running two storage devices in tandem, utilizing both a PCIe port and a SATA port. Typically this would be used to run a hard disk drive, which is slower, but cheaper for more memory, and a solid state drive for programs and files which need to be accessed quickly. Because there may be two storage devices on your device, you may have to do some investigating as to which one is faulty. If you suspect your computer is having storage problems and replacing the SSD didn’t help, check out our Lenovo IdeaPad Flex 5 1570 Hard Drive Replacement Guide.
O que você precisa
Kits de conserto
Estes kits contêm todas as peças e ferramentas necessárias para executar este guia.


Peças


Ferramentas


Exibir mais…
-
-
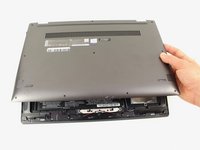
Remove the ten 5 mm Phillips #00 screws that are holding the back panel on.
-
-
-
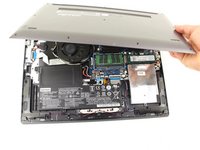
Once all the clips have been disengaged, lift off the back cover.
You should probably disconnect the battery immediately after opening the laptop. Don’t want to risk damaging your nice hardware.
-
-
-
Using your fingers, grasp the entire bundle of wires to pull the battery cable from its connector. This will cut off power to the motherboard.
-
-
-
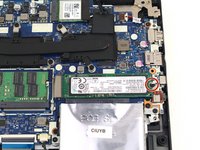
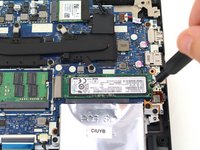
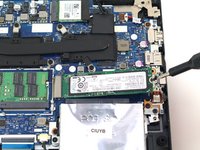
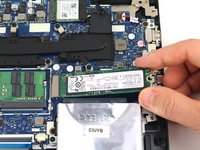
Remove the single 2.9 mm screw holding down the solid state drive with a Phillips #0 screwdriver.
-


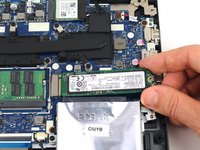
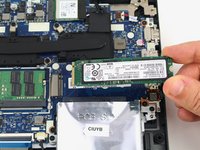
To reassemble your device, follow these instructions in reverse order.
Take your e-waste to an R2 or e-Stewards certified recycler.
To reassemble your device, follow these instructions in reverse order.
Take your e-waste to an R2 or e-Stewards certified recycler.
Cancelar: não concluí este guia.
Uma outra pessoa concluiu este guia.


1Comentário do guia
Very informative, the pictures were most helpful.
IDK if you've got a guide detailing the drive cloning process or not but that would put the icing on the cake.
Thank you