
Google Pixel 3 Loudspeaker Replacement

Introdução
Ir para o passo 1This repair guide was authored by the iFixit staff and hasn’t been endorsed by Google. Learn more about our repair guides here.
Follow this guide to remove the bottom loudspeaker for the Pixel 3. Due to the phone’s ingress design, removing the loudspeaker will compromise the phone’s water resistance capability.
O que você precisa
Peças


Ferramentas


Exibir mais…
-
-
Heat an iOpener and apply it to the bottom of the phone for one minute.
-
-
-
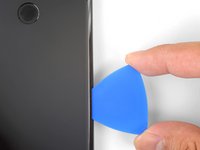
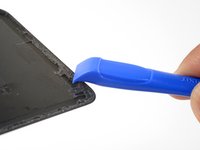
Apply a suction cup to the heated bottom edge of the back cover.
-
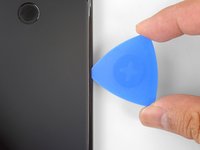
Lift on the suction cup with strong, steady force to create a gap.
-
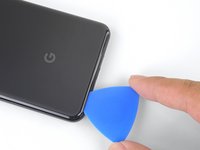
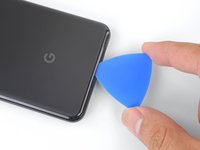
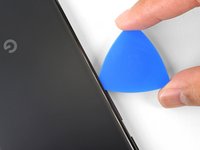
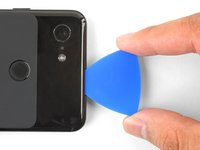
Insert an opening pick into the gap.
-
-
-
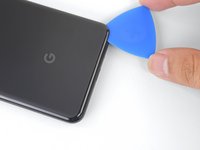
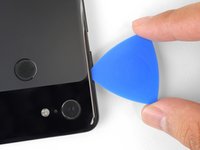
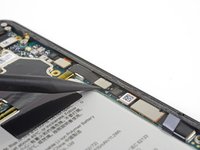
Slice the adhesive along the bottom edge of the phone and around the right corner.
-
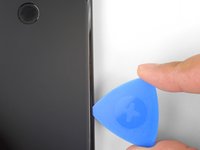
Leave a pick in the bottom edge to prevent the adhesive from re-sealing.
-
-
-
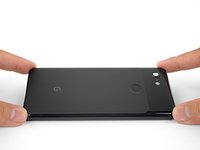
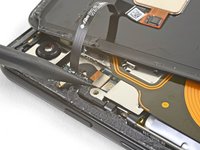
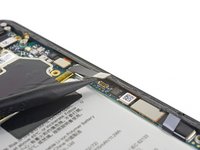
Once you have sliced around the perimeter of the phone, carefully lift the left edge of the back cover.
-
Flip the back cover along its long axis and rest it so that the fingerprint sensor cable is not strained.
-
-
Ferramenta utilizada neste passo:Magnetic Project Mat$19.95
-
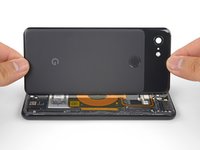
Remove the two 4.1 mm-long Phillips screws securing the fingerprint connector bracket.
-
-
-
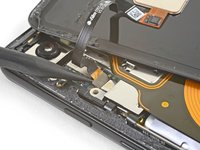
Use the point of a spudger to slide the fingerprint connector bracket out from under the NFC coil.
-
Remove the fingerprint connector bracket.
-
-
-
Use the point of a spudger to pry up and disconnect the fingerprint connector from its socket.
-
-
-
Remove the five Phillips screws securing the wireless charging coil:
-
Two 1.9 mm screws
-
Two 4.2 mm screws
-
One 4.3 mm screw
-
-
-
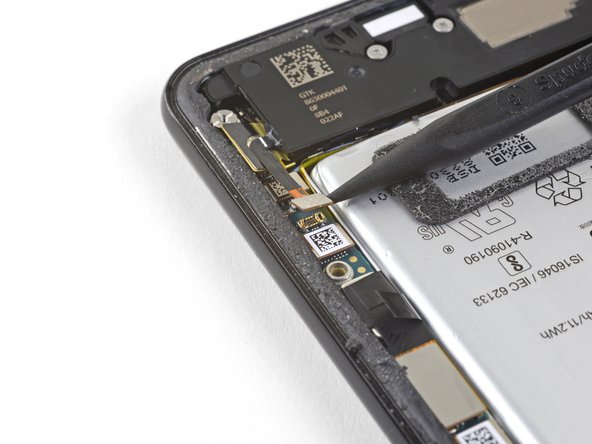
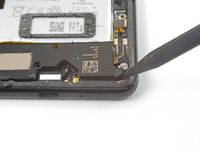
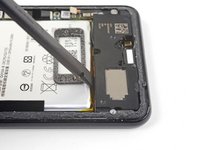
Use the point of a spudger to pry up and disconnect the battery press connector from its socket near the right edge of the phone.
-
-
-
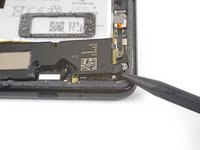
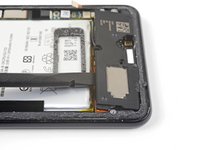
Use the point of a spudger to pry up and disconnect the loudspeaker connector from its motherboard socket near the right edge of the phone.
-
-
-
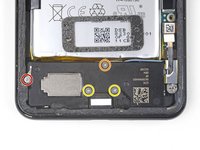
Remove the following four Phillips screws:
-
One 1.9 mm screw
-
One 4.3 mm screw
-
Two 4.3 mm screws with thinner shanks
-
Remove the tiny grounding clip from the left screw hole. Be careful not to lose it.
-
Remove the small plastic insert from the right side of the USB-C port.
-
-
-
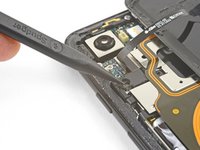
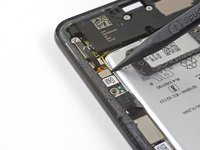
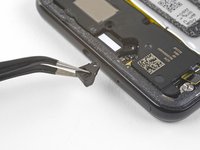
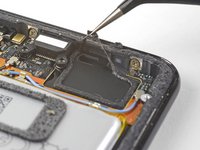
Insert the point of a spudger under the bottom right corner of the loudspeaker.
-
Pry up to loosen the loudspeaker from the phone.
-
-
-
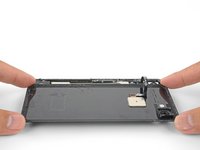
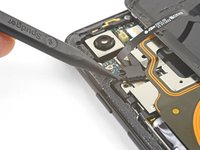
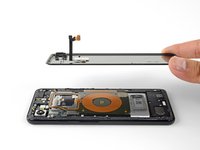
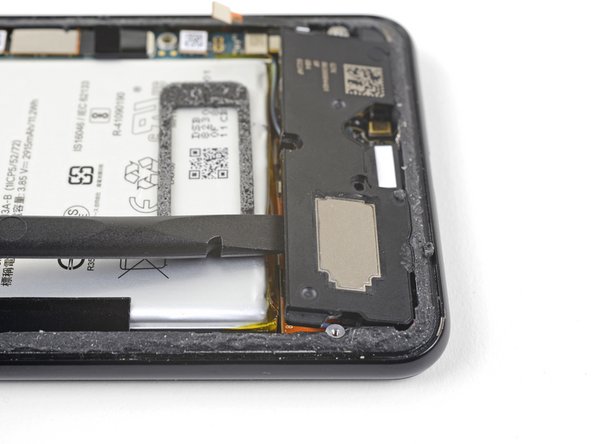
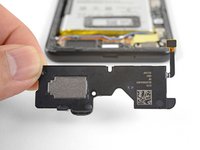
Remove the loudspeaker.
-
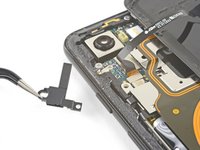
If it is in good condition, you can re-use the gasket. Make sure that the gasket does not cover the exit hole.
-
If the gasket is pulled out of place, remove it and replace the adhesive with a pre-cut strip or Tesa tape.
-


To reassemble your device, follow these instructions in reverse order.
Repair didn’t go as planned? Check out our Google Pixel 3 Answers community for troubleshooting help.
To reassemble your device, follow these instructions in reverse order.
Repair didn’t go as planned? Check out our Google Pixel 3 Answers community for troubleshooting help.
Cancelar: não concluí este guia.
4 outras pessoas executaram este guia.

