
iMac Intel 21.5" EMC 2638 Adhesive Strips Replacement

Introdução
Ir para o passo 1Removing the display requires cutting through the adhesive around the perimeter of the screen. After the adhesive is cut, it cannot be used to re-seal the display. You'll need to apply a new set of adhesive strips to ensure a proper seal.
O que você precisa
Peças

Ferramentas


Exibir mais…
-
Ferramenta utilizada neste passo:iMac Intel 21.5" Cardboard Service Wedge$4.99
-
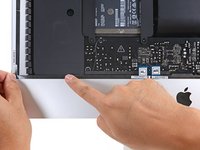
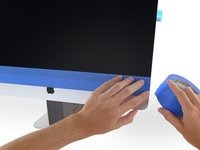
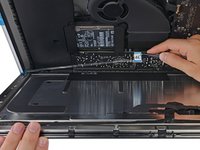
With the hinge free to move, the iMac will be unbalanced and hard to work on. Place an iMac service wedge in the stand to stabilize the iMac.
-
-
Ferramenta utilizada neste passo:Tweezers$4.99
-
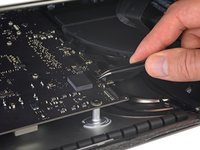
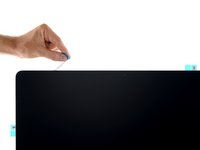
If you are re-using your existing display, you must also remove the old adhesive from the back of the display.
-
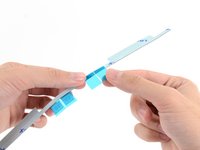
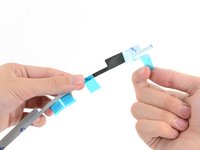
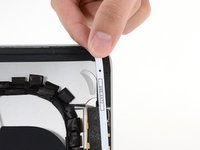
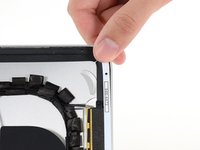
Peel off the old strips of adhesive using tweezers or your fingers. Start at the bottom and peel upward towards the top of the device.
-
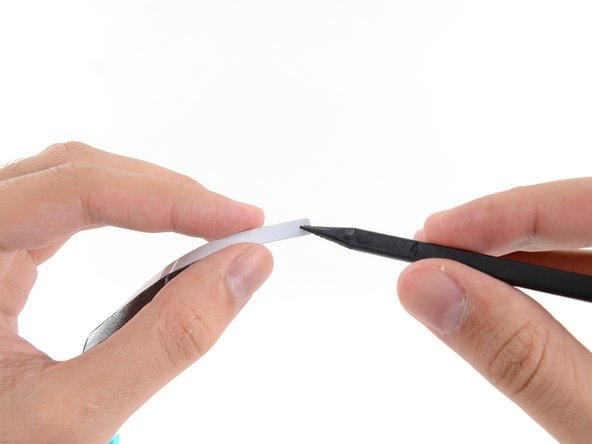
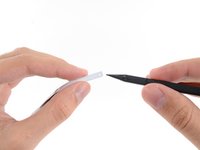
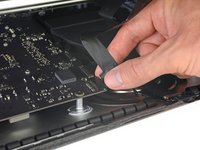
After all the old adhesive is removed, carefully clean off the adhesive residue with high-concentration isopropyl alcohol (90% or greater) and a lint-free cloth. Wipe in one direction, not back and forth.
-
-
-
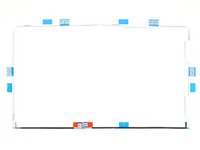
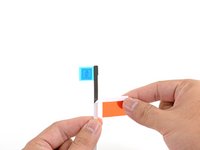
Lay out the adhesives strips beforehand so you won't accidentally install a strip in the wrong place:
-
Strip 01 on the top left
-
Strip 02 on the top right
-
Strip 03 on the right vertical
-
Strip 4R on the bottom right, dark side facing up
-
Strip 4L on the bottom left, dark side facing up
-
Strip 05 on the left vertical
-
-
-
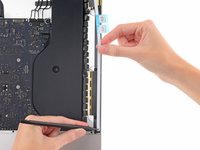
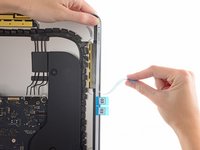
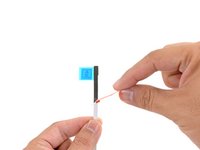
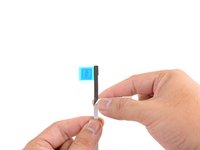
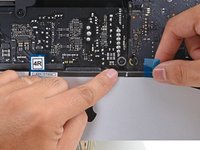
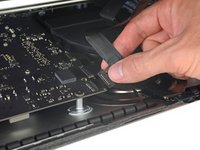
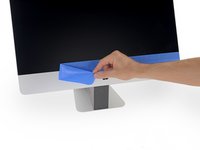
Start with strip 03, which goes on the right vertical side of the rear enclosure.
-
Grasp the blue tab and peel the short piece of backing off the back of the strip to expose a section of adhesive to attach to the enclosure.
-
-
-
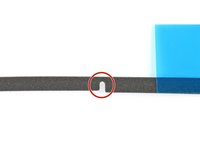
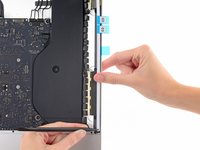
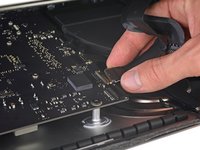
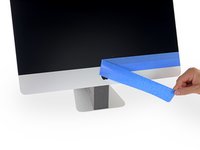
Insert the tip of a spudger into the hole at the end of the strip where you just removed one layer of backing. Insert the spudger from the side that still has a layer of white backing on it.
-
-
-
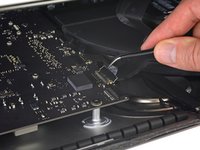
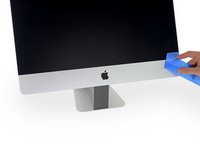
With the spudger still poking through the hole in the adhesive strip, push the spudger tip into the corresponding hole in the frame of the iMac.
-
Using the hole and spudger to anchor the position of the adhesive strip, line the strip up against the right edge, gently pulling up against the spudger to ensure the strip is taut, and stick it onto the frame.
-
-
-
Work your way counter-clockwise around the perimeter of the iMac, adding three more adhesive strips in the same manner:
-
Strip 02 on the top right
-
Strip 01 on the top left
-
Strip 05 on the left vertical
-
-
-
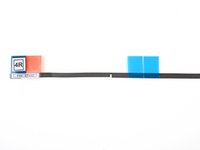
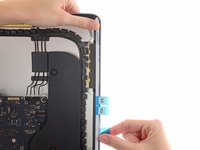
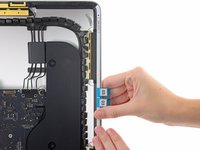
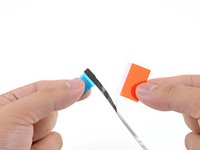
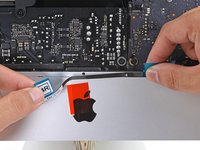
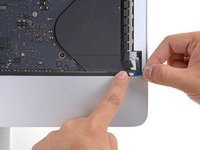
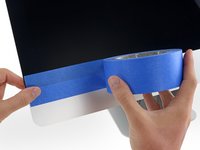
Grasp the red pull tab on strip 4R and pull to separate about 2 inches (5 cm) of white backing from the strip.
-
-
-
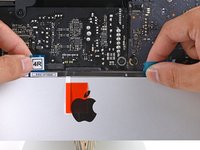
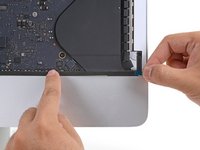
Align the adhesive strip to the bottom edge by positioning the microphone notch over the microphone hole.
-
If your iMac does not have a microphone hole, align the right end of the strip such that the L-bend sits next to the right vertical adhesive. The L-bend should not overlap the right vertical adhesive.
-
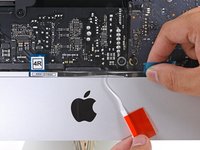
Once you have aligned the strip, carefully set the left exposed edge onto the iMac to secure the alignment.
-
-
-
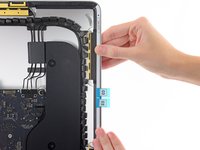
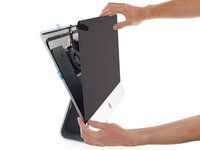
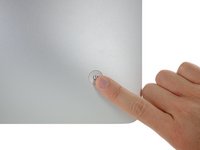
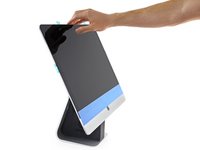
Gently set the display in place over the iMac and align it carefully.
-
-
-
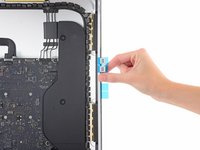
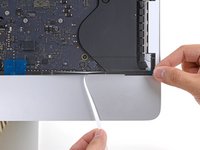
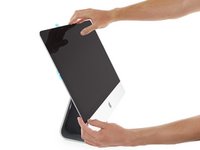
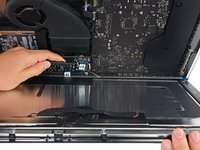
After confirming that your iMac functions properly, disconnect the display cables and carefully lean the display forward.
-
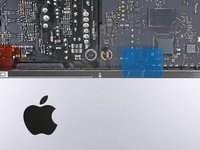
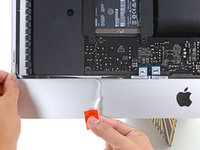
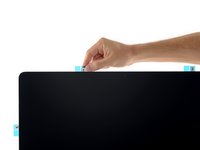
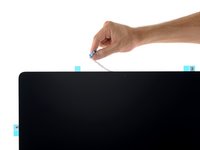
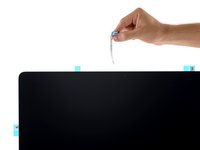
Remove the film from the two bottom strips by reaching in from above with a pair of tweezers and pulling the blue tabs straight up from the bottom edge of the display.
-
-
-
Reconnect the display power and data cables for the final time.
-
-
Ferramenta utilizada neste passo:Microfiber Cleaning Cloths$3.99
-
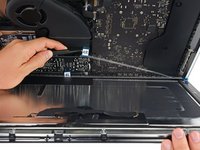
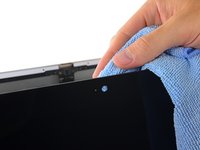
Steady the display with one hand as you remove the protective film in the following steps, or rest it lightly against the iMac's enclosure.
-


Cancelar: não concluí este guia.
107 outras pessoas executaram este guia.


7 comentários
Be VERY CAREFUL with the bottom strips. I found them very difficult. The front peeled off first allowing the strips to stretch. Made it work but went slow and meticulously. I found the use of a headlamp useful instead of a flashlight.
I’ve just upgraded the RAM in two iMacs requiring adhesive strips and had a problem both times. In the first, the white tape on the lower part of the ‘3’ strip broke leaving about 50% behind.. In the second, both ‘2’ tags came off the white tape leaving all the tape still attached to the sticky layer. Both these instances caused a major problem as part of the screen was already stuck down. I had to try to make a gap between the screen and the case to insert a craft knife to loosen an edge of the white tape so I could grab it with my tweezers. Nightmare! Perhaps the adhesive strip kits sold in Europe aren’t as good quality as the ones sold in the US.
Thank you iFixIt for top notch parts, instructions and tutorials. The reassembly went smoothly, removing the adhesive on the iMac was much easier than the iWatch I performed earlier. The adhesive strips went on easily (kudos for the alignment notches). Like previous comments, the only issue I had was w/ the bottom strips (4L/4R) in that the backing doesn’t want to release and the backing with the adhesive strip actually releases from the front backing instead. I carefully teased the adhesive from front backing with the bent tip iFixIt tweezers and then was able to get the backing released, but it wasn’t optimal because the front backing was slightly releasing from the adhesive as I was applying it and if not careful would stretch a bit which could cause miss-alignment when you get to the end of the adhesive. All-in-all the reassembly of the iMac is one of the easier ones.