
Samsung Galaxy A51 Screen Replacement

Introdução
Vá para o passo 1Use this guide to replace a cracked or broken screen on your Samsung Galaxy A51.
Note: The function of the fingerprint sensor might be lost after this screen replacement. Security patches installed after September 2020 don’t support this repair.
If the frame is deformed, it's important to replace it to make sure the new screen will mount correctly and won’t suffer damage from uneven pressure.
Before disassembling your phone, discharge the battery below 25%. The battery can catch fire and/or explode if accidentally punctured, but the chances of that happening are much lower if discharged.
This guide instructs you to replace the screen while leaving the original frame and motherboard in place. However, some replacement screens for this phone come pre-installed in a new frame (a.k.a. chassis), which requires a very different procedure. Make sure you have the correct part before starting this guide.
You’ll need replacement adhesive to reattach components when reassembling the device.


-
-
Insert a SIM card eject tool, a SIM eject bit or a straightened paper clip into the hole on the SIM tray located at the left side of the phone.
-
Press firmly to eject the tray.
-
Remove the SIM card tray.
-
-
-
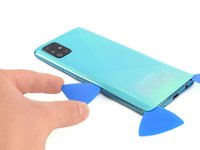
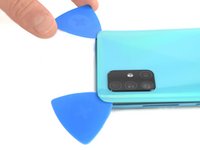
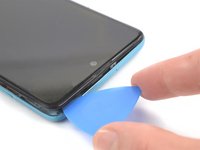
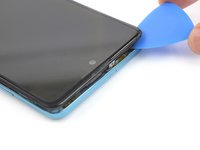
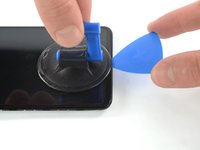
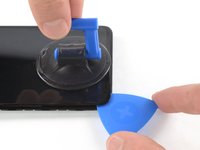
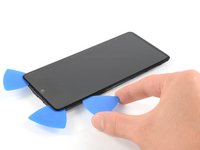
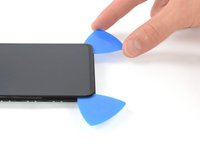
Insert the tip of an opening pick between the frame and the back cover at the bottom of the phone near the USB-C port.
-
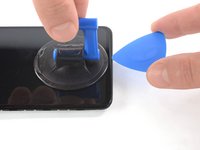
If you can't get between the back cover and midframe with your opening pick, you can use a suction handle or strong tape to pull up the back cover to create a gap.
-
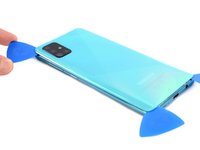
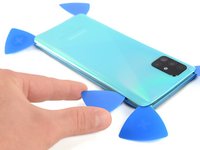
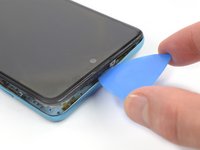
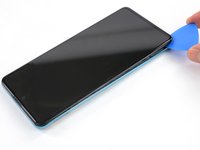
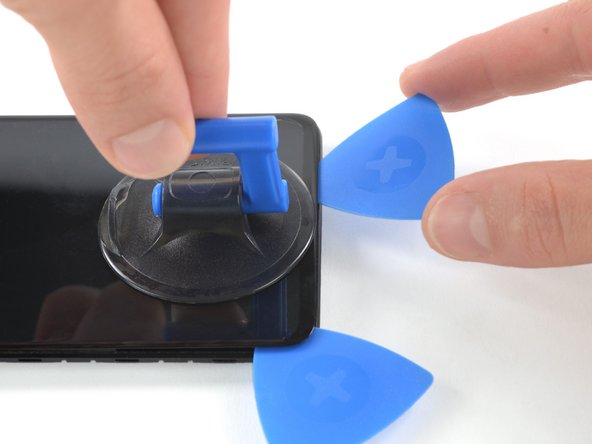
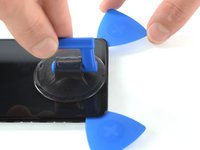
Slide the opening pick to the bottom right corner and leave it there.
-
-
-
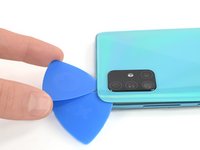
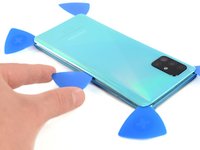
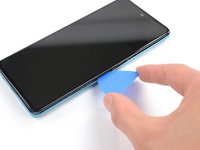
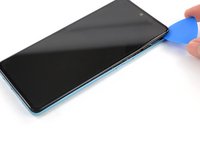
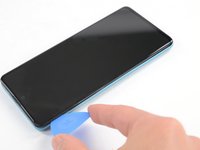
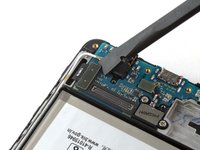
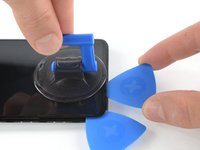
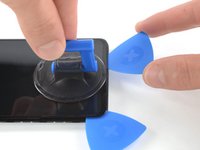
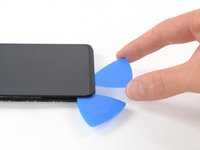
Insert an opening pick between the midframe and front panel assembly on the bottom of the phone near the charge port.
-
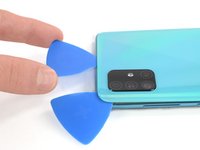
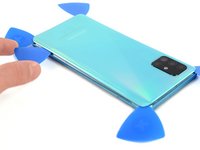
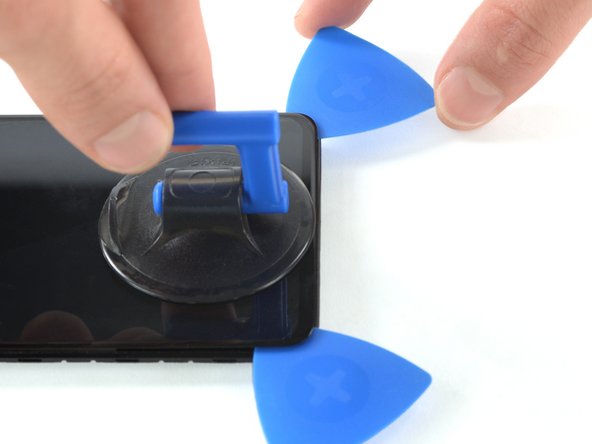
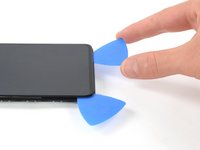
Slide the opening pick to the left bottom corner to release the plastic clips.
-
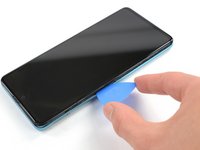
Slide the opening pick to the bottom right corner to release the rest of the bottom plastic clips.
-
-
-
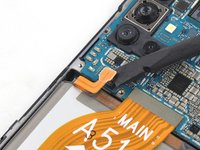
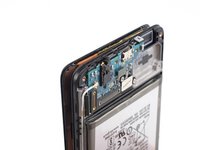
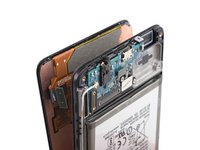
Use the flat end of a spudger to disconnect the battery by prying the connector straight up from its socket.
-
-
-
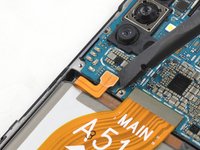
Use the flat end of a spudger to pry up and disconnect the display flex cable on the bottom of the phone.
-
-
-
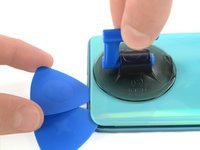
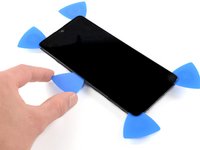
Prepare an iOpener and apply it to the display for at least two minutes to loosen the adhesive beneath.
-
-
-
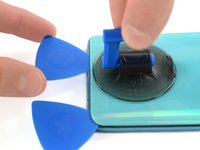
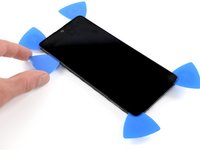
Reapply a heated iOpener to the screen to loosen the adhesive underneath.
-
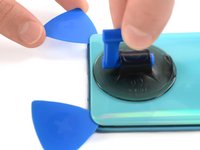
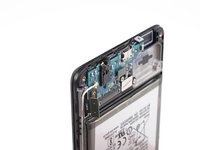
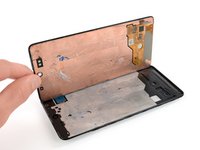
As you wait, take note of the rectangular-shaped adhesive placed underneath the screen.
Que voulez-vous dire pare prenez note du rectangle d'adhésif en dessous de l'écran
Bonjour @patrickgar51601 c'est l'adhésif qui fixe l'écran, entouré en rouge sur la seconde photo de l'étape, et que vous devez décoller pendant l'étape suivante. Il est important de visualiser son emplacement pour mener à bien la procédure.
-
-
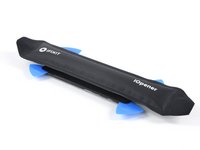
Ferramenta utilizada neste passo:Plastic Cards$2.99
-
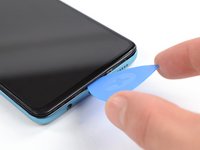
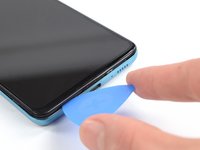
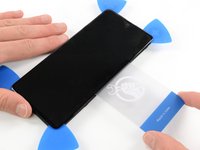
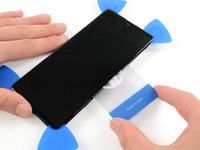
Insert a plastic card on the left edge into the gap between display and the phone assembly.
-
Press the plastic card in and slide it back and forth until you cut through the entire adhesive.
-
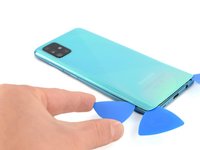
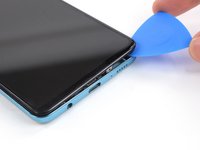
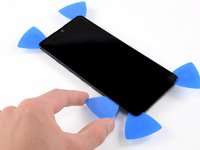
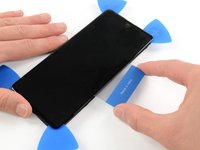
Once you are sure you cut through the adhesive, remove the four opening picks from the corners.
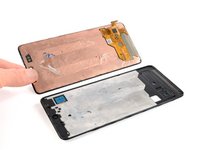
Bonjour, dans mon cas, la vitre teintée s’est décollée du Oled. J’ai ensuite chauffé et soulevé l’écran Oled (surface argentée) qui se brise en centaine d’éclats (attention les yeux). Le dessous de l’écran Oled est couvert d’un film de cuivre.
-


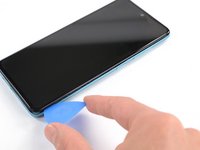


If possible, turn on your device and test your repair before installing new adhesive and resealing.
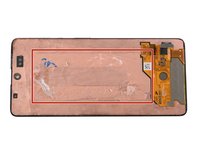
Compare your new replacement part to the original part—you may need to transfer remaining components or remove adhesive backings from the new part before installing.
To reassemble your device, follow these instructions in reverse order. Apply new adhesive where necessary after cleaning the relevant areas with isopropyl alcohol (>90%).
The best way to secure the new screen is to apply a sheet of custom-cut double-sided tape to the back of the screen.
Take your e-waste to an R2 or e-Stewards certified recycler.
Repair didn’t go as planned? Try some basic troubleshooting, or ask our Answers community for help.
If possible, turn on your device and test your repair before installing new adhesive and resealing.
Compare your new replacement part to the original part—you may need to transfer remaining components or remove adhesive backings from the new part before installing.
To reassemble your device, follow these instructions in reverse order. Apply new adhesive where necessary after cleaning the relevant areas with isopropyl alcohol (>90%).
The best way to secure the new screen is to apply a sheet of custom-cut double-sided tape to the back of the screen.
Take your e-waste to an R2 or e-Stewards certified recycler.
Repair didn’t go as planned? Try some basic troubleshooting, or ask our Answers community for help.
Cancelar: não concluí este guia.
69 outras pessoas executaram este guia.


13 comentários
Fingerprint scanner is disabled when original screen is replaced
You need to buy the right replacement screen like the one that supports fingerprint like amoled
Attention, Fingerprint makes some trouble after replaceing the display
I see that users have posted about the Fingerprint Scanner causing issues. “…disabled when original screen is replaced” or “… some trouble after replacing…” Are these issues that since have been resolved? Scanner can be re-enabled or disabled and re-enabled to bypass the “issues”?
Hi, as far as we know, there is no official solution for this issue yet. We hope Samsung fixes this issue or provides a way for 3rd party repair technicians to calibrate new sensors. If you want to know more about this topic you can watch this video from Hugh Jeffreys: https://www.youtube.com/watch?v=zGLQ9ZRn....
If you find any other news about this topic share it with us. :)
So I ordered the replacement Digitizer and Screen for my A51 but I didn’t pay attention and it didn’t come with everything assemble to the frame. Most of the videos show their replacements coming in and all they are having to do is move all the hardware from the broken screen/digitizer to the replacement. I wanted to verify that this guide is allowing me to use the old frame before I re-purchase new replacement parts. I understand the photos show the screen and digitizer being removed from the frame.
Hi, these guide describe how to replace the screen while leaving the original frame and motherboard in place. Good luck with the repair!
After replacing the screen and close the phone the louder speaker not working, what maybe the cause?
So, while having difficulty getting the adhesive to release, my plastic tools would not get under the glass…. Using a hobby knife was not a wise choice. I tore the antenna on the back near the USB-C port. Any info on what antenna I harmed, and potentially a source? Foil looks like it is on some type of Kapton tape, which I think I *might* be able to bridge, but that increased the difficulty by an order of magnitude (Trace repair is easier with access to a 40x Stereoscope).
My phone is froze I can't do a hard reset I can get the talk assistance with no help from anything else it's just Rose I don't know if I need a screen or what I can't get money factor people tell me shitt
ca ma cost un displei de samsung a 51
The antenna opposite to the camera was torn and remained partly stuck to the back !
A WARNING about this issue is missing ! It could be a mistake with the mediator, or a too low temperature at this location, or just bad luck...
Then it is impossible to push the ifixit mediator at the level of the usb port. This mediator is too thick ! It worked near the sdcard slot.
The procedure to remove the screen is not valid when you have a block screen part.
Moreover, the gluing of the back does not seem so easy. We need to clean...
Conclusion it is very fragile and delicate.
Kijk uit voor de vingerafdruk scanner. Er zit een kleine flat cable aan die kapot gaat als je de behuizing er in 1 keer vanaf haalt
Arno van Duijn - Responder
Falls der vorherigen Kommentar nicht verstanden wird, hier nun die Übersetzung 😉 Achte dabei auf den Fingerprint Scanner, da ist ein kleines flaches Kabel dran welches kaputt geht wenn Du die Hülle auf einmal entfernst.... also Vorsicht ist hier wohl geboten, wenn man sich an dieses scheinbar Einfache heran macht.
Sylvia L. - Responder
Ik kan helaas niet de simkaart houder met sim. Eruit halen. In de S9 plus de sim kaart blijft achterwege.
Deden - Responder
????????????
Deden - Responder