Ir para o conteúdo principal
Philips HD9252 Touch Screen Motherboard Replacement

Philips HD9252 Touch Screen Motherboard Replacement

Zach Person

Zach Person e 2 outros colaboradores

Última atualização em May 14, 2024

15 minutos
Moderado
Melhor Introdução

Introdução

Ir para o passo 1

This guide will lead users through the process of replacing a faulty touch screen. This may be required if the touch screen is unresponsive or does not turn on.

O que você precisa

Ferramentas

  • Spudger
    Spudger
  1. Philips HD9252 Touch Screen Motherboard Replacement, Top: passo 1, imagem 1 %32
    • Insert a nylon spudger underneath the top of the device.

    • Leverage the tool and pop off each of the eight tabs holding the plastic cover in place.

  2. Philips HD9252 Touch Screen Motherboard Replacement: passo 2, imagem 1 %32
    • Remove the four 12.4 mm screws in each of the corners using a JIS #1 screwdriver.

  3. Philips HD9252 Touch Screen Motherboard Replacement: passo 3, imagem 1 %32
    • Remove the top by lifting it upwards and setting it down.

    Hi, I cannot lift the top half because it's blocked by the exhaust vent. Any step that I am missing?

    Lorenzo Giraudi - Responder

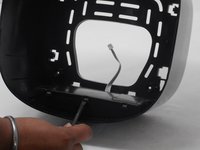
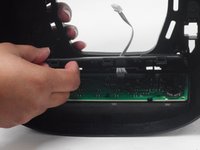
  4. Philips HD9252 Touch Screen Motherboard Replacement, Touch Screen Motherboard: passo 4, imagem 1 %32 Philips HD9252 Touch Screen Motherboard Replacement, Touch Screen Motherboard: passo 4, imagem 2 %32
    • Remove the back panel from the touch screen motherboard by popping the tabs off using the nylon spudger.

  5. Philips HD9252 Touch Screen Motherboard Replacement: passo 5, imagem 1 %32
    • Remove the touch screen motherboard.

Conclusão

To reassemble your device, follow these instructions in reverse order.

2 outras pessoas executaram este guia.

1Comentário do guia

Does the same method apply to milex airfryer 5.6 litre xxxl ? Coz when I switch it on it does not respond

Morena - Responder

Comentar

Visualizações:

Últimas 24 horas: 1

Últimos 7 dias: 8

Últimos 30 dias: 73

Ao todo: 498