Husqvarna Viking Designer 1 Needle Replacement

Introdução
Vá para o passo 1The needle on a sewing machine may need to be replaced for a variety of reasons, but the main reason is typically due to damage. Oftentimes, needles break due to user error, including using a fabric that is too thick for that particular needle or threading the needle incorrectly. Regardless of the cause, knowing how to replace a needle is a must for all seamstresses. This guide will provide users with that knowledge, as it relates specifically to the Husqvarna Viking Designer 1 sewing machine.
-
-
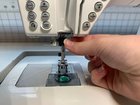
Thread the needle. (See pages 8-10 from the link.)
-
You may now remove the sheet of paper and begin sewing!
-


Replacing the needle is a quick, easy task to complete, using the directions provided in this guide.
Replacing the needle is a quick, easy task to complete, using the directions provided in this guide.
Cancelar: não concluí este guia.
2 outras pessoas executaram este guia.

Equipe

Grand Valley State University, Team S3-G1, DeVasto Winter 2021 Membro de Grand Valley State University, Team S3-G1, DeVasto Winter 2021
GVSU-DEVASTO-W21S3G1
1 Membro
1 Guia de autoria
6 comentários
Excellent illustration!!!
I have a Husqvarna viking designer se embroidery sewing machine and my needle threader broke had to purchased two needle threaders for my viking and one of them two big and the other one it's not the eye of the needle help I need a replacement asap thanks
Where do I purchase a vikking designer se needle threaders I search every where for that piece no luck 😢 thank you Nenalinda0216@yahoo.com Magali Rivera
I brought a replacement automatic needle threader and it fix on the viking & when I put it on the viking designer se it's doesnt line up in the eye of the needle and take the needle off and put it on again but it's still the same need help and I don't know what to do reply asap thanks
Hi my name is Magali and iam looking a replacement needle threaders for my husqvarna viking designer se embroidery sewing machine will someone answer me i search every where for a designer se needle threaders thank you!