Ir para o conteúdo principal
HP Pavilion 17-g192dx Cooling Fan Replacement

HP Pavilion 17-g192dx Cooling Fan Replacement

Dominic Perito

Dominic Perito e 4 outros colaboradores

Última atualização em July 1, 2024

10 - 15 minutos
Moderado

Introdução

Ir para o passo 1

This guide shows you how to replace the cooling fan in an HP Pavilion 17-g192dx laptop.

Cooling fans help keep devices cool, as the name implies, by circulating air to dissipate excess heat. However, cooling fans have an average lifespan of only 3-6 years, and that lifespan can be further shortened by a dusty environment. An old or damaged laptop cooling fan can cause serious issues, from lagging to system crashes to device damage. If you notice grinding noises coming from your laptop, a hotter-than-usual CPU temperature, and/or decreases in system performance, it may be time to replace your cooling fan.

This replacement is relatively fast and easy, though it does require knowledge of How to Apply Thermal Paste. This is because the cooling fan is located on the motherboard and is connected to the heat sink; any time you remove a laptop's heat sink, you must reapply thermal paste during reassembly.

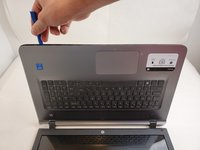
Lastly, ensure your laptop is powered down and unplugged from the charging adapter before you begin the repair.

O que você precisa

Ferramentas

Exibir mais…

  1. HP Pavilion 17-g192dx Cooling Fan Replacement, Battery: passo 1, imagem 1 %32 HP Pavilion 17-g192dx Cooling Fan Replacement, Battery: passo 1, imagem 2 %32 HP Pavilion 17-g192dx Cooling Fan Replacement, Battery: passo 1, imagem 3 %32
    • Turn off the laptop.

    • Slide the battery lock to the right until you see the open lock symbol.

  2. HP Pavilion 17-g192dx Cooling Fan Replacement: passo 2, imagem 1 %32
    • Slide the battery release to the left until the battery pops up.

    • This may require significant force.

  3. HP Pavilion 17-g192dx Cooling Fan Replacement: passo 3, imagem 1 %32 HP Pavilion 17-g192dx Cooling Fan Replacement: passo 3, imagem 2 %32
    • Lift the battery up.

  4. HP Pavilion 17-g192dx Cooling Fan Replacement, laptop: passo 4, imagem 1 %32
    • Using the metal spudger, pry up the screw covers.

  5. HP Pavilion 17-g192dx Cooling Fan Replacement: passo 5, imagem 1 %32
    • Remove the fifteen 7mm screws holding the back casing on using the Phillips #00 screwdriver.

  6. HP Pavilion 17-g192dx Cooling Fan Replacement: passo 6, imagem 1 %32 HP Pavilion 17-g192dx Cooling Fan Replacement: passo 6, imagem 2 %32
    • Remove the 7mm screw holding the disc drive in place using the Phillips #00 head screwdriver.

  7. HP Pavilion 17-g192dx Cooling Fan Replacement: passo 7, imagem 1 %32 HP Pavilion 17-g192dx Cooling Fan Replacement: passo 7, imagem 2 %32 HP Pavilion 17-g192dx Cooling Fan Replacement: passo 7, imagem 3 %32
    • Using an iFixit opening tool, push the disc drive away from the outer case.

    • Once the disk drive is out far enough, it easily slides out.

  8. HP Pavilion 17-g192dx Cooling Fan Replacement: passo 8, imagem 1 %32 HP Pavilion 17-g192dx Cooling Fan Replacement: passo 8, imagem 2 %32 HP Pavilion 17-g192dx Cooling Fan Replacement: passo 8, imagem 3 %32
    • Remove the four 7mm screws holding the back resting plates on using the Phillips #00 screwdriver.

    • Using a metal spudger, lift up on the back resting plate until it pops off.

  9. HP Pavilion 17-g192dx Cooling Fan Replacement: passo 9, imagem 1 %32 HP Pavilion 17-g192dx Cooling Fan Replacement: passo 9, imagem 2 %32
    • Remove the two 7 mm screws behind the plate using a Phillips #00 screwdriver.

  10. HP Pavilion 17-g192dx Cooling Fan Replacement: passo 10, imagem 1 %32 HP Pavilion 17-g192dx Cooling Fan Replacement: passo 10, imagem 2 %32 HP Pavilion 17-g192dx Cooling Fan Replacement: passo 10, imagem 3 %32
    • Pry up on the case with an iFixit opening tool until you can feel a snap.

    • Pry around the remainder until you can separate the case from the keyboard with your hands.

    • Gently separate the two.

  11. HP Pavilion 17-g192dx Cooling Fan Replacement, Cooling Fan: passo 11, imagem 1 %32 HP Pavilion 17-g192dx Cooling Fan Replacement, Cooling Fan: passo 11, imagem 2 %32 HP Pavilion 17-g192dx Cooling Fan Replacement, Cooling Fan: passo 11, imagem 3 %32
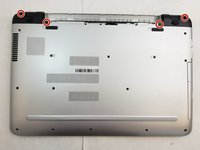
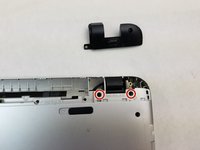
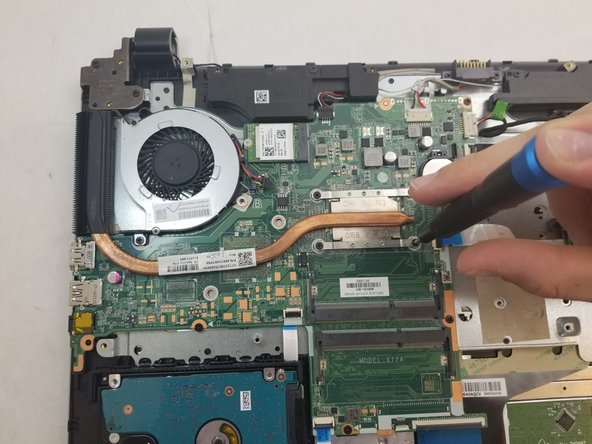
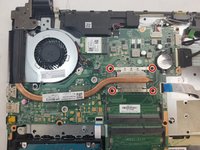
    • Remove the four 2mm screws on the heat sink with a Phillips #00 screwdriver.

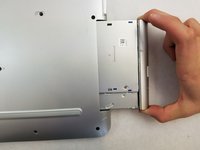
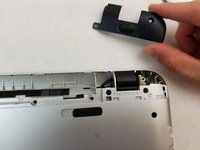
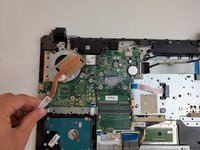
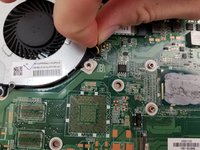
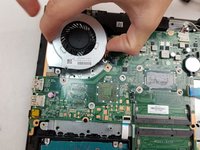
    • Remove the heat sink.

    • When setting the heat sink down, set it face down to avoid putting the thermal paste on the work surface.

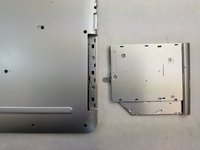
    • When reinstalling the heat sink, be sure to clean the contact surfaces and reapply fresh thermal paste.

  12. HP Pavilion 17-g192dx Cooling Fan Replacement: passo 12, imagem 1 %32
    • Remove the two 5mm screws holding the fan in place using the Phillips #00 screwdriver.

  13. HP Pavilion 17-g192dx Cooling Fan Replacement: passo 13, imagem 1 %32 HP Pavilion 17-g192dx Cooling Fan Replacement: passo 13, imagem 2 %32
    • Unplug the cooling fan from the motherboard.

    • Remove the cooling fan.

Conclusão

To reassemble your device, follow these instructions in reverse order.

0 comentários

Comentar

Exibir estatísticas:

Últimas 24 horas: 0

Últimos 7 dias: 1

Últimos 30 dias: 9

Ao todo: 594