Ir para o conteúdo principal
HP Chromebook x360 11-ae010nr Speakers Replacement

HP Chromebook x360 11-ae010nr Speakers Replacement

Devin Cannistraro

Devin Cannistraro e 5 outros colaboradores

Última atualização em January 5, 2024

15 minutos
Moderado
Precisa de melhores imagens

Introdução

Ir para o passo 1

If your HP Chromebook x360 11-ae010nr is producing distorted sound, or no sound can be heard from the device, this guide can be used to remove and replace the speakers.

The speakers are internal output devices that enable a user to listen to a sound or play audio.

Before using this guide, make sure to refer to the Troubleshooting Guide for audio issues. [Troubleshooting].

In order to access the speakers, the keyboard will need to be removed first. Removing the keyboard exposes the speakers, but will also expose other internal components of the device. Handling and repairing internal components can potentially be dangerous and cause Electrostatic Discharge (ESD). In order to prevent this, it is important to use an anti-static wrist band and mat. To ensure proper use, refer to iGixit's guide on how to set up the wrist band and mat before beginning the Speaker replacement. Antistatic Wristband and Mat Guide.

Make sure to power off your Chromebook and disconnect from any power sources before removing the keyboard and starting this guide.

O que você precisa

Ferramentas

Exibir mais…

  1. HP Chromebook x360 11-ae010nr Speakers Replacement, Keyboard: passo 1, imagem 1 %32 HP Chromebook x360 11-ae010nr Speakers Replacement, Keyboard: passo 1, imagem 2 %32
    • Flip the device upside down so that the screws are visible.

    • Loosen two captive Phillips #1 screws from the center of the device.

    • Remove three 9.3 mm Phillips #1 screws from the joint side of the device.

    • Remove four 6.1 mm Phillips #1 screws from the opening side of the device.

  2. HP Chromebook x360 11-ae010nr Speakers Replacement: passo 2, imagem 1 %32 HP Chromebook x360 11-ae010nr Speakers Replacement: passo 2, imagem 2 %32 HP Chromebook x360 11-ae010nr Speakers Replacement: passo 2, imagem 3 %32
    • Insert an iFixit opening tool between the edge of the keyboard assembly and the base of the device.

    • Push down on the handle of the opening tool to create an opening between the keyboard assembly and the base of the device.

    • Move the opening tool around the device, popping open the clips with force when necessary, until the keyboard assembly is fully lifted from the base of the device.

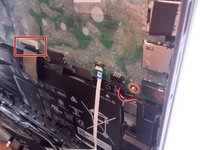
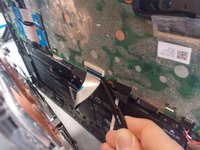
  3. HP Chromebook x360 11-ae010nr Speakers Replacement: passo 3, imagem 1 %32 HP Chromebook x360 11-ae010nr Speakers Replacement: passo 3, imagem 2 %32
    • Separate the keyboard assembly and the case.

    • Two cables connect the keyboard to the device, so take caution to not damage these cables.

    • Flip the black plastic tab where the wider cable meets the main board using the tip of a spudger or a fingernail.

    • Remove the cable with curved needle nose pliers or your fingers.

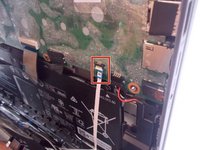
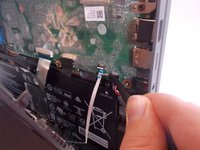
  4. HP Chromebook x360 11-ae010nr Speakers Replacement: passo 4, imagem 1 %32 HP Chromebook x360 11-ae010nr Speakers Replacement: passo 4, imagem 2 %32
    • Flip the white plastic tab where the thinner cable meets the main board using the tip of a spudger or a fingernail.

    • Remove the cable with curved needle nose pliers or your fingers.

    • Separate the keyboard from the laptop.

  5. HP Chromebook x360 11-ae010nr Speakers Replacement, Speakers: passo 5, imagem 1 %32 HP Chromebook x360 11-ae010nr Speakers Replacement, Speakers: passo 5, imagem 2 %32
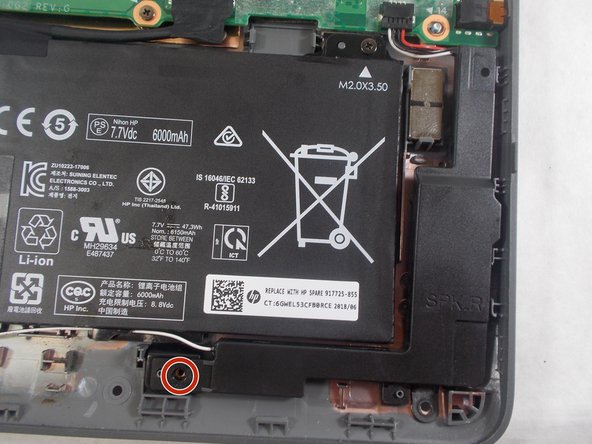
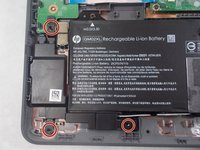
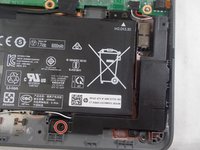
    • Remove the four 5 mm Phillips #1 screws from the left and right speakers.

  6. HP Chromebook x360 11-ae010nr Speakers Replacement: passo 6, imagem 1 %32 HP Chromebook x360 11-ae010nr Speakers Replacement: passo 6, imagem 2 %32
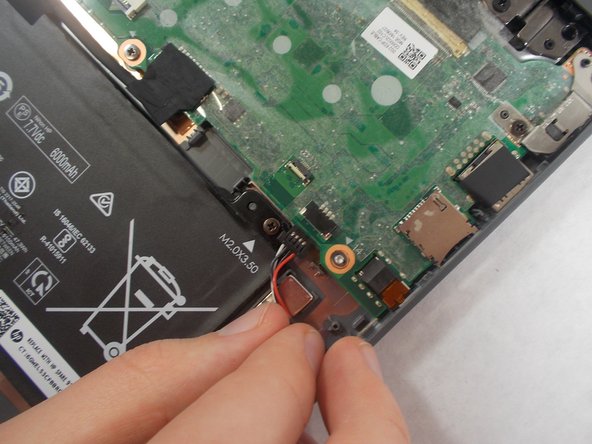
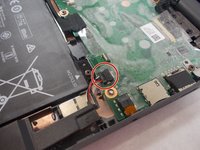
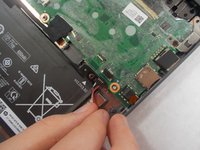
    • Remove the cable from the right speaker by removing the tape then detaching the cable.

  7. HP Chromebook x360 11-ae010nr Speakers Replacement: passo 7, imagem 1 %32
    • Pull the white cable down to detach from the battery.

    • Remove the speakers from the laptop.

Conclusão

To reassemble your device, follow these instructions in reverse order.

Devin Cannistraro

Membro desde: 10/28/19

193 Reputação

Autoria de 2 guias

Equipe

0 comentários

Comentar

Exibir estatísticas:

Últimas 24 horas: 0

Últimos 7 dias: 0

Últimos 30 dias: 2

Ao todo: 236