
Dell Inspiron 1525 DC Power Board Replacement

Introdução
Vá para o passo 1A step-by step to disassembling the Inspiron 1525 to replace the DC Jack.
O que você precisa
Peças
Ferramentas


Exibir mais…
-
-
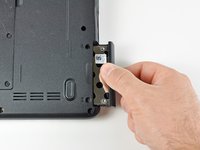
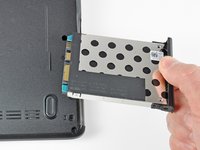
Remove the two 3.60 mm #1 Phillips screws securing the hard drive and hard drive tray.
-
Slide the hard drive and hard drive tray out of the laptop.
-
-
-
Remove the 5.75 mm #1 Phillips screw securing the optical drive.
-
Pull the optical drive straight from the laptop.
-
-
-
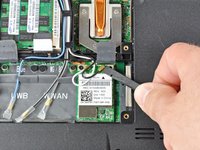
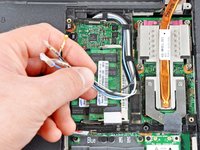
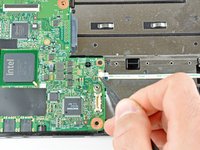
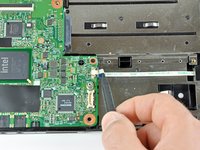
Use the flat end of a spudger to gently pry the black and white antenna connectors off the Wireless Mini-Card.
-
-
-
Remove the two 4.00 mm Phillips #1 screws from the battery tray.
-
-
-
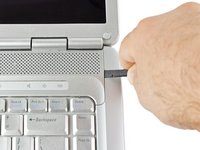
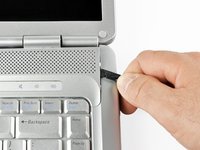
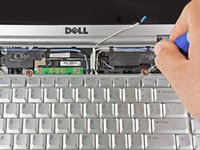
Remove the two 5.75 mm Phillips #1 screws securing the keyboard to the laptop.
-
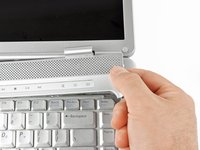
Gently slide the keyboard towards the display until the tabs on its front side are free.
-
-
-
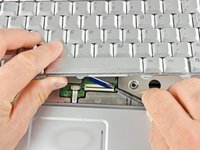
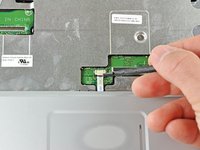
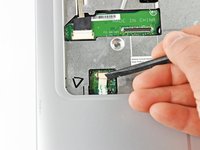
Use a spudger to gently lift the ribbon cable retaining flap.
-
Disconnect the ribbon cable.
-
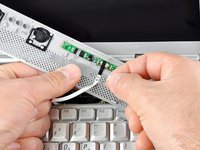
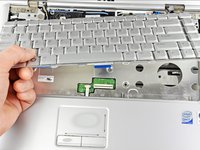
Shift the keyboard sideways enough to free one side from it's retaining tab. Then lift the keyboard away from the laptop.
-
-
-
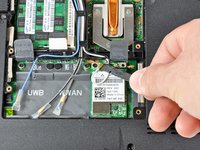
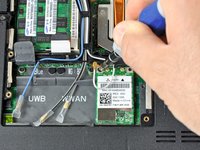
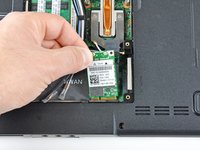
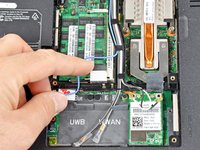
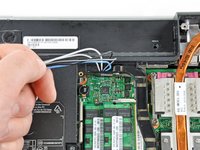
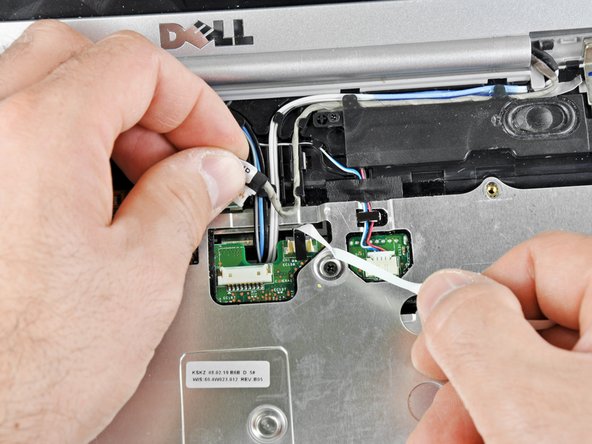
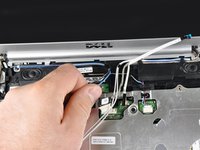
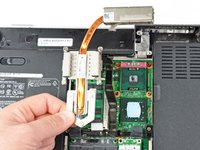
Disconnect the five antennas from their respective cards.
-
De-route the antennas from their routing retainers.
-
-
-
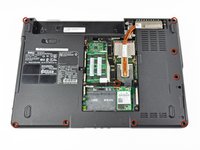
Remove the nine 5.75 mm Phillips #1 screws on the bottom side of the laptop.
-
Remove the two 5.70 mm Phillips #1 screws on the top side of the laptop.
-
-
-
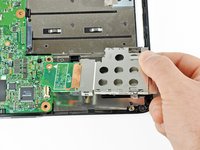
Eject your ExpressCard or ExpressCard dust shield if you want to transfer it to the new ExpressCard cage. Eject the card by pressing it in until it clicks, releasing it, then sliding it out.
-
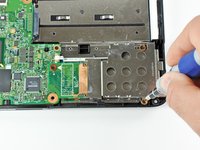
Remove the 3.80 mm Phillips #1 screw securing the ExpressCard cage.
-
Remove the two 3.70 mm Phillips #1 screws securing the ExpressCard cage.
-
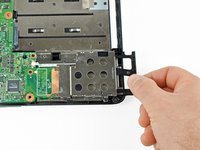
Lift the ExpressCard cage out of its connector.
-
-
-
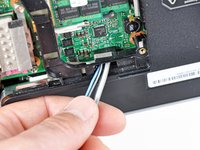
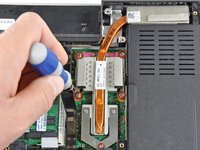
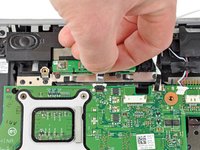
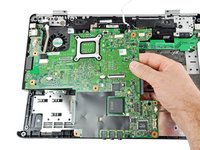
Loosen the five #1 Phillips screws securing the heat sink and clean it with compressed air
-
Gently lift the heat sink from side indicated in the picture.
-
-
-
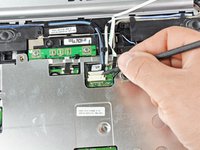
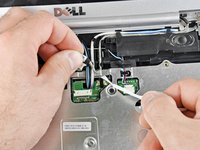
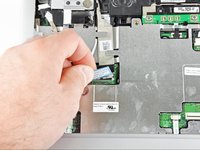
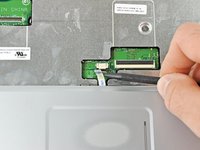
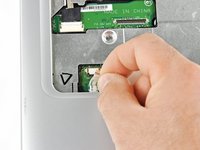
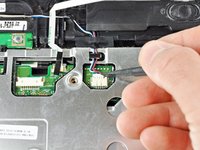
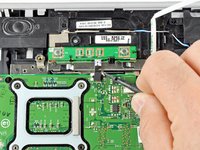
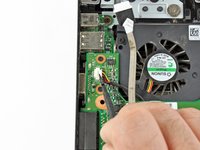
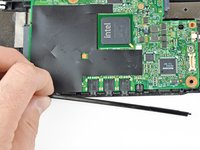
Use a spudger to push the retaining latch of the central control button connector towards its cable.
-
Pull the cable out of the connector.
-
-
-
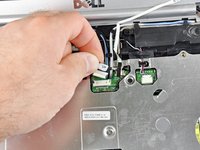
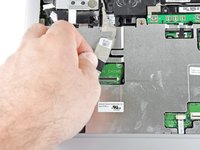
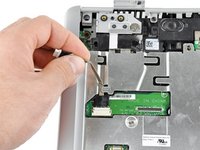
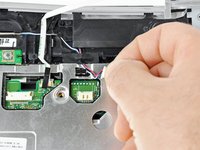
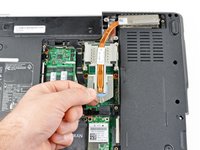
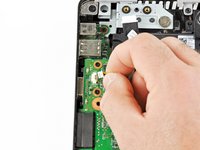
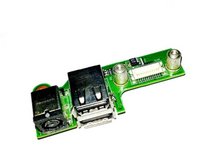
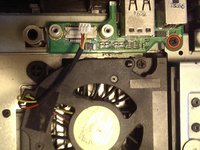
Unscrew the single screw holding the DC charger board into the laptop and lift it out.
-


To reassemble your device, follow these instructions in reverse order. Tip: Be sure that when you put the metal frame (between the keyboard and motherboard) that all of the cables that you have disconnected are back in their proper place and not trapped under the frame.
To reassemble your device, follow these instructions in reverse order. Tip: Be sure that when you put the metal frame (between the keyboard and motherboard) that all of the cables that you have disconnected are back in their proper place and not trapped under the frame.
Cancelar: não concluí este guia.
9 outras pessoas executaram este guia.

Equipe

3 comentários
What a brilliant guide - worked like a dream. Thanks for your hard work.