
Dell Inspiron 15 7579 Battery Replacement
Introdução
Ir para o passo 1If your laptop is unresponsive or you have a consistently low battery life, we recommend starting with our troubleshooting guide. If those tips don't solve your problem, then follow this guide to replace your battery.
O que você precisa
Fix Kit
Este kit contém todas as peças e ferramentas necessárias para executar este guia.

Peças

Ferramentas


Exibir mais…
-
-
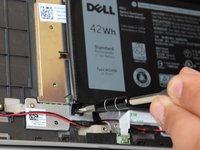
Remove the two 7.8 mm long screws on the left side of the battery with the Phillips #1 screwdriver.
-
-
-
Pull out the fabric clip that attaches the battery to the main board from the connector by hand.
-
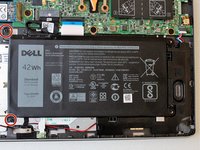
Remove the battery from the device.
Super easy 3minute battery swap, removing and replacing housing screws is what all the work here is.
My Mom is super happy she no longer has to be plugged in to use her laptop.
Thank you ifixit 😊✌️
-


To reassemble your device, follow these instructions in reverse order.
To reassemble your device, follow these instructions in reverse order.
Cancelar: não concluí este guia.
10 outras pessoas executaram este guia.
Equipe

Cal Poly, Team S24-G9, Maness Spring 2018 Membro de Cal Poly, Team S24-G9, Maness Spring 2018
CPSU-MANESS-S18S24G9
4 Membros
Autoria de 6 guias
2 comentários
Thanks! Very helpful and to the point!
You ARE TECHNICALLY missing one step however, removing the fabric ribbon from the old battery at the end. Yes, it seems like common sense but…
Anyways, thanks.
Thanks for the help, worked well.
Remember the connector needs to be removed from the old battery and re-installed in the new. I used a small slotted screwdriver.
A. Holness
June 7, 2020