
Apple Watch Series 3 Battery Replacement

Introdução
Vá para o passo 1Use this guide to replace a worn-out battery in your Apple Watch Series 3.
This guide shows the procedure on the standard, GPS-only version of the watch, but the cellular/LTE version is similar. Any important differences are noted in the text.
Note: If your battery is swollen, take appropriate precautions.
O que você precisa
Kits de conserto
Estes kits contêm todas as peças e ferramentas necessárias para executar este guia.


Peças


Ferramentas


Exibir mais…
-
-
Before starting repairs, take your watch off the charger and power it down.
-
-
-
Prepare an iOpener (or grab a hair dryer or heat gun) and heat the face of the watch until it's slightly too hot to touch.
-
Leave the iOpener on the watch for at least a minute to fully heat the screen and soften the adhesive holding it to the case.
-
-
-
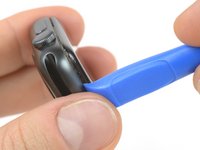
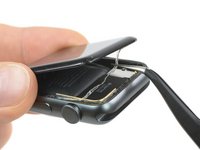
Place the edge of a curved blade into the thin gap between the display and the outer case. Start at the short side of the display, closest to the digital crown.
-
Press firmly straight down into the gap.
-
Once inserted, tilt the blade to pry the display open slightly.
-
-
Ferramenta utilizada neste passo:Tweezers$4.99
-
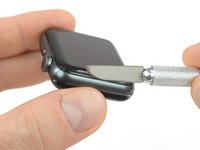
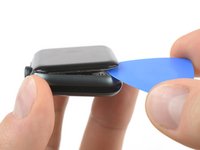
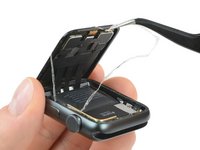
Use a Y000 driver to remove the tri-point screw securing the metal cover plate.
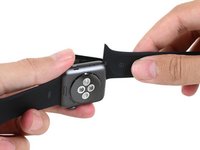
-
Use a pair of tweezers to remove the cover plate.
-
First open the plate all the way to unhinge the two flaps.
-
Then close it halfway to remove it completely by lifting it out.
-
-
-
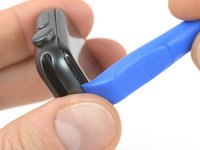
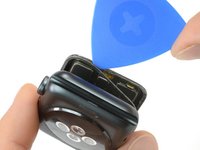
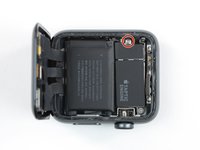
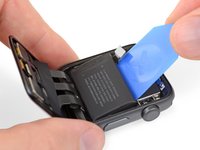
Use scissors to cut one of your opening picks to about the width of the battery. Try not to leave any sharp corners.
-
Insert the modified pick between the edge of the battery and the case, on the side opposite the digital crown.
-
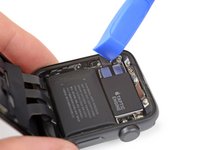
Use constant, steady pressure to slowly pry the battery up, separating it from the adhesive securing it to the system board.
-
-
Ferramenta utilizada neste passo:Tesa 61395 Tape$5.99
-
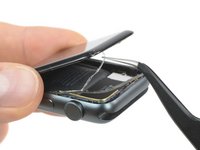
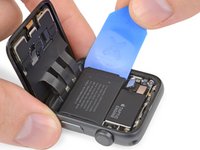
Remove the battery.
-
If needed, try re-using the existing adhesive to secure the battery. Alternatively, try a small piece of double-sided tape such as Tesa 61395, or a dab of liquid adhesive such as E6000.
-


Once your new battery is set in place, continue from Step 10 of the Force Touch Gasket guide to re-seal your watch and complete your repair.
Once your new battery is set in place, continue from Step 10 of the Force Touch Gasket guide to re-seal your watch and complete your repair.
Cancelar: não concluí este guia.
73 outras pessoas executaram este guia.

Equipe

Tobias Isakeit - Repairability Engineer Membro de Tobias Isakeit - Repairability Engineer
Business
1 Membro
Autoria de 1.131 guias
10 comentários
Hi
I’m having problem with my Apple Watch series 3, a red snake shown in the watch, I bought a brand new battery here in ifix and i proceed to install it but I’m having the same problem. Can someone help me.
thanks
Have you checked our Apple Watch troubleshooting page for the charging issue?
followed all the steps properly. But the Apple watch does not switch on! The new battery does not seem to work.
After replacing the Battery will the watch be waterproof enough to swim with/ have the same water resistance as when it was new
If you cleaned both the backside of the lens and the case groove where the adhesive was very well and replaced the adhesive getting it squarely on the case lip just as the original one was installed, I would expect the watch to be as sealed and water resistant as it was when new.