Ir para o conteúdo principal

O que você precisa

Este teardown (desmontagem analítica) não é um guia de reparo. Para reparar seu/sua Power Mac G4 Cube, use o nosso manual de serviço.

  1. Power Mac G4 Cube Teardown, Power Mac G4 Cube Teardown: passo 1, imagem 1 %32 Power Mac G4 Cube Teardown, Power Mac G4 Cube Teardown: passo 1, imagem 2 %32 Power Mac G4 Cube Teardown, Power Mac G4 Cube Teardown: passo 1, imagem 3 %32
    • The Cube!

  2. Power Mac G4 Cube Teardown: passo 2, imagem 1 %32 Power Mac G4 Cube Teardown: passo 2, imagem 2 %32 Power Mac G4 Cube Teardown: passo 2, imagem 3 %32
    • To Start The Dissasembly, Flip The Cube Upside-Down, and unplug it.

    • Next, push on the handle, it should pop up.

  3. Power Mac G4 Cube Teardown: passo 3, imagem 1 %32 Power Mac G4 Cube Teardown: passo 3, imagem 2 %32 Power Mac G4 Cube Teardown: passo 3, imagem 3 %32
    • Now, pull up on the cube by the handle, all of the guts should come out.

    • As you might notice, the cube's guts only go in one way, the ports facing the back of the enclosure

  4. Power Mac G4 Cube Teardown: passo 4, imagem 1 %32 Power Mac G4 Cube Teardown: passo 4, imagem 2 %32 Power Mac G4 Cube Teardown: passo 4, imagem 3 %32
    • Removing the Ram

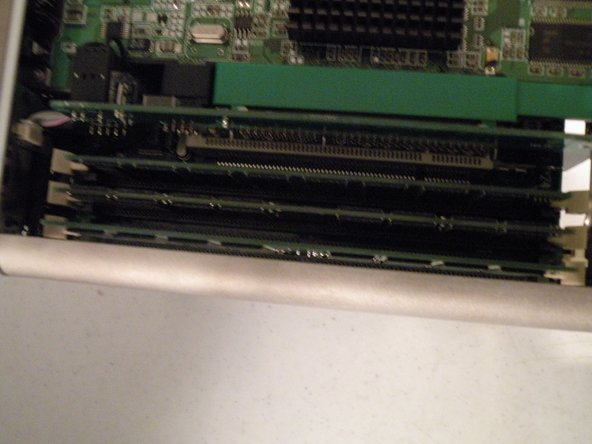
    • Start by fliping the cube so that the side with the graphics card is facing you, you may want to push the handle back in.

    • There are 3 RAM Slots, they are Standard PC100 Ram. The cube can support up to 1.5GB of ram, that's a 512MB Stick In All 3 Slots.

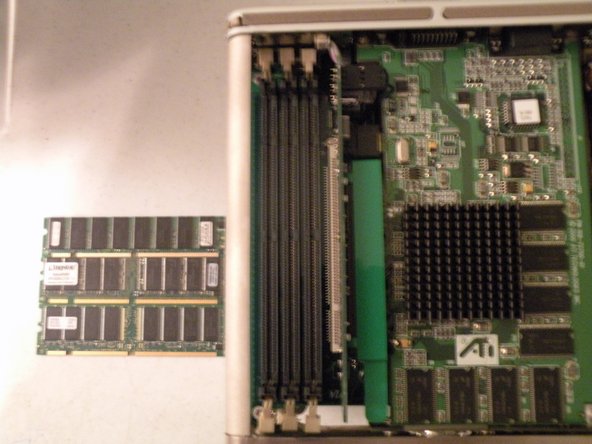
    • Remove the ram, just like any other kind of ram.

  5. Power Mac G4 Cube Teardown: passo 5, imagem 1 %32 Power Mac G4 Cube Teardown: passo 5, imagem 2 %32 Power Mac G4 Cube Teardown: passo 5, imagem 3 %32
    • Airport Card

    • The Cube Uses the standard PCMCIA 802.11b Airport card commonly found in macs from 1999-2004

    • Flip the cube to the side with the airport card attatched. Remove the antenna cable, then grasp the card by the plastic tab, and pull it out of it's socket.

  6. Power Mac G4 Cube Teardown: passo 6, imagem 1 %32 Power Mac G4 Cube Teardown: passo 6, imagem 2 %32 Power Mac G4 Cube Teardown: passo 6, imagem 3 %32
    • The Graphics Card

    • The Cube came standard with a Mac ATI Rage 128 Pro 16MB AGP Card. ATI Radeon (32MB) and nVidia GeForce 2MX (32MB) cards were BTO options.

    • There are few Cube compatible mac cards, due to the cube's small size, heat dissipation limitations, and limited power supply capabilities.

    • Remove these T10 screws:

    • Then, pull the top piece of metal off of the computer,

    • There is a small fragile cable coming from the top if the cube for the power button/LED, before fully removing the piece, unplug this cable from the logic board.

  7. Power Mac G4 Cube Teardown: passo 7, imagem 1 %32 Power Mac G4 Cube Teardown: passo 7, imagem 2 %32
    • And These T10 Screws...

  8. Power Mac G4 Cube Teardown: passo 8, imagem 1 %32 Power Mac G4 Cube Teardown: passo 8, imagem 2 %32 Power Mac G4 Cube Teardown: passo 8, imagem 3 %32
    • Now to free the card, pull this tab towards you and with some persuasion, the card should come free.

    • Oops! Oh well, even without the brittle plastic tab, the card isn't going anywhere.

    • Then, remove the card and set it aside.

  9. Power Mac G4 Cube Teardown: passo 9, imagem 1 %32 Power Mac G4 Cube Teardown: passo 9, imagem 2 %32
    • Removing the AGP Riser card

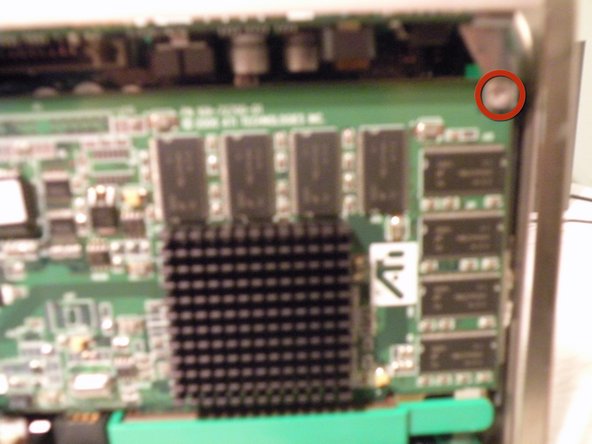
    • Pull the card out of the PCI Socket, and no, unfortunately, you can't use this to put an AGP card in a PCI slot in a PC.

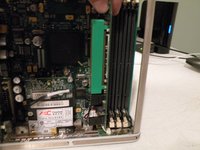
    • Once the card is free, mind the 3 cables attached to it, remove these 2 cables first.

    • The third cable is glued to the AGP board, unplug it from the logic board instead.

  10. Power Mac G4 Cube Teardown: passo 10, imagem 1 %32 Power Mac G4 Cube Teardown: passo 10, imagem 2 %32
    • Removing the 56K Modem

    • Remove the 2 T10 Torx Screws

    • Then, pull the 56k modem out, there is a socket on the back of it, so be careful!

  11. Power Mac G4 Cube Teardown: passo 11, imagem 1 %32 Power Mac G4 Cube Teardown: passo 11, imagem 2 %32 Power Mac G4 Cube Teardown: passo 11, imagem 3 %32
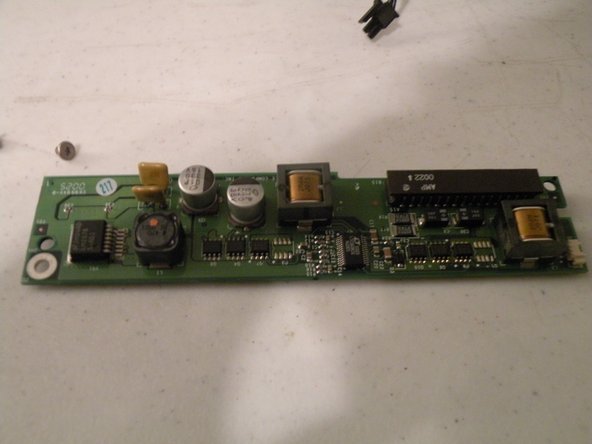
    • Removing the Voltage Regulator Module.

    • This board is called the DC/DC board, or the Voltage Regulator Module. It takes the power from the power brick and regulates the power to different components of the Cube.

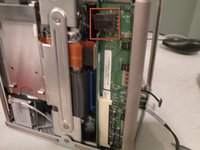
    • First, disconnect the power connector.

    • Then release the white clip on the connector socket, which is accessed from the side of the core.

    • With a little persuasion, the board comes out of it's socket(it's hard to show how the board comes out, but in person, it's pretty self explanatory)

  12. Power Mac G4 Cube Teardown: passo 12, imagem 1 %32
    • The Logic Board

    • Unfortunately, this as far as I am going to dissect my cube, partially because I still use it frequently, but here is an overview of the cube.

    • 450Mhz or 500Mhz PowerPC G4 Processor

    • Shipped with 64MB ram, supports up to 1.5GB of PC100 or PC133

    • One PCI Slot(Converted to AGP via adaptor)

    • No Onboard Audio.(Unfortunately)

Chris Green

Membro desde: 10/11/09

36.869 Reputação

Autoria de 49 guias

Equipe

Master Techs Membro de Master Techs

Community

Membros da 322

Autoria de 2.495 guias

8 comentários

This is great! What a beautiful machine that was.

Kyle Wiens - Responder

Awesome teardown, Chris! Thanks for posting it.

Miroslav Djuric - Responder

Worst pictures I've seen in a teardown in a long time…

Jena - Responder

"This was a big mistake on apple's part, because G4 processors run very hot!"

How was it a mistake? Mine still runs fine after all these years.

Maxim - Responder

the plastic cracked around the top screws (when stepped on by Wozniak)

max white - Responder

Adicione um comentário

Exibir estatísticas:

Últimas 24 horas: 6

Últimos 7 dias: 25

Últimos 30 dias: 100

Duração total: 61,838