
iPod Touch 4th Generation Home Button Replacement

Introdução
Ir para o passo 1Click. Click. Pfft. Has your home button stopped clicking? Use this guide to replace it. This guide is for replacing the plastic home button cover. If you need to replace the functional home button switch, go to this guide.
O que você precisa
Peças

Ferramentas


Exibir mais…
-
-
With the heat gun set on "low", begin heating the lower portion of the Touch near the home button.
-
-
-
Carefully pull the top of the front panel assembly away from the adhesive holding it to the Touch, minding the short digitizer cable connecting the two components.
-
-
-
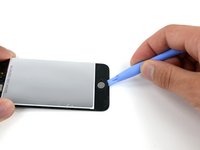
Insert a plastic opening tool under the rubber holding the home button in place.
-
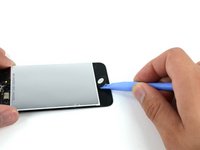
Slide the tool around the perimeter of the button, prying up as you go.
-
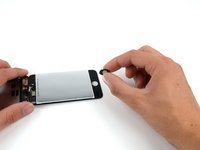
Lift the home button out of the device.
-


To reassemble your device, follow these instructions in reverse order.
To reassemble your device, follow these instructions in reverse order.
Cancelar: não concluí este guia.
69 outras pessoas executaram este guia.

11Comentários do guia
"To reassemble your device, follow these instructions in reverse order."
So Nice. Its Fully help
can you make professional step by step tutorial on how to put the touch back together like the one you made to take it apart ?
If you follow the guide from the bottom to the top, you can reassemble the device. If you disassembled the phone farther than the Home Button guide shows, go back to the device page and follow the guide that matches your device.
Hmm I was careful to not break any wires (all the wires looked fine to me) and plug the thing back in but the screen stays black after I press the power button :/
NO you cannot follow instructions in reverse BECAUSE you need focking adhesive to re apply the FOCKING SCREEN!
You are right. the adhesive is here: iPod touch (4th Gen) Adhesive Strips
nirv -
i timed it and it took me 5 minutes and i think it should be rated 1 in difficulty