
Toshiba Satellite L455-S5046 The Fan Replacement
Introdução
Ir para o passo 1In this guide we will teach you how to replace the fan on your laptop. Be sure to read the Satellite L455-S5046 Troubleshooting Guide to see if a replacement is necessary.
O que você precisa
Ferramentas

-
-
Find the battery on the back of the computer. Slide both tabs outward towards the side of the laptop and the battery will come loose.
-
Insert your finger under the middle tab and lift the battery out.
-
-
-
Start on the back and unscrew the 12 Phillips #0 11-mm screws holding the back cover down.
-
-
-
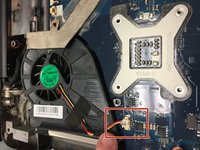
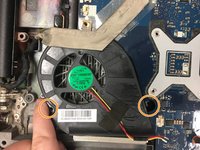
Flip the laptop over. Remove the keyboard as instructed in the keyboard replacement guide.
-
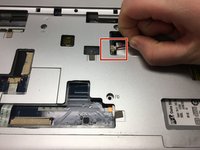
Gently remove the connector visible in the upper right hand corner of the laptop by pulling to the right.
-
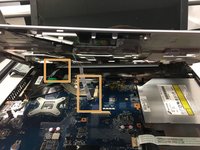
Remove the cover slowly. There will be two other connectors on the underside that can be removed by pulling gently.
-


To reassemble your device, follow these instructions in reverse order.
To reassemble your device, follow these instructions in reverse order.
Equipe

Oakland University, Team 2-1, Ruskiewicz Winter 2017 Membro de Oakland University, Team 2-1, Ruskiewicz Winter 2017
OAK-RUSKIEWICZ-W17S2G1
3 Membros
Autoria de 6 guias