Ir para o conteúdo principal
Participe da comunidade de reparos - Criar conta
Sony RM-LVR1 LCD Screen Replacement

Sony RM-LVR1 LCD Screen Replacement

Alexander Thomas

Alexander Thomas e 5 outros colaboradores

Última atualização em 7 de mai de 2024

30 minutos
Moderado

Introdução

Ir para o passo 1

This guide will teach you step by step how to replace your LCD screen.

O que você precisa

Ferramentas

Exibir mais…

  1. Sony RM-LVR1 LCD Screen Replacement, Battery: passo 1, imagem 1 %32
    • Use a Phillips #00 screwdriver to remove the four (4) screws on the back of the device.

    • If the screws strips or is previously stripped, refer to the stripped screw repair guide.

  2. Sony RM-LVR1 LCD Screen Replacement: passo 2, imagem 1 %32
    • Battery is the rectangular and silver object in the center of device.

    • Remove battery with finger by prying at the rear.

    • If unable to remove battery, pry out using spudger.

  3. Sony RM-LVR1 LCD Screen Replacement, LCD Screen: passo 3, imagem 1 %32 Sony RM-LVR1 LCD Screen Replacement, LCD Screen: passo 3, imagem 2 %32
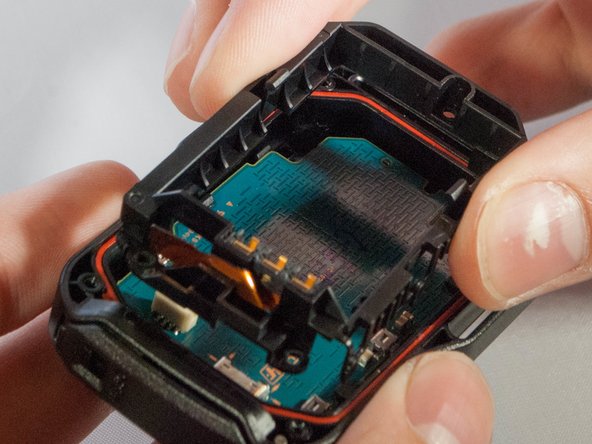
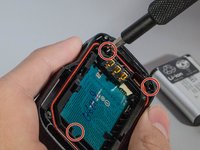
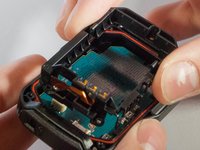
    • Unscrew the 3 (three) screws holding the bracket in place.

    • Then remove the bracket by prying one end up.

    • Do not rip the ribbon cable connecting the bracket to the motherboard.

  4. Sony RM-LVR1 LCD Screen Replacement: passo 4, imagem 1 %32
    Ferramenta utilizada neste passo:
    Tweezers
    $4.99
    • With tweezers, unplug the ribbon cable from the white connector.

  5. Sony RM-LVR1 LCD Screen Replacement: passo 5, imagem 1 %32
    • Remove motherboard from the device by pulling upward gently, with fingers or tweezers.

  6. Sony RM-LVR1 LCD Screen Replacement: passo 6, imagem 1 %32
    • Gently push out on these two clips holding the LCD to the motherboard

    • Once you have the first two off, ever so carefully, push the LCD towards the remaining two clips.

    • There is a ribbon cable underneath the LCD connecting it to the motherboard. Avoid sharp, sudden movements to prevent it from being damged

    Salut, svp referance de l'LCD?

    be_vdp - Responder

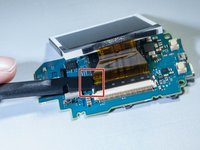
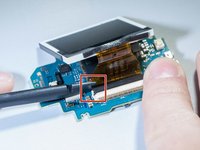
  7. Sony RM-LVR1 LCD Screen Replacement: passo 7, imagem 1 %32 Sony RM-LVR1 LCD Screen Replacement: passo 7, imagem 2 %32
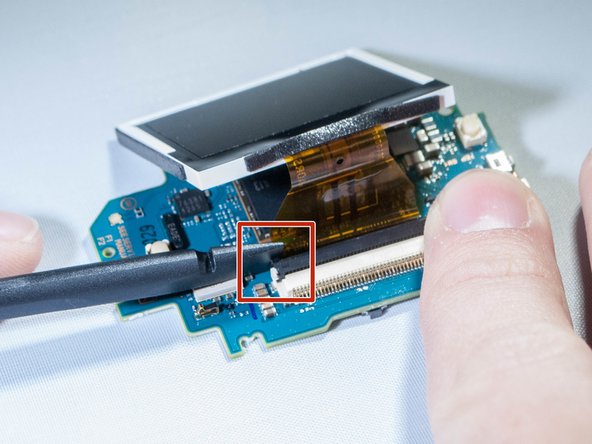
    • Undo the ribbon cable attached between the motherboard and screen by prying up black tab which holds the cable, using spudger. (See pictures)

  8. Sony RM-LVR1 LCD Screen Replacement: passo 8, imagem 1 %32
    • Remove the screen from the motherboard.

Conclusão

To reassemble your device, follow these instructions in reverse order.

Uma outra pessoa concluiu este guia.

Gear Up For Future Repairs

Shop all

4Comentários do guia

здорово!

подскажите где купить дисплей?, или его маркировку?. на дисплее ничего не написано, не могу найти.

Александр - Responder

Hi

I cant find an replacement lcd.

Could anybody help me where to get one?

Cheers

Sven

Sven van Bellen - Responder

any link to the replacement LCD please?

Bart Ptachowski - Responder

Hi .

search : HD 170 LCD Drift aliexp****

i think it will do the job .

cheers

ruigyl - Responder

Comentar

Visualizações:

Últimas 24 horas: 1

Últimos 7 dias: 7

Últimos 30 dias: 24

Ao todo: 626