
Nintendo Game Boy Advance SP Buttons Replacement
Introdução
Ir para o passo 1The buttons control all the operations on the device. Taking care of the buttons leads to a longer lifespan for your Game Boy Advance SP.
O que você precisa


-
-
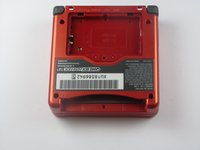
Use a standard Phillips #00 screwdriver to loosen the 4 mm screw that keeps the battery cover attached to the device.
-
-
-
Remove four 6.5 mm screws from the corners of the back cover using a tri-point Y00 screwdriver.
-
Remove two 4.6mm screws from the top-center and bottom-center of the device using a tri-point Y00 screwdriver.
-
-
-
Using a Phillips #00 screwdriver, remove the three Phillips #00 4 mm long screws that hold the motherboard to the button panel.
-
-
-
Flip the motherboard up and rest it on the other half of the device, so that the back of the buttons are visible as seen in the picture.
My Game Boy Advance SP has a problem where it won’t charge the device. The Game Boy is plugged in but the charge light does not go on. How may I turn it back on? What, inside the system, needs to be fixed? Is it one of the cables behind the charging socket inside the Game Boy?
-
-
-
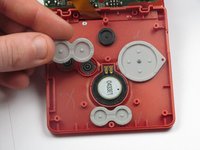
Using your fingers, gently lift and remove the trackpads covering the following:
-
'A' and 'B' buttons
-
Directional Control Button Pad
-
'Start' and 'Select' buttons
-
-
Ferramenta utilizada neste passo:Tweezers$4.99
-
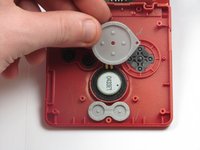
Using tweezers or fingers, lift and remove:
-
'A' and 'B' buttons
-
Directional control button pad
-
'Start' and 'select' buttons
-


To reassemble your device, follow these instructions in reverse order.
To reassemble your device, follow these instructions in reverse order.
Cancelar: não concluí este guia.
12 outras pessoas executaram este guia.
Equipe

Cal Poly, Team 17-22, Forte Winter 2013 Membro de Cal Poly, Team 17-22, Forte Winter 2013
CPSU-FORTE-W13S17G22
4 Membros
Autoria de 41 guias
5 comentários
there is most likely a crack in the mother board or the battery has too much pressure placed onto it
you can fix this by changing the position of the battery and putting something to stop it from moving around so it fits tightly
@
Quel est le nom du vis svp je l'ai perdu et j'ai pas la référence
la chaîne de Samarium - Responder
Bonjour @lachainede96340 D'après les instructions du tutoriel, il s'agit d'une vis Phillips (ou cruciforme) #00 de 4 mm de long. Ces mesures devraient suffire pour trouver une vis de remplacement dans votre stock de vis ou en magasin le cas échéant.
Claire Miesch -