
Nintendo DS Bottom LCD Screen Replacement
Introdução
Ir para o passo 1After removing the circuit board, the bottom LCD screen can easily be removed from the Nintendo DS.
O que você precisa


-
-
Remove the cartridge from the console.
-
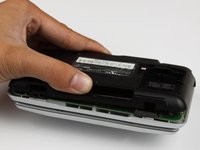
Use a Phillips #00 Screwdriver to remove the screw securing the battery door to the rear case.
-
Remove the battery door.
-
-
-
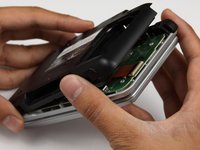
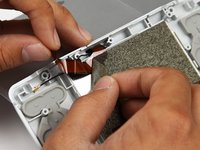
With your hands, pry the back panel off the main case.
-
Separate the back from the front, and set it aside.
If some of your screws spin free but can’t be removed, it maybe that the screw posts have separated from the shell.
This makes separating the back panel more difficult, but it will still work.
The plastic used for the original silver nds may be the most prone to the UV damage that causes the plastic to become brittle.
-
-
-
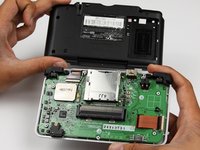
Using a Phillips #00 screwdriver, remove the four screws on the circuit board.
-
-
-
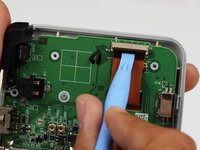
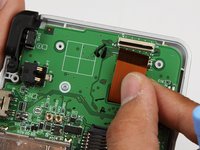
Unlock the two large ribbon cables by moving the black clip up.
-
Carefully pull the ribbon cables down and out with your fingers.
Benutze für die nächsten Schritte besser einen Spudger und keine Pinzette,
sonst läufst du Gefahr eines der Kabel oder die Platine selbst zu beschädigen.
Better use a Spudger, not a Tweezer for the next Steps.
That minimize the risk to demolish one of the wires or the mainboard himself.
That’s what i did but it didn’t work
-
-
Ferramenta utilizada neste passo:Tweezers$4.99
-
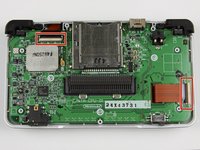
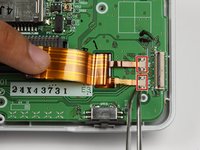
Locate the two small ribbon cables, beneath the rightmost large ribbon cable.
-
Slide the locks for the small ribbon cables down to the side, and remove the cables.
Does anyone know where I can get a new connector for the P6 connector? I can only find them for the ds lite
-
-
-
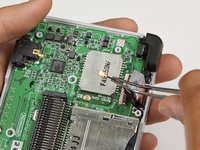
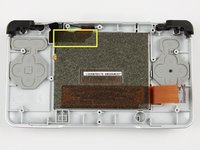
Peel off the black cushion foam on the bottom touch screen to expose the ribbon cable.
-
Gently lift the screen out of the base.
-


To reassemble your device, follow these instructions in reverse order.
To reassemble your device, follow these instructions in reverse order.
Cancelar: não concluí este guia.
22 outras pessoas executaram este guia.
Equipe

Cal Poly, Team 18-3, Maness Fall 2009 Membro de Cal Poly, Team 18-3, Maness Fall 2009
CPSU-MANESS-F09S18G3
4 Membros
Autoria de 31 guias
2Comentários do guia
I like it but add a step 12 maybe, to see how to put in a new screen.
Why was this unfinished guide published?
Or was it just mistitled?
"How to 'almost' remove the lower screen"