Ir para o conteúdo principal
Microsoft Surface Pro 2 Fan Replacement

Microsoft Surface Pro 2 Fan Replacement

Skyler Addy

Skyler Addy e 5 outros colaboradores

Última atualização em July 26, 2022

30 minutos
Moderado

Introdução

Ir para o passo 1

Use this guide to replace the fans in your Microsoft Surface Pro 2.

This guide is for a Microsoft Surface Pro 2 (Model Number: 6CX-00001RB ) if it is overheating or making loud grinding noises. If you are having these issues with your device the Microsoft Surface Pro 2 Fans (P/N: KDB04105HB CK91 DF43) may need to be replaced. These issues may occur through extended use of the device or other possible damage sources like dropping the device. Replacing this fans prevent further damage from the overheating of the device or from the grinding of the fans.

This guide will show you in detail how to replace these fans in a safe manner. However, this guide is above average in difficulty because you will need have proficiency with both a heat gun and an opening tool to remove the screen of the device. After replacing the fans, follow the guide in reverse order to reassemble the device.

O que você precisa

Ferramentas

Exibir mais…

  1. Microsoft Surface Pro 2 Fan Replacement, LCD Display: passo 1, imagem 1 %32 Microsoft Surface Pro 2 Fan Replacement, LCD Display: passo 1, imagem 2 %32
    • To avoid electrical shocks, unplug and turn off your Surface Pro 2 before proceeding.

  2. Microsoft Surface Pro 2 Fan Replacement: passo 2, imagem 1 %32
    • Avoid any skin or eye contact with the heating pad or heating gun because they may cause bodily harm.

    • Using a heating pad or heating gun, heat the edges of the screen to soften the glue. This area extends roughly one inch from the edge of the device.

    • The glue is under the darker border of the device display.

  3. Microsoft Surface Pro 2 Fan Replacement: passo 3, imagem 1 %32
    • Using a plastic opening tool and a suction cup as needed for leverage, gently insert one edge of the opening tool under the corner of the screen.

    • If the tool does not easily slide under the screen, return to heating before proceeding.

    • Slowly work the tool around the entire edge of the screen.

  4. Microsoft Surface Pro 2 Fan Replacement: passo 4, imagem 1 %32 Microsoft Surface Pro 2 Fan Replacement: passo 4, imagem 2 %32 Microsoft Surface Pro 2 Fan Replacement: passo 4, imagem 3 %32
    • Detach the orange cables that connect the screen to the motherboard by pulling on the small tabs. Using the nylon spudger, release these cables.

    • Please note the third small connector in red.

    • Allow the glue to cool before letting it come into contact with any other surface.

  5. Microsoft Surface Pro 2 Fan Replacement, Motherboard: passo 5, imagem 1 %32 Microsoft Surface Pro 2 Fan Replacement, Motherboard: passo 5, imagem 2 %32 Microsoft Surface Pro 2 Fan Replacement, Motherboard: passo 5, imagem 3 %32
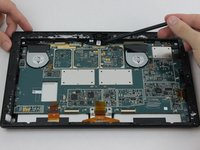
    • Make sure that the front-facing camera is completely disconnected, and then remove the plastic bracket.

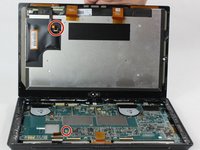
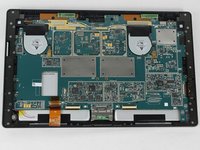
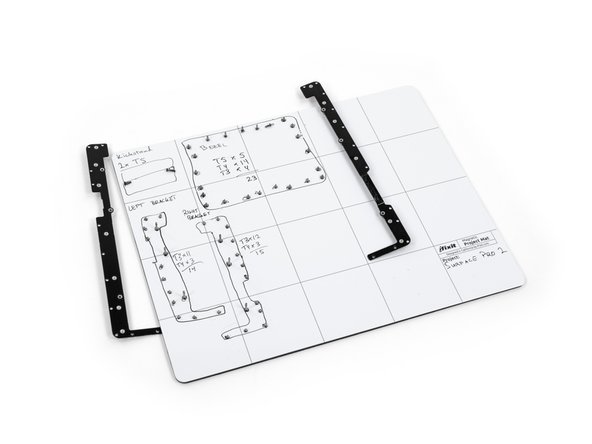
    • Remove the 22 screws on the bezel.

    • Remove the left and right brackets; the left has 16 screws and the right has 15 screws.

    • The three different torx screws used are T3, T4, and T5.

  6. Microsoft Surface Pro 2 Fan Replacement: passo 6, imagem 1 %32 Microsoft Surface Pro 2 Fan Replacement: passo 6, imagem 2 %32 Microsoft Surface Pro 2 Fan Replacement: passo 6, imagem 3 %32
    • Once the brackets are removed, set them aside.

    • The motherboard itself also has screws.

    • Remove the 25 screws of varying sizes that attach the motherboard to the back plate.

    • View the attached photo of a screw diagram to help keep track of your screws.

  7. Microsoft Surface Pro 2 Fan Replacement: passo 7, imagem 1 %32 Microsoft Surface Pro 2 Fan Replacement: passo 7, imagem 2 %32 Microsoft Surface Pro 2 Fan Replacement: passo 7, imagem 3 %32
    • You have now completely removed the motherboard, and it should look like the pictures shown.

    • Be sure to be cautious with all the connections with the cables on the motherboard.

  8. Microsoft Surface Pro 2 Fan Replacement, Heat Sinks: passo 8, imagem 1 %32 Microsoft Surface Pro 2 Fan Replacement, Heat Sinks: passo 8, imagem 2 %32 Microsoft Surface Pro 2 Fan Replacement, Heat Sinks: passo 8, imagem 3 %32
    • Be sure to use gloves or tools because metal is sharp along the edge.

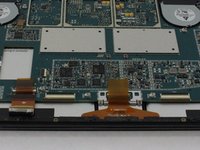
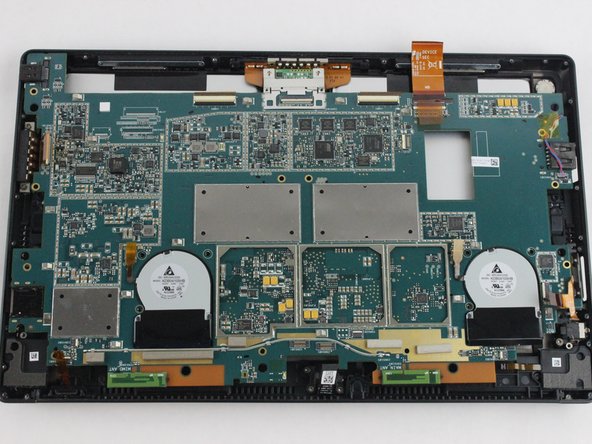
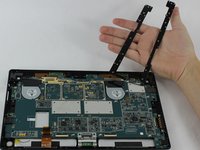
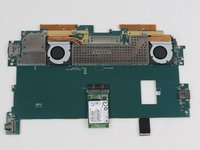
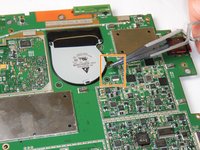
    • On the underside of the motherboard locate the heat shield which is located between the two fans near the top of the motherboard.

    • Remove the heat shield using an opening pick by lifting along the edges.

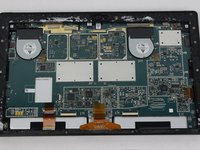
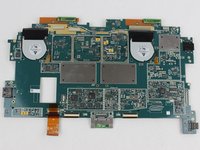
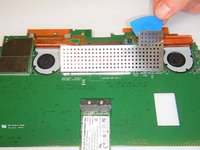
    • Remove all four Torx T5 screws located in each corner of the heat sink mounting frame.

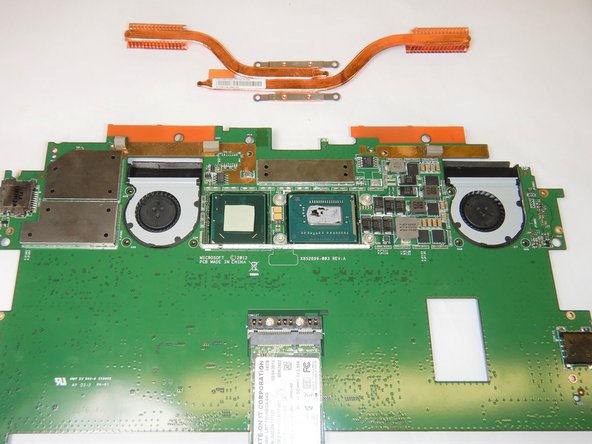
    • Carefully lift off the heat sinks from the motherboard.

    • During reinstallation of the heat sinks, be sure to clean both contact surfaces with isopropyl alcohol and reapply thermal paste.

  9. Microsoft Surface Pro 2 Fan Replacement, Fan: passo 9, imagem 1 %32 Microsoft Surface Pro 2 Fan Replacement, Fan: passo 9, imagem 2 %32 Microsoft Surface Pro 2 Fan Replacement, Fan: passo 9, imagem 3 %32
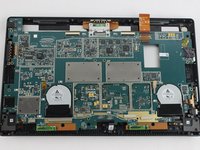
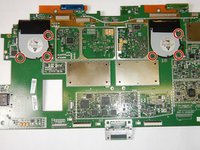
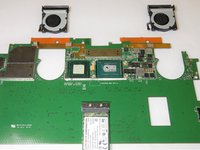
    • On the top side of the motherboard, remove the three Torx T5 screws that secure each of the two fans to the motherboard.

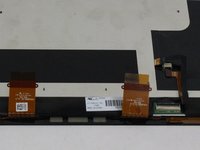
    • Remove the ribbon cables that connect the fans to the motherboard from their clamps.

    • The ribbon cables are fragile and are prone to damage if too much force is used.

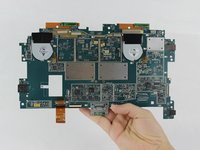
    • Remove the fans through the underside of the motherboard.

Conclusão

To reassemble your device, follow these instructions in reverse order.

3 outras pessoas executaram este guia.

Um comentário

very thorough- well done

Gray R - Responder

Comentar

Exibir estatísticas:

Últimas 24 horas: 1

Últimos 7 dias: 4

Últimos 30 dias: 25

Ao todo: 4,266