
Lenovo Thinkpad T440s RAM Replacement
Introdução
Ir para o passo 1Is your device experiencing problems with loading and saving while the computer is in use? Consider using this guide to replace the RAM in your device.
O que você precisa
Peças
Ferramentas


Exibir mais…
-
-
Make sure to power down and turn off your device before proceeding with the repair.
-
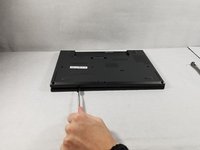
Flip your laptop over so that the backside is facing you.
-
-
-
Using a Phillips #1 screwdriver, remove the eight screws securing the backplate.
-
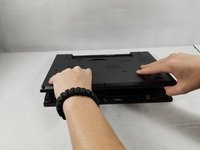
Don’t try to force screws which won't come out. They are held in place by a stopper on the reverse side. This will not prevent you from removing the backplate.
+1 — Only the bottom left and right screws can be pulled out. Don’t try to force the others.
-
-
-
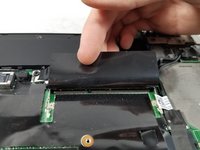
Right below the battery slot on the right half of the device is where you can access the RAM card Slot.
-
Remove the RAM by pulling it straight out of the device.
-


To reassemble your device, follow these instructions in reverse order.
To reassemble your device, follow these instructions in reverse order.
Cancelar: não concluí este guia.
7 outras pessoas executaram este guia.
Equipe

UMass Dartmouth, Team S1-G5, Simcock Fall 2018 Membro de UMass Dartmouth, Team S1-G5, Simcock Fall 2018
UMASSD-SIMCOCK-F18S1G5
3 Membros
Autoria de 8 guias
1Comentário do guia
I have a T460, very similar. A few points missing here… It’s imperative to take out the battery first. Most other tutorials mention disabling the internal battery in the BIOS before starting the process. Then screws don’t come out, they stay attached, which is very nice but better if you expect it. And one of them is right under the battery. The 460 has 2 memory slots, and they’re both functional. I had to swap my 4G card to the second slot, and put the 8G one in to replace it, I don’t know whether that’s mandatory or it was just bad seating initially.
You should also disable the internal battery in the BIOS first too.
martin8777 - Responder