Ir para o conteúdo principal
How to Repair Wood Dents with Wood Filler

How to Repair Wood Dents with Wood Filler

Nicole See

Nicole See e 5 outros colaboradores

Última atualização em June 3, 2022

1 - 2 horas
Fácil

This guide will walk you through how to repair wood surface damage. This guide requires a putty knife, wood filler, stain or paint, cloth towels, and brushes. These materials are relatively inexpensive and available at most hardware stores. You will need to allow time for the wood filler and stain to dry; the bigger the damaged area, the longer it will take for the filler to dry.

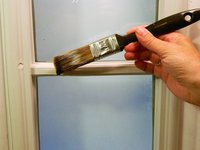
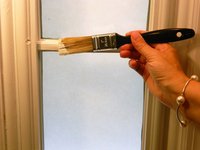
Optional: Painting the door instead of using stain is an option. It is not mandatory to do, yet if the stain is not the desired color for the surface, then paint is a good alternative. This optional solution is written in the guide in step 7.

  1. How to Repair Wood Dents with Wood Filler, How to Repair Wood Dents with Wood Filler: passo 1, imagem 1 %32
    • Inspect the damage in the wood and determine how much wood filler will be needed.

    • A shallow dent in the wood will require less wood filler than a dent with deeper damage.

  2. How to Repair Wood Dents with Wood Filler: passo 2, imagem 1 %32
    • Smooth the surface where the damage was by scraping off the splinters using a 50 mm wide putty knife blade.

    • Use the corner of the blade to smooth over the bumps.

  3. How to Repair Wood Dents with Wood Filler: passo 3, imagem 1 %32
    • Apply Elmer's Carpenter's Color Change Wood Filler to the putty knife and smear onto the surface.

    • An 8 ounce can of Elmer's Wood Filler will suffice for many repairs.

  4. How to Repair Wood Dents with Wood Filler: passo 4, imagem 1 %32
    • Allow the filler to dry.

    • Shallow damages can take thirty minutes to an hour to dry.

    • Deep damages take up to two hours.

  5. How to Repair Wood Dents with Wood Filler: passo 5, imagem 1 %32
    • Sand the dry surface using a 3M 75 mm wide fine-grit sandpaper.

    • Before sanding the surface, make sure the wood filler has dried by touching the wood filler.

  6. How to Repair Wood Dents with Wood Filler: passo 6, imagem 1 %32 How to Repair Wood Dents with Wood Filler: passo 6, imagem 2 %32
    • Apply Minwax Wood Finish Stain to the wood using a 25 mm stain brush.

    • Allow the stain to soak the surface for a few minutes so the wood absorbs it well.

    • An 8 ounce can of stain will suffice for this repair.

    • Optional: The 25 mm stain brush can be replaced with a regular 25 mm cloth brush found at home.

    • Multiple coats may be applied to reach the desired color.

  7. How to Repair Wood Dents with Wood Filler: passo 7, imagem 1 %32
    • Optional: Paint the surface with white paint from a can of Rust-Oleum if the stain is not the desired color for the surface.

    • Use a 25 mm paint brush and an 8 ounce can of Rust-Oleum.

    • Multiple coats map be applied to reach the desired color.

  8. How to Repair Wood Dents with Wood Filler: passo 8, imagem 1 %32
    • Dry the surface by patting the surface with a cloth towel.

Conclusão

If the damage is still visible, then follow steps 1 through 8 again until the damaged area matches the rest of the wood. I hope this guide was helpful!

Nicole See

Membro desde: 01/16/17

161 Reputação

Autoria de 1 guia

Equipe

Um comentário

Thank you for sharing this post

تعمیرات مبل کسری - Responder

Adicione um comentário

Exibir estatísticas:

Últimas 24 horas: 0

Últimos 7 dias: 10

Últimos 30 dias: 21

Duração total: 6,192