
HP Pavilion x360 14m-cd0003dx SSD Replacement

Introdução
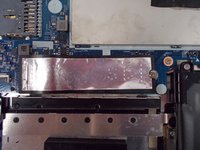
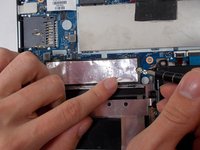
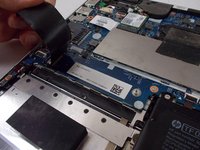
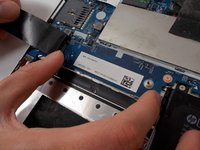
Ir para o passo 1This guide helps you with removal and replacing the SSD for HP Pavilion x360 14m-cd0003dx laptop. If your computer is running very slow and freezes you may need a new SSD.
For further information to determine if the Heat Sink and Fan needs to be replaced, please refer to this troubleshooting guide.
O que você precisa
Kits de conserto
Estes kits contêm todas as peças e ferramentas necessárias para executar este guia.


Peças


Ferramentas


Exibir mais…
-
-
Make sure computer is turned off
-
Disconnect the power cord and any external devices connected to the computer.
-


To reassemble your device, follow these instructions in reverse order.
To reassemble your device, follow these instructions in reverse order.

Equipe

UMass Dartmouth, Team 7-4, Sinclaire Spring 2022 Membro de UMass Dartmouth, Team 7-4, Sinclaire Spring 2022
UMASSD-SINCLAIRE-S22S7G4
6 Membros
Autoria de 6 guias