
HP Compaq 2510p Power/audio bar Replacement
10 minutos
Moderado
Ferramentas incorretas
Introdução
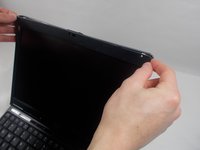
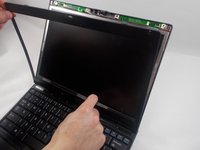
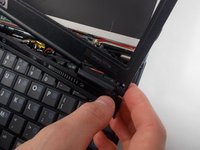
Ir para o passo 1This guide will show step-by-step instruction depicting the replacement of your laptops power/audio bar.
O que você precisa


Quase terminado!
To reassemble your device, follow these instructions in reverse order.
Conclusão
To reassemble your device, follow these instructions in reverse order.
Cancelar: não concluí este guia.
Uma outra pessoa concluiu este guia.
Equipe

UMass Dartmouth, Team 3-8, Isaacson Fall 2016 Membro de UMass Dartmouth, Team 3-8, Isaacson Fall 2016
UMASSD-ISAACSON-F16S3G8
3 Membros
Autoria de 5 guias