
Canon PowerShot S100 Control Dial Assembly Replacement
Introdução
Ir para o passo 1The control dial on the back of the camera can be removed and replaced.The control dial is used to adjust the camera's settings and navigate the camera menus.
O que você precisa


-
-
Remove the 2 screws (3.2mm, Phillips #00) found on the bottom side of the camera.
-
Remove the 2 screws (3.2mm, Phillips #00) found on the side of the camera.
-
Remove the 2 screws (3.2mm, Phillips #00) found on the side of the camera where the terminals are.
-
Open the flap revealing the cable inputs and remove the final screw (3.8mm, Phillips #00) found inside.
-
-
Ferramenta utilizada neste passo:Tweezers$4.99
-
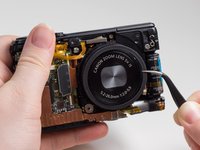
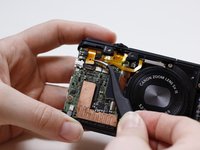
Turn the camera so that the lens is facing you.
-
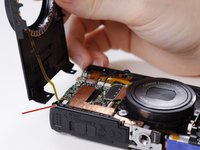
Slowly lift the front panel from the camera.
-
The ribbon cable is connecting the front panel to the camera. Using the tweezers, gently pull the ribbon cable out of its socket.
-
Remove the rubber guard that rests on top of the lens.
-
-
-
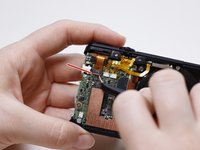
Turn the camera over so that the LCD screen is facing you.
-
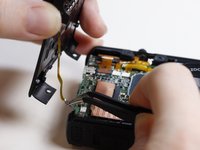
Remove the screw (3.9mm, Phillips #00) that is attaching the thin metal frame to the camera.
-
Remove the 2 screws (3.1mm, Phillips #00) that are attaching the control dial panel to the camera.
-


To reassemble your device, follow these instructions in reverse order.
To reassemble your device, follow these instructions in reverse order.
Equipe

USF Tampa, Team 1-4, Leahy Winter 2015 Membro de USF Tampa, Team 1-4, Leahy Winter 2015
USFT-LEAHY-W15S1G4
4 Membros
Autoria de 5 guias
1Comentário do guia
I have Canon S100 and it was stuck. Can I send this camera to you to get it fixed and if so, what is your address and how much it will cost?