
Brother XR-40 Lightbulb Replacement
Introdução
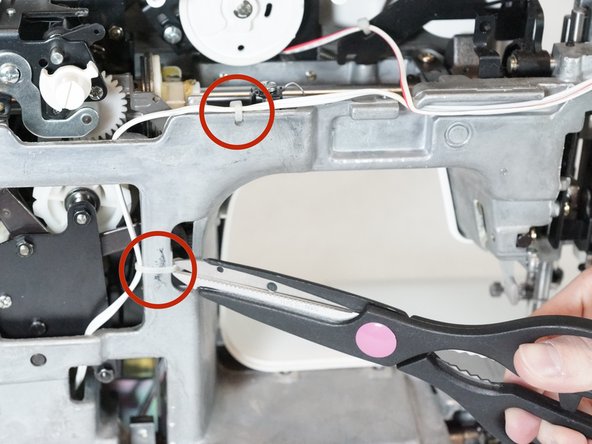
Vá para o passo 1Replacing the lightbulb involves opening up the machine. You will need to purchase a sewing machine bulb set, including the wire plug-in, to replace it.
O que você precisa
Peças

Ferramentas


Exibir mais…
-
-
Place the machine on a solid surface.
-
Remove the 14mm Phillips #2 screw holding on the face cover.
-


To reassemble your device, follow these instructions in reverse order.
To reassemble your device, follow these instructions in reverse order.
Cancelar: não concluí este guia.
Uma outra pessoa concluiu este guia.
Equipe

Cal Poly, Team 2-12, Amido Winter 2014 Membro de Cal Poly, Team 2-12, Amido Winter 2014
CPSU-AMIDO-W14S2G12
Membros da 4
Autoria de 12 guias