Ir para o conteúdo principal
Blink Video Doorbell Lens Replacement

Blink Video Doorbell Lens Replacement

Kayla Crai

Kayla Crai e 4 outros colaboradores

Última atualização em January 15, 2025

15 - 20 minutos
Moderado
Guia do aluno destaque

Introdução

Ir para o passo 1

The Blink Video Doorbell is a doorbell to provide extra security to your residence by giving you an accessible view whenever necessary. The lens is an essential part of the device’s camera. It allows you to view images with sharpness, composition; therefore, determining image quality. Refer to the troubleshooting page if there are issues with the camera which could be connected to causes such as battery failure, software failure, and frozen screen. If you need to take out the lens, use this guide to remove and replace the lens.

O que você precisa

Ferramentas

Exibir mais…

A iFixit ganha comissão quando você compra por estes links.
  1. Blink Video Doorbell Lens Replacement, Battery: passo 1, imagem 1 %32 Blink Video Doorbell Lens Replacement, Battery: passo 1, imagem 2 %32 Blink Video Doorbell Lens Replacement, Battery: passo 1, imagem 3 %32
    • Push the opening key into the small opening with the two gray buttons on the bottom of the device.

    • The device will click off the mount.

    • Push the device up from the mount and slide it off.

  2. Blink Video Doorbell Lens Replacement: passo 2, imagem 1 %32 Blink Video Doorbell Lens Replacement: passo 2, imagem 2 %32 Blink Video Doorbell Lens Replacement: passo 2, imagem 3 %32
    • Use your finger to slide the gray tab, located near the bottom of the device, upwards.

    • Remove the battery cover.

  3. Blink Video Doorbell Lens Replacement: passo 3, imagem 1 %32 Blink Video Doorbell Lens Replacement: passo 3, imagem 2 %32 Blink Video Doorbell Lens Replacement: passo 3, imagem 3 %32
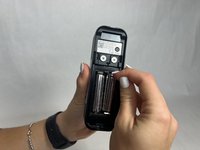
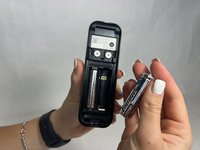
    • Remove the right battery by pushing the positive end down and pulling the battery out toward yourself.

    • Repeat the procedure for the left battery.

    • Do not mix used and new batteries or batteries of different types (for example, lithium and alkaline batteries).

  4. Blink Video Doorbell Lens Replacement, Back Panel: passo 4, imagem 1 %32 Blink Video Doorbell Lens Replacement, Back Panel: passo 4, imagem 2 %32 Blink Video Doorbell Lens Replacement, Back Panel: passo 4, imagem 3 %32
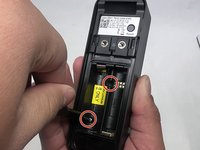
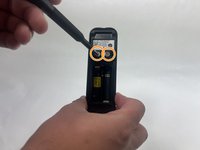
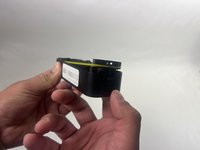
    • Remove the two 6 mm screws in the battery compartment using a JIS #1 screwdriver.

    • Remove the two 7 mm screws above the battery compartment using a JIS #1 screwdriver.

    • Starting from the bottom of the device, pry the back plate away from the rest of the doorbell.

  5. Blink Video Doorbell Lens Replacement, Lens: passo 5, imagem 1 %32 Blink Video Doorbell Lens Replacement, Lens: passo 5, imagem 2 %32 Blink Video Doorbell Lens Replacement, Lens: passo 5, imagem 3 %32
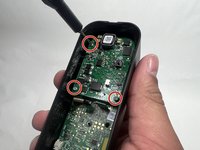
    • Remove the three 6 mm screws from the upper part of the motherboard using a JIS #1 screwdriver.

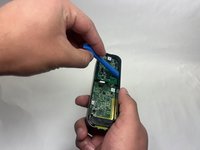
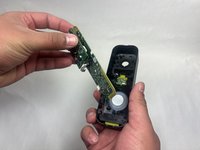
    • Use an opening tool to release the motherboard from the device.

  6. Blink Video Doorbell Lens Replacement: passo 6, imagem 1 %32 Blink Video Doorbell Lens Replacement: passo 6, imagem 2 %32
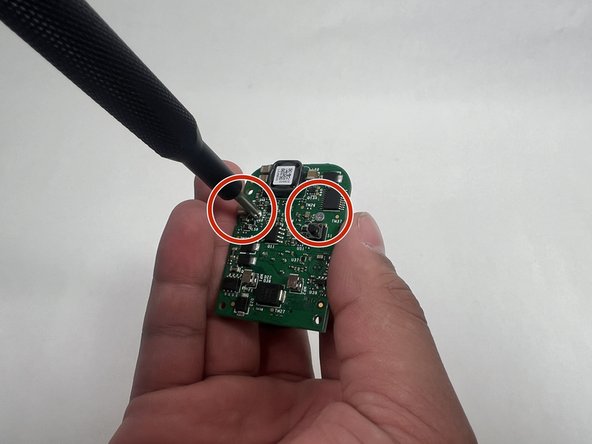
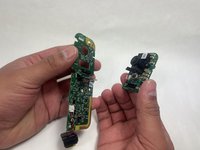
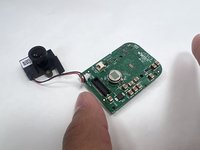
    • Carefully lift up the small daughterboard which contains the camera.

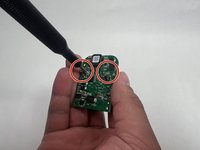
    • Remove two 5 mm screws from the back of the camera using a Phillips #0 screwdriver.

  7. Blink Video Doorbell Lens Replacement: passo 7, imagem 1 %32 Blink Video Doorbell Lens Replacement: passo 7, imagem 2 %32
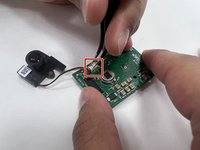
    • Use tweezers to detach the white connector from the adapter on the motherboard.

    • Remove the lens.

Conclusão

To reassemble your device, follow these instructions in reverse order.

Kayla Crai

Membro desde: 10/18/24

495 Reputação

Autoria de 4 guias

Equipe

UMass Dartmouth, Team 1-1, Konn Fall 2024 Membro de UMass Dartmouth, Team 1-1, Konn Fall 2024

UMASSD-KONN-F24S1G1

4 Membros

Autoria de 5 guias

Um comentário

Is it available to purchase the lens

William - Responder

Comentar

Visualizações:

Últimas 24 horas: 3

Últimos 7 dias: 28

Últimos 30 dias: 120

Ao todo: 395