Ir para o conteúdo principal

Acer Aspire 5253 Speaker Replacement

O que você precisa

  1. Acer Aspire 5253 Speaker Replacement, Battery: passo 1, imagem 1 %32
    • Turn the laptop over.

  2. Acer Aspire 5253 Speaker Replacement: passo 2, imagem 1 %32
    • "Unlock" your battery by moving the switch as shown so that an unlocked lock on a red background is shown.

  3. Acer Aspire 5253 Speaker Replacement: passo 3, imagem 1 %32
    • Next move the other switch, while the unlocked symbol is still showing. The battery should pop up, and no longer be flush with the bottom of the laptop.

  4. Acer Aspire 5253 Speaker Replacement: passo 4, imagem 1 %32
    • Now remove the battery by lifting it out of the laptop by the side closest to the switches.

  5. Acer Aspire 5253 Speaker Replacement: passo 5, imagem 1 %32
    • You have successfully removed the battery. Congratulations!

  6. Acer Aspire 5253 Speaker Replacement, Back Cover Panel: passo 6, imagem 1 %32
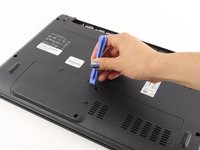
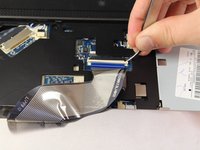
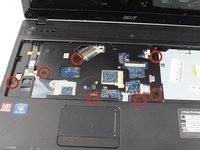
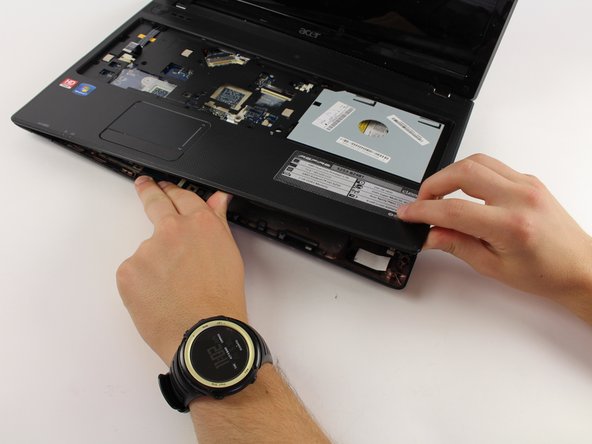
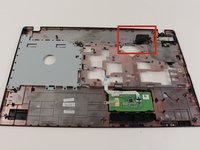
    • Now, locate the two screws that hold the back cover panel onto the laptop.

  7. Acer Aspire 5253 Speaker Replacement: passo 7, imagem 1 %32
    • Unscrew both of the screws that are holding the back panel in place with the Philips #00 head.

    • The screws are 3/8" in length and have a 1/4" head.

  8. Acer Aspire 5253 Speaker Replacement: passo 8, imagem 1 %32 Acer Aspire 5253 Speaker Replacement: passo 8, imagem 2 %32
    • Once both screws have been removed use a plastic opening tool to lift the panel up. Starting with the indented notch , and moving left and right from there.

  9. Acer Aspire 5253 Speaker Replacement: passo 9, imagem 1 %32
    • After the panel has been loosened by the plastic opening tool, take your finger, place it in the gap, and remove the panel from the laptop.

  10. Acer Aspire 5253 Speaker Replacement, Keyboard: passo 10, imagem 1 %32
    • Fling your laptop over and open it as shown in the image.

  11. Acer Aspire 5253 Speaker Replacement: passo 11, imagem 1 %32
    • Locate the tabs keeping the keyboard in place.

  12. Acer Aspire 5253 Speaker Replacement: passo 12, imagem 1 %32 Acer Aspire 5253 Speaker Replacement: passo 12, imagem 2 %32
    • Using thin tweezers push the tabs in the keyboard in and pull up on the edge of the keyboard.

    • The keyboard will bend and it will seem like its breaking, but don't worry this is OK!

  13. Acer Aspire 5253 Speaker Replacement: passo 13, imagem 1 %32
    • Once the keyboard begins popping out of place use your hand to keep the part that has been detached from the laptop in the air.

    • Continue pushing in tabs and lifting up the keyboard as described above.

  14. Acer Aspire 5253 Speaker Replacement: passo 14, imagem 1 %32
    • Once the keyboard has been separated from the body of the laptop carefully lift the keyboard up and tilt it forward, leaving it to rest on the laptop as shown.

    • Do not pull the keyboard up with too much force because you may cause damage to your laptop!

  15. Acer Aspire 5253 Speaker Replacement: passo 15, imagem 1 %32 Acer Aspire 5253 Speaker Replacement: passo 15, imagem 2 %32
    • Using tweezers pull the white tab down on both sides. This will release the blue and black connector.

  16. Acer Aspire 5253 Speaker Replacement: passo 16, imagem 1 %32
    • Pull the blue and black connector out of its socket.

    • Make sure it comes off easily or you may rip it.

  17. Acer Aspire 5253 Speaker Replacement: passo 17, imagem 1 %32
    • Now you can pull the keyboard away from the laptop.

  18. Acer Aspire 5253 Speaker Replacement, Speaker: passo 18, imagem 1 %32 Acer Aspire 5253 Speaker Replacement, Speaker: passo 18, imagem 2 %32 Acer Aspire 5253 Speaker Replacement, Speaker: passo 18, imagem 3 %32
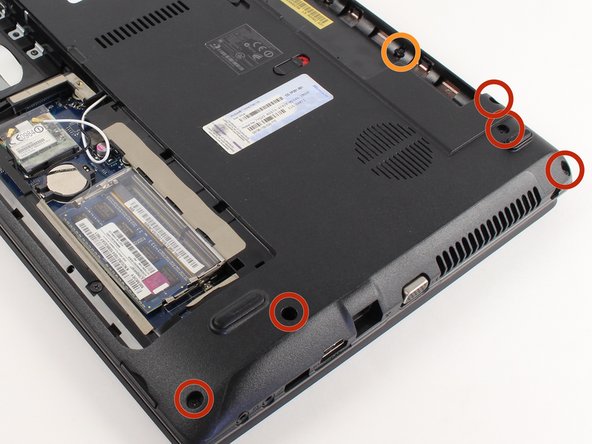
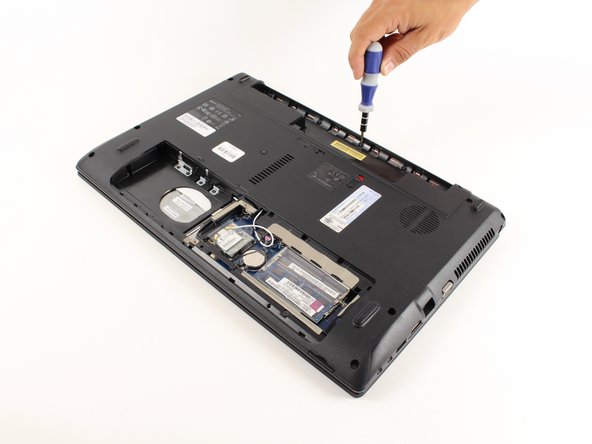
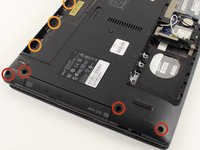
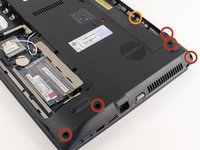
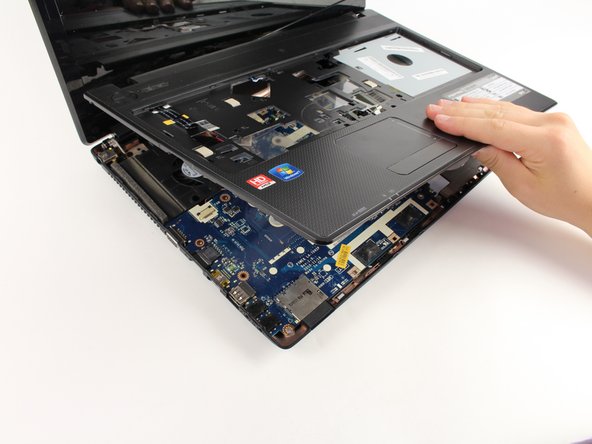
    • After you have removed all of the prerequisites its time to unscrew a few more screws. Flip your laptop over and first remove all the screw highlighted in red with the Phillips #00 screwdriver. These are 1/4" head diameter by 3/8" screw length screws.

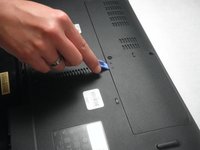
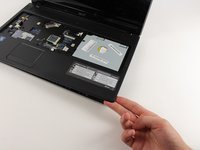
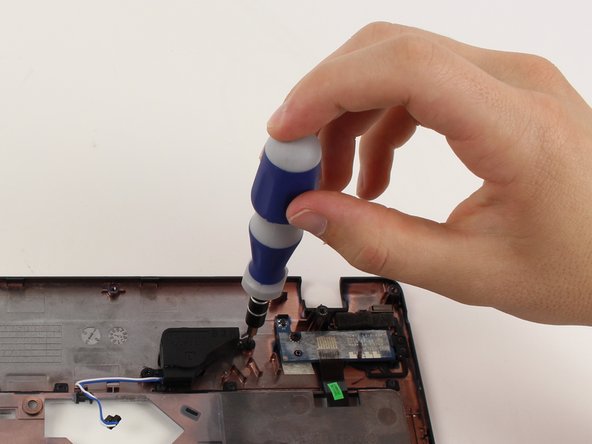
    • Now remove the screws highlighted in orange with the Phillips #00 screwdriver. These are 5/32" head diameter by 5/32" screw length screws. Keep these separate from the other screws.

  19. Acer Aspire 5253 Speaker Replacement: passo 19, imagem 1 %32 Acer Aspire 5253 Speaker Replacement: passo 19, imagem 2 %32
    • Flip the Laptop back over, and unscrew the 1/4" diameter head 7/32" length screws indicated in the picture.

  20. Acer Aspire 5253 Speaker Replacement: passo 20, imagem 1 %32
    • The indicated spots show where different components are attached to the motherboard (such as the power button and the track pad). You will have to remove these connections the same way you undid the keyboard using the tweezers.

  21. Acer Aspire 5253 Speaker Replacement: passo 21, imagem 1 %32 Acer Aspire 5253 Speaker Replacement: passo 21, imagem 2 %32 Acer Aspire 5253 Speaker Replacement: passo 21, imagem 3 %32
    • Here is a close-up of all of the connectors. Remember to use tweezers on the black part and carefully pull out both sides. Once it has been moved back slightly, pull the connector out just like the keyboard.

  22. Acer Aspire 5253 Speaker Replacement: passo 22, imagem 1 %32 Acer Aspire 5253 Speaker Replacement: passo 22, imagem 2 %32 Acer Aspire 5253 Speaker Replacement: passo 22, imagem 3 %32
    • Carefully lift up the corner of the top panel of the laptop. Once it starts coming off continue to lift it while holding the open side with the other hand.

  23. Acer Aspire 5253 Speaker Replacement: passo 23, imagem 1 %32 Acer Aspire 5253 Speaker Replacement: passo 23, imagem 2 %32
    • Turn the panel you just took off over and locate the speaker.

  24. Acer Aspire 5253 Speaker Replacement: passo 24, imagem 1 %32 Acer Aspire 5253 Speaker Replacement: passo 24, imagem 2 %32
    • Locate and remove the two screws to loosen the speaker from the panel.

  25. Acer Aspire 5253 Speaker Replacement: passo 25, imagem 1 %32
    • The speaker can now be removed from the panel.

Conclusão

To reassemble your device, follow these instructions in reverse order.

11 outras pessoas executaram este guia.

Cynthia Barajas

Membro desde: 04/08/14

2.195 Reputação

Autoria de 5 guias

Equipe

Cal Poly, Team 8-11, Regan Spring 2014 Membro de Cal Poly, Team 8-11, Regan Spring 2014

CPSU-REGAN-S14S8G11

Membros da 4

Autoria de 15 guias

6 comentários

I loved it.. I'm goanna try it today to fix my Speakers and keyboards..

Sanoj Mohanan - Responder

It is so nice to represent know-how here with steps. Thanks.

lopthayhung - Responder

I loved it, very easy

S Shamshuddin - Responder

Can the AV ports for the headphones also be fixed?

peterreilly - Responder

This is the left speaker. Where is the right speaker

Prince Thamburaj - Responder

Adicione um comentário

Exibir estatísticas:

Últimas 24 horas: 2

Últimos 7 dias: 3

Últimos 30 dias: 12

Duração total: 8,441