Ir para o conteúdo principal

Este teardown (desmontagem analítica) não é um guia de reparo. Para reparar seu/sua Alactel Joy tab 2, use o nosso manual de serviço.

  1. Alactel Joy tab 2 Teardown, Alactel Joy tab 2 Teardown: passo 1, imagem 1 %32
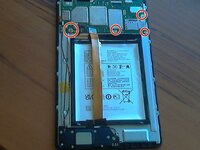
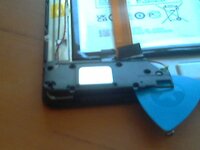
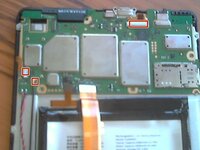
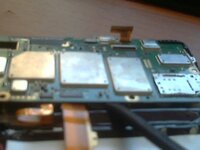
    • Pop off the case with Opening Picks and pull off the cover.

    • There is a LOT of glue.

  2. Alactel Joy tab 2 Teardown: passo 3, imagem 1 %32
    • I give up.

  3. Alactel Joy tab 2 Teardown: passo 4, imagem 1 %32 Alactel Joy tab 2 Teardown: passo 4, imagem 2 %32
    • Remove the circled screws with a Philips 00 driver bit.

    • Remove these three cables.

  4. Alactel Joy tab 2 Teardown: passo 5, imagem 1 %32 Alactel Joy tab 2 Teardown: passo 5, imagem 2 %32 Alactel Joy tab 2 Teardown: passo 5, imagem 3 %32
    • Unscrew all screws in the boxed in area with a Ph 00 bit.

    • Pry up with an Opening Pick and remove the tape.

  5. Alactel Joy tab 2 Teardown: passo 6, imagem 1 %32 Alactel Joy tab 2 Teardown: passo 6, imagem 2 %32
    • Now remove the mainboard with a Spudger.

    • Oh look, a baby camera module!

  6. Alactel Joy tab 2 Teardown: passo 7, imagem 1 %32
    • I wanted to show the CPU but the RF shields don't come off. I even tried dremeling them but then will not come off.

    • Thanks for reading.

I take things apart

Membro desde: 03/06/24

673 Reputação

Autoria de 6 guias

0 comentários

Adicione um comentário

Exibir estatísticas:

Últimas 24 horas: 16

Últimos 7 dias: 159

Últimos 30 dias: 192

Duração total: 192