Ir para o conteúdo principal

Motorola Moto Z2 Force ディスプレイと指紋センサーの交換

Aviso: Você está editando um guia tipo pré-requisito. Todas as alterações que você fizer afetarão todos os 6 guias que incluem este passo.

Inglês
Japonês
Passo 12
Motorola Moto Z2 Force Display and Fingerprint Sensor Replacement, Pry Up the Screen Assembly: passo 0, imagem 1 %32 Motorola Moto Z2 Force Display and Fingerprint Sensor Replacement, Pry Up the Screen Assembly: passo 0, imagem 2 %32 Motorola Moto Z2 Force Display and Fingerprint Sensor Replacement, Pry Up the Screen Assembly: passo 0, imagem 3 %32
Pry Up the Screen Assembly
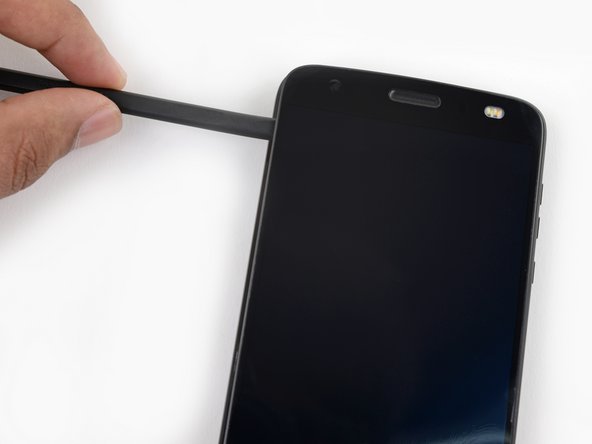
  • Slowly and carefully slide the flat end of a spudger under the left edge of the screen assembly. Gradually insert it deeper to pry up the top edge of the assembly and release the right patch of adhesive.

  • Add more isopropyl alcohol as needed, but take care to not use too much, as this may dissolve other adhesives in the device that would preferably remain sticky. Give any additional alcohol some time to penetrate the adhesive before continuing.

  • Only pry up the assembly enough to slide the spudger underneath and release the adhesive. The assembly is still attached via the display cable, and prying the left side too far upward may damage it.

スクリーンアセンブリの左端の下に、スパッジャーの平面側先端をゆっくりと注意深く滑らせる。徐々に深く挿入し、アセンブリの上端をこじあけ、接着剤の右側のパッチを剥がします。

必要に応じてイソプロピルアルコールを追加しますが、注入しすぎないように注意してください。作業に戻る前に、追加したアルコールが接着剤に浸透するまで、時間をかけてください。

アッセンブリをこじ開けるのは、スパッジャーを下に滑らせ、粘着剤を剥がす程度にしてください。アセンブリはディスプレイケーブルで固定されているため、左側をこじ上げすぎると破損する恐れがあります。

Suas contribuições são licenciadas pela licença de código aberto Creative Commons.