Esta tradução pode não refletir as atualizações mais recentes do guia de fontes. Ajude a atualizar a tradução ou veja guia de fontes.
Introdução
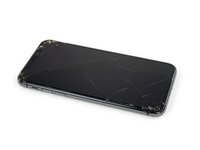
Tela rachada? O touch não está funcionando? Tela OLED danificada? Use este guia para restaurar o funcionamento do seu iPhone X com uma nova tela OLED inclusive digitalizador. Experimentar uma nova tela também pode ajudar se o seu iPhone X parece não querer mais ligar.
Observação: O conjunto combinado de alto-falante auricular e sensor afixado na parte traseira do visor está emparelhado de fábrica com o seu iPhone, portanto é necessário transferi-lo do visor antigo para o novo, conforme as instruções abaixo, durante a substituição da tela. Ele contém o flood illuminator, que faz parte do sistema biométrico de segurança identificação facial. Se ele for danificado ou substituído, a identificação facial deixa de funcionar. Portanto, tome muito cuidado para não danificar nenhum desses componentes durante este procedimento. Se estiver danificado, somente a Apple poderá restaurar o funcionamento da identificação facial.
Observação: Se o recurso de brilho automático do iPhone não funcionar corretamente após o reparo da tela, verifique se o iPhone foi atualizado para iOS 12. A funcionalidade do True Tone é desativada após uma substituição da tela, mesmo quando se usa uma tela original da Apple.
O que você precisa
Vídeo de Apresentação
-
-
Desligue o iPhone antes de iniciar a desmontagem.
-
Remova os dois parafusos pentalobe de 6,9 mm na borda inferior do iPhone.
-
-
-
Meça 3 mm a partir da ponta e marque a palheta com um marcador permanente.
-
-
-
Coloque tiras sobrepostas de fita adesiva transparente sobre a tela do iPhone até que toda a superfície fique coberta.
-
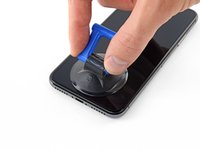
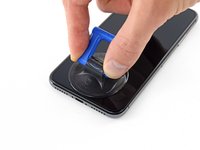
Se não conseguir fazer com que a ventosa grude nas próximas etapas, dobre um pedaço de fita adesiva resistente (como fita adesiva vedante) na forma de uma pega e levante a tela com ela.
-
-
-
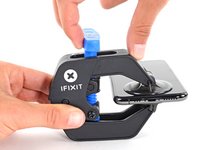
Puxe a pega azul para trás para destravar os braços do Anti-Clamp.
-
Deslize os braços pela borda esquerda ou direita do iPhone.
-
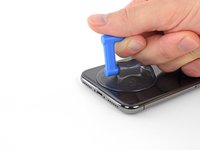
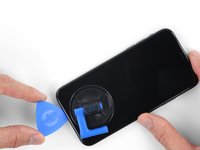
Posicione as ventosas próximo à borda inferior do iPhone - uma pela frente e a outra pela traseira.
-
Aperte as ventosas uma contra a outra para aplicar sucção na área desejada.
-
-
-
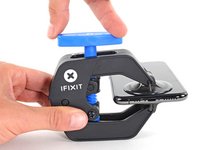
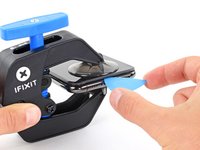
Puxe a pega azul para a frente para travar os braços.
-
Gire a pega 360 graus no sentido horário ou até que as ventosas comecem a se esticar.
-
Certifique-se de que as ventosas permaneçam alinhadas uma com a outra. Se elas começarem a ficar desalinhadas, solte um pouco as ventosas e realinhe os braços.
-
-
-
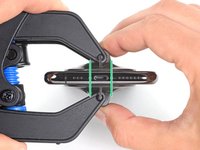
Aqueça uma bolsa térmica iOpener e passe-a pelos braços do Anti-Clamp.
-
Dobre a bolsa térmica iOpener de modo que ela fique sobre a borda inferior do iPhone.
-
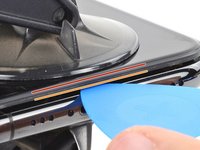
Aguarde um minuto para que o adesivo tenha a chance de se soltar e apresentar uma vão para a abertura.
-
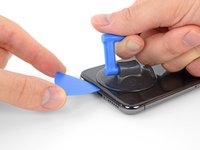
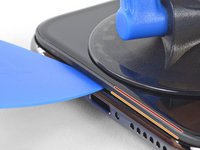
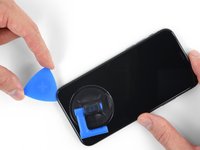
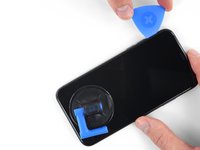
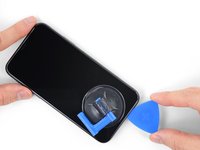
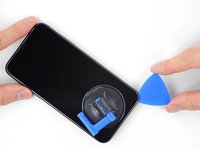
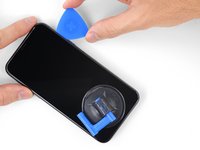
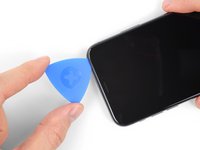
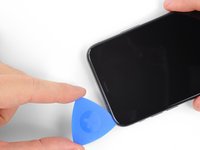
Insira uma palheta de abertura sob a tela e o painel de plástico, mas não abaixo da própria tela.
-
Pule as próximas três etapas.
-
-
-
Use um secador de cabelo, uma pistola de ar quente ou prepare uma bolsa térmica iOpener e aplique-o(a) na borda inferior do iPhone por cerca de um minuto para amolecer o adesivo que se encontra por baixo.
-
-
-
Ferramenta utilizada neste passo:Magnetic Project Mat$19.95
-
Remova os cinco parafusos Y000 que prendem o suporte do conector da placa lógica, com os seguintes comprimentos:
-
Três parafusos de 1,1 mm
-
Um parafuso de 3,1 mm
-
Um parafuso de 3,7 mm
-
-
-
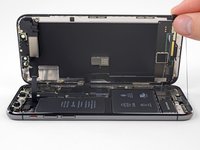
Com a ponta pontiaguda de uma espátula ou uma unha limpa, erga o conector da bateria de seu soquete na placa lógica.
-
Vire o conector ligeiramente para fora da placa lógica para evitar que ele entre acidentalmente em contato com o soquete e alimente o telefone com energia elétrica durante o reparo.
-
-
-
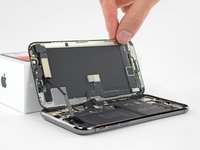
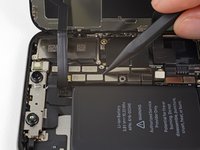
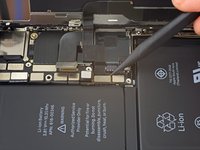
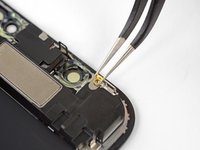
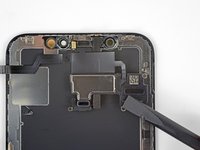
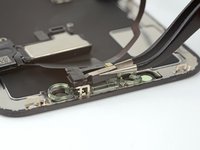
Remova o parafuso Y000 de 1,2 mm na parte traseira do conjunto do visor, próximo ao conector da câmera de infravermelho.
-
-
-
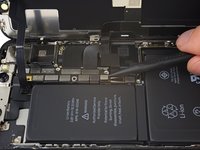
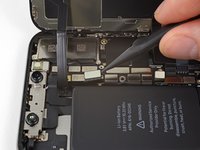
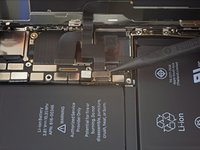
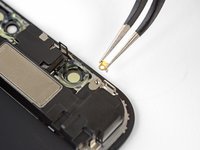
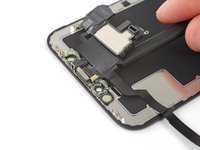
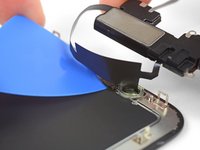
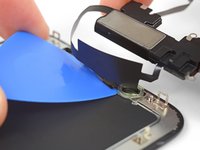
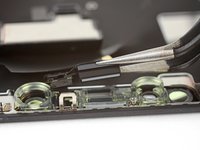
Passe cuidadosamente a borda plana da espátula por debaixo do cabo conector flex, que fica abaixo do microfone.
-
Faça movimentos de vai-e-vem suaves para separar o microfone, tomando cuidado para não esticar ou danificar o cabo conector flex.
-
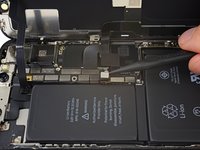
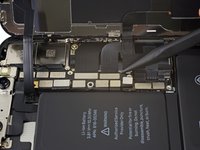
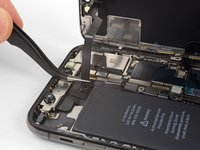
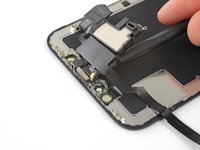
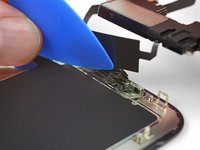
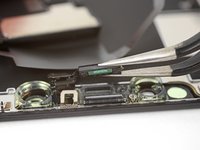
Se necessário, use a ponta pontiaguda da espátula para terminar de separar o microfone de seu entalhe no painel frontal.
-
-
-
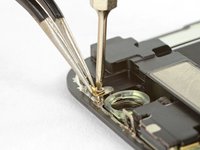
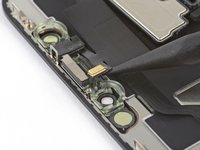
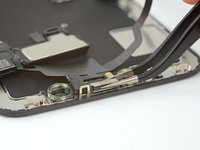
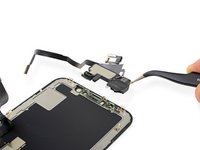
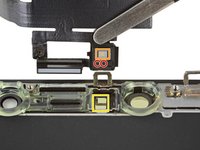
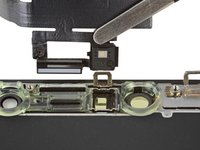
Se você tiver conseguido remover todo o sensor de luz ambiente, conforme mostrado na primeira foto, passe para a próxima etapa abaixo.
-
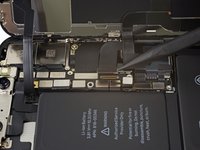
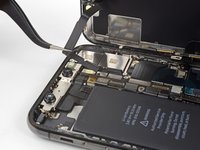
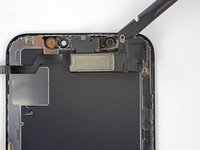
Se a tira branca do difusor se soltar e permanecer embutida no visor, como mostrado na segunda foto, você precisará alavancá-la cuidadosamente ao longo da borda superior usando uma lâmina fina ou uma ferramenta de alavanca. Uma nova aplicação de calor pode facilitar um pouco essa tarefa.
-


Compare a sua nova peça de reposição com a peça original - pode ser que você precise transferir componentes remanescentes ou remover suportes adesivos da nova peça antes de instalá-la.
Para a remontagem de seu dispositivo, execute os passos acima na ordem inversa.
Leve o seu lixo eletrônico para um ponto de recolha ou uma recicladora certificada.
O reparo não está indo conforme o planejado? Confira a nossa comunidade de Respostas para obter ajuda com a solução de seu problema.
Se você "ainda assim" tiver problemas com o reparo e estiver pensando em trocar de dispositivo, confira estas ofertas de iPhone X da Backmarket - eles têm uma grande variedade de dispositivos usados e recondicionados cobertos por uma garantia incrível.
Cancelar: não concluí este guia.
705 outras pessoas executaram este guia.
Um agradecimento especial a esses tradutores:
50%

Udo Baingo está nos ajudando a consertar o mundo! Quer contribuir?
Comece a traduzir ›


100Comentários do guia
does a new display not come with faceid sensor? so you have to remove this and instal it again with the new glass?
yeah, also face id will not work if you don’t replace the flex. Just be careful
jump1n -
FaceID is diabled if the hardware detects a new FaceID module. Using the original parts avoids this issue so that the FaceID feature is’t disabled. This could prevent a FaceID module from being replaced with a doctored or unlicensed part which may fail to provide the same level of security than the Apple supplied part.
Sorry, if I replace my iPhone X Lcd, will the Face ID stop working?