Introdução
Use this guide shows to remove and replace the battery in the iPhone SE 2022.
This guide was performed on the A2783 (international) model.
If your battery is swollen, take appropriate precautions.
For your safety, discharge your battery below 25% before disassembling your device. This reduces the risk of fire if the battery is accidentally damaged during the repair.
Note: This guide instructs you to fully detach the display assembly; this is intended to prevent accidental damage to the display cables. If you feel comfortable removing the battery without putting undue strain on the display cables, you can skip the steps for detaching the display. Additionally, while it’s possible to remove the adhesive strips securing the battery as soon as you open the phone, this guide recommends first removing the Taptic Engine. Doing so reduces the risk of breaking the lower adhesive strips accidentally, either by snagging them on the Taptic Engine, or by pulling the strips at too sharp of an angle.
If you do not replace the adhesive seals when reassembling, your device will function normally, but will most likely lose its water protection.
You’ll need replacement adhesive to reattach components when reassembling the device.
O que você precisa
-
-
Power off your phone before beginning disassembly.
-
Remove the two 3.4 mm P2 pentalobe screws on the bottom edge of the iPhone.
-
-
-
Measure 3 mm from the tip and mark the opening pick with a permanent marker.
-
-
-
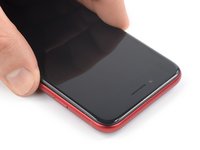
Lay overlapping strips of clear packing tape over the iPhone's screen until the whole face is covered.
-
If you can't get the suction cup to stick in the next few steps, fold a strong piece of tape (such as duct tape) into a handle and lift the screen with that instead.
-
-
Ferramenta utilizada neste passo:Clampy - Anti-Clamp$24.95
-
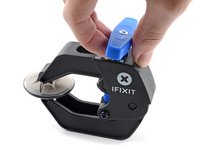
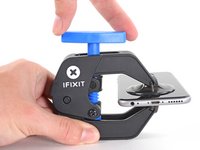
Pull the blue handle backwards to unlock the Anti-Clamp's arms.
-
Slide the arms over either the left or right edge of your iPhone.
-
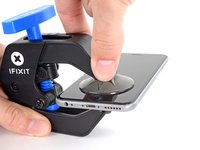
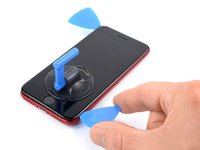
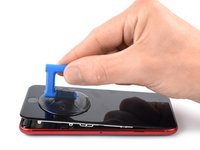
Position the suction cups near the bottom edge of the iPhone just above the home button—one on the front, and one on the back.
-
Squeeze the cups together to apply suction to the desired area.
-
-
-
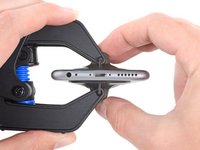
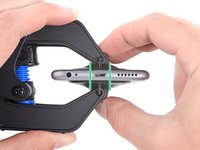
Heat an iOpener and thread it through the arms of the Anti-Clamp.
-
Fold the iOpener so it lays on the bottom edge of the iPhone.
-
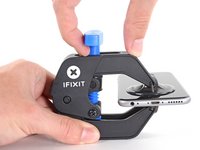
Wait one minute to give the adhesive a chance to release and present an opening gap.
-
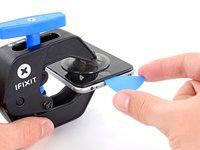
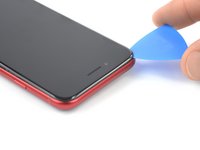
Insert an opening pick under the screen's plastic bezel, not the screen itself.
-
Skip the next two steps.
-
-
-
Prepare an iOpener and apply it to the screen for at least two minutes to loosen the adhesive underneath.
-
-
-
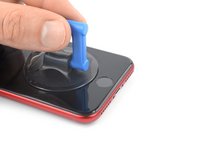
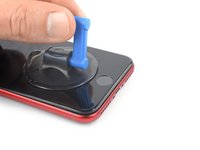
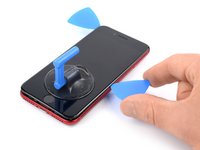
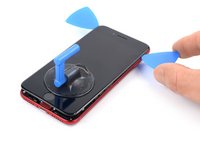
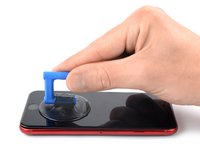
Secure a suction handle to the lower half of the front panel, as close to the home button as possible.
-
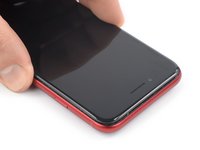
Lift the front panel with the suction handle to create a small gap between the front panel and the frame.
-
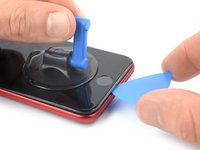
Insert an opening pick into the gap under the screen's plastic bezel.
-
-
-
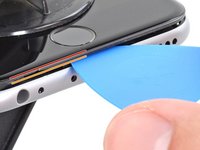
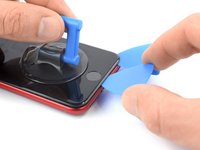
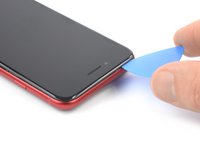
Slide the opening pick to the bottom right corner to slice the front panel adhesive.
-
Insert a second opening pick at the bottom edge of your phone.
-
Slide the opening pick to the bottom left corner to slice the adhesive.
-
Leave the opening picks in place to prevent the adhesive from resealing.
-
-
-
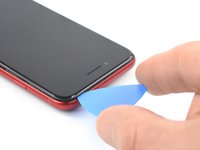
Slide the bottom left opening pick along the left edge of your phone to slice the adhesive.
-
Stop near the top left corner of the display.
-
-
-
Remove the opening picks.
-
Gently pull up on the suction handle to lift up the bottom edge of the display.
-
Remove the suction handle.
-
-
-
Slide an opening pick underneath the top left corner of the display.
-
Slide the opening pick around the top left corner and along the top edge of the phone to slice the remaining adhesive.
-
-
-
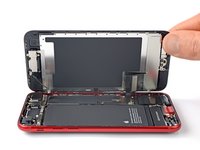
Slide the display assembly slightly down in direction of the charging port to disengage the clips holding it to the rear case.
-
-
-
-
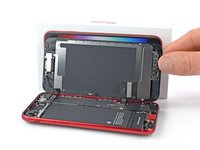
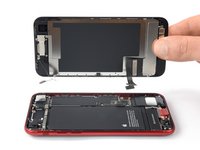
Open the phone by swinging the display up from the left side, like the back cover of a book.
-
Lean the display against something to keep it propped up while you're working on the phone.
-
-
Ferramenta utilizada neste passo:Magnetic Project Mat$16.96
-
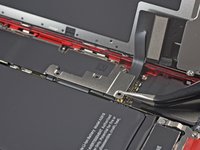
Remove the four Phillips screws securing the lower display cable bracket:
-
Two 1.2 mm-long screws
-
Two 2.8 mm-long screws
-
-
Ferramenta utilizada neste passo:Tweezers$4.99
-
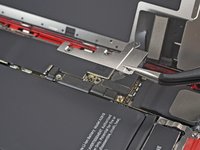
Use a pair of tweezers to carefully remove the lower display cable bracket.
-
-
-
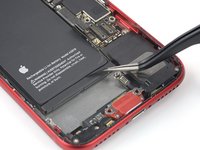
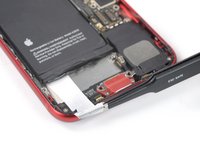
Use the pointed end of a spudger to disconnect the battery by prying the connector straight up from its socket.
-
-
-
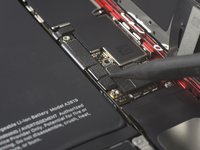
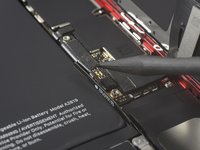
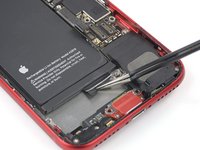
Use the pointed end of a spudger to disconnect the bottom two display cables by prying the connectors straight up from their sockets.
-
-
-
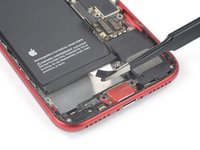
Use a Phillips screwdriver to remove the three 1.2 mm-long screws securing the front sensor assembly bracket.
-
-
Ferramenta utilizada neste passo:Tweezers$4.99
-
Use a pair of tweezers to carefully remove the front sensor assembly bracket.
-
-
-
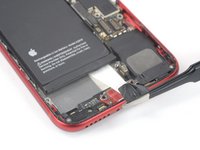
Use the pointed end of a spudger to disconnect the front sensor assembly by prying the connector straight up from its socket.
-
-
-
Unfasten the three screws securing the Lighting connector bracket:
-
One 1.2 mm-long Y000 screw
-
One 2.7 mm-long Phillips screw
-
One 2.9 mm-long Phillips screws
-
-
Ferramenta utilizada neste passo:Tweezers$4.99
-
Use a pair of tweezers to remove the Lightning connector bracket.
-
-
-
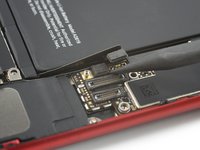
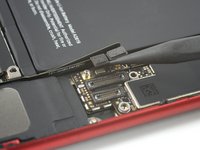
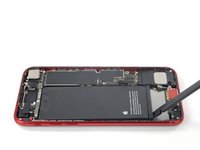
Carefully slide an opening pick between the antenna flex cable and the top of the speaker.
-
-
-
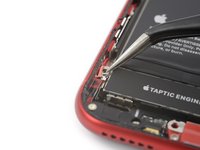
Use the pointed end of a spudger to disconnect the Wi-Fi diversity antenna by prying its connector straight up from its socket.
-
-
-
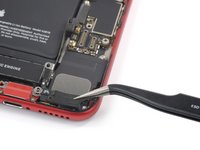
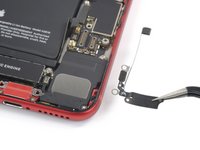
Use a pair of tweezers to remove the Wi-Fi diversity antenna.
-
-
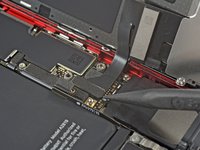
Ferramenta utilizada neste passo:Standoff Screwdriver for iPhones$5.49
-
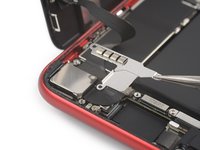
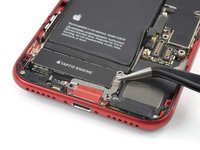
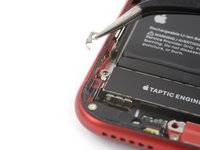
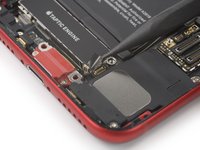
Remove the two screws securing the Taptic Engine:
-
One 2.1 mm Phillips screw
-
One 2.1 mm standoff screw
-
-
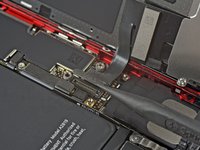
Ferramenta utilizada neste passo:Tweezers$4.99
-
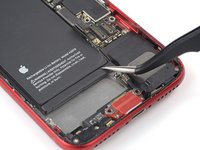
Use a pair of tweezers to remove the grounding bracket at the left edge of the Taptic Engine.
-
-
-
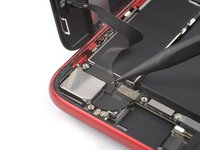
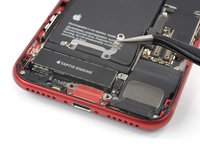
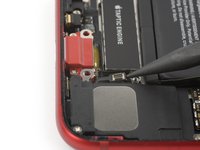
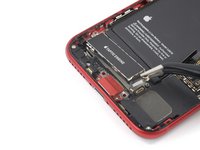
Use the pointed end of your spudger to pry the antenna cable socket up and away from the Taptic Engine connector below.
-
-
-
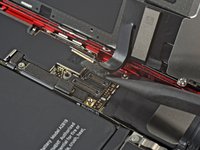
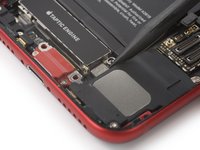
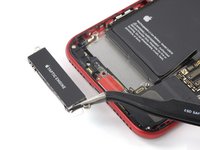
Use the pointed end of a spudger to disconnect the Taptic Engine by prying the connector straight up from its socket.
-
-
-
Use a pair of tweezers to carefully remove the Taptic Engine.
-
-
-
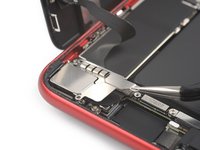
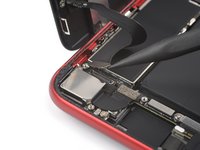
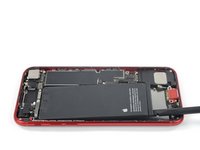
The iPhone's battery is secured by four pieces of stretch-release adhesive—two at the top, and two at the bottom.
-
Each piece of adhesive has a black pull-tab at the end, which is lightly adhered to the front surface or sometime only to the short edge of the battery.
-
-
Ferramenta utilizada neste passo:Tweezers$4.99
-
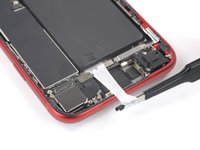
Peel back the first battery adhesive tab from the bottom right edge of the battery.
-
-
-
Grab the first pull tab with your fingers or blunt nosed tweezers and slowly pull it away from the battery, toward the bottom of the iPhone.
-
Pull hard enough to maintain tension on the strip, but don't force it. Give it plenty of time to stretch and un-stick from under the battery.
-
Don't press down on the battery. Hold the iPhone firmly by its sides.
-
Keep the strip flat and unwrinkled. Try to pull evenly on the whole strip, rather than pulling mainly in the middle or on one side.
-
Pull at a low angle so the strip doesn't snag on the edge of the battery.
-
The strip is less likely to tear if you use a combination of pulling and then reeling the strip around your tweezers. Slowly repeat this procedure until the strip is removed.
-
If the adhesive strip breaks off, try to retrieve it using your fingers or blunt tweezers, and continue pulling—but do not pry under the battery.
-
-
-
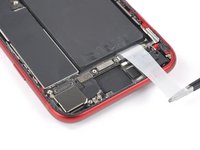
Grab the three other pull-tabs with your fingers or blunt nosed tweezers and pull them away from the battery, toward the bottom of the iPhone.
-
Follow the same procedure as with the previous strip: don't press down on the battery, keep the strip flat and unwrinkled, and pull at a low angle.
-
If the adhesive strip breaks off, try to retrieve it using your fingers or blunt tweezers, and continue pulling—but do not pry under the battery.
-
-
-
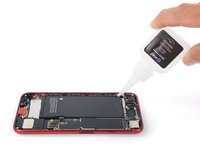
If any of the adhesive strips broke off and the battery remains stuck to the rear case, remove it by adding a few drops of isopropyl alcohol (90% or greater) underneath the battery near the stuck strip(s).
-
Wait about one minute for the alcohol solution to weaken the adhesive.
-
Use an opening pick or the flat end of a spudger to gently lift the battery.
-
-
Ferramenta utilizada neste passo:Plastic Cards$2.99
-
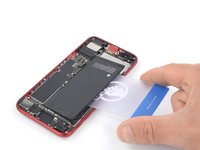
If you don't have any high concentration (over 90%) isopropyl alcohol at hand you can prepare an iOpener and apply it to the rear glass for at least three minutes to loosen the stretch-release adhesive underneath the battery.
-
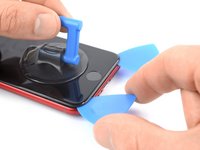
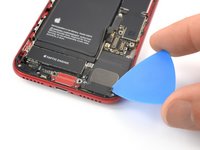
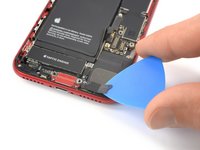
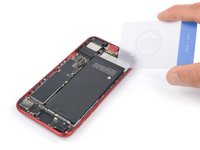
Insert a plastic card underneath the bottom edge of the battery.
-
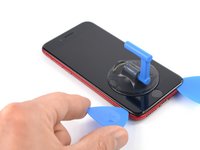
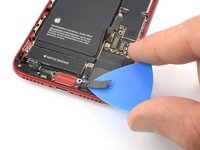
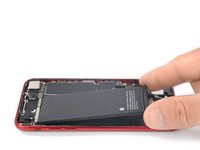
Slide the plastic card along the edge of the battery to separate it from the rear case and to cut the adhesive.
-
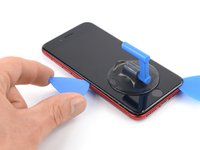
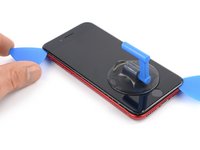
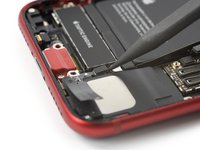
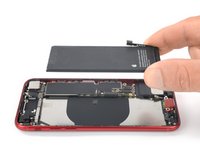
Use your plastic card to carefully pry up the battery.
-
-
-
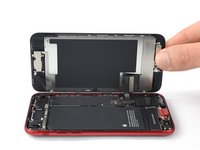
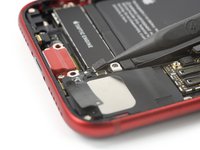
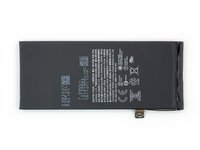
Remove the battery.
-
If there's any alcohol solution remaining in the phone, carefully wipe it off with a coffee filter or lint-free cloth or allow it to air dry before installing your new battery.
-


If possible, turn on your device and test your repair before installing new adhesive and resealing.
Compare your new replacement part to the original part—you may need to transfer remaining components or remove adhesive backings from the new part before installing.
To reassemble your device, follow these instructions in reverse order. During reassembly apply new adhesive where necessary after cleaning the relevant areas with isopropyl alcohol (>90%).
For optimal performance, calibrate your newly installed battery after completing this guide.
Take your e-waste to an R2 or e-Stewards certified recycler.
Repair didn’t go as planned? Try some basic troubleshooting, or ask our Answers community for help.
Cancelar: não concluí este guia.
28 outras pessoas executaram este guia.


5Comentários do guia
Caution: you'll get the Unknown Part message in Settings > Battery, even if you use a genuine part.
iFixIt has this documented at Apple can upgrade individual iPhone SE parts, can you?
Quoting the relevant section:
Installing a 3rd Gen iPhone SE 2022 battery in a 3rd Gen iPhone SE 2022: Possible, but…
This is the current standard, and a good sign for future battery replacements, but unfortunately you’ll still get the “unknown part” warning. The only feature you’ll lose is Battery Health. Yes even if you’re using a perfectly genuine battery, Apple considers the repair “nongenuine” until they personally verify it.
Caveat: Apple will now let you pay for the privilege of verification, if you buy their part.
Just did a battery replacement for somebody last night phone said 0% when I plugged it in. Used an iFixit battery. He left this morning and shortly after unplugging the phone it died plugged it back in works unplug it it dies. Battery is not charging, is this a defective battery or is this Apple anti-repair since they sell the same battery for 5 dollars less? (after you find the super secret code and return the old one, if not it's 75 $ just to place the order).
I am extremely grateful for ifixit, and all the folks (here and on youtube) who share their knowledge. All the steps here were good until I got to placing the new battery and putting everything back together. I had to go to youtube for guidance on placing the new battery correctly, dealing with battery adhesive, and installing new screen adhesive. It was definitely NOT quite so simple as just "doing all the steps in reverse." Perhaps more/better guidance on the final half, and provide clear steps all the way to checking the battery? Thanks again! BIG GRATITUDE
Diese Anleitung ist sehr gut designet, also perfekt und entsprach genau dem iPhone SE 2022, ein dickes Dankeschön an alle Beteiligten.
Ich habe es geschafft, die Schritte 24 bis 34 zu überspringen; diese beiden Klebestreifen des Akku habe ich zu fassen bekommen und ganz langsam herausgezogen. Aber einer ist gottseidank nur soweit abgerissen, dass ich ihn noch zu fassen bekam.
Beim Zusammenbau des iPhone hatte ich ein bisschen Probleme mit den winzigen Schräubchen der beiden Abdeckungen (Schritt 16 "Untere Displaykabelhalterung" und Schritt 20 "Halterung der Frontsensoreinheit"), diese wieder hineinzusetzen und festzuschrauben. Ich hatte leider keinen Magnetisierer zur Hand, dann wäre das einfacher gewesen, diese Schräubchen auf dem Schraubendreher zu fixieren. Aber es hat dann doch geklappt.
Alles in Allem habe ich mit Hilfe der iPhone-Eigentümerin, die Ihre Reparaturanleitung auf einem iPad abgespielt und die Taschenlampe gehalten hat, etwas über 1 Stunde gedauert (75 Minuten).
Nochmals herzlichen Dank.