Introdução
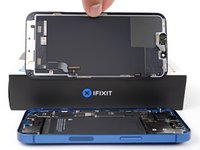
If your iPhone 13 screen is cracked, not responding to touch, or not showing a picture when your phone is powered on, use this repair guide to restore your iPhone to working order with a new screen, a.k.a. display assembly.
Note: On iOS 17.6 and earlier, True Tone and auto brightness functionality is disabled after a screen replacement, even when using an original Apple screen. Face ID is also disabled, unless the iPhone is running iOS 15.2 or newer. On iOS 18 and newer, you can calibrate your new screen using Apple's Repair Assistant to restore True Tone functionality on genuine screens purchased from Apple.
O que você precisa
-
-
Power off your iPhone before beginning disassembly.
-
Remove the two 6.8 mm-long pentalobe P2 screws at the bottom edge of the iPhone.
-
-
-
Measure 3 mm from the tip and mark the opening pick with a permanent marker.
Got to step 2 and realized the fix kit doesn't include an opening pick! Looks like a guitar pick, and I have those lying around. Is that expected? Looks like the pick is used in many steps below. There's a little blue crowbar that isn't mentioned in the instructions. Perhaps that replaces the opening pick?
Hi! I can't see which guide you were using when writing this comment. Can you reply here with which guide and fix kit you used?
I see you posted this in Meta. I hope it's resolved soon! In the meantime, a guitar pick may work well enough for your repair.
what fix kit?
My fix kit didn't include an opening pick either
My AliExpress refurbished screen came with a pick that has a coin-like circle that pops out, so no modification was necessary
It's not an Ifixit KIT if it doesn't include everything. You'll need to order the opening pic separately. Or head to Walmart like myself and look for guitar pics. Hopefully, this will work just as well.
No pick in mine as well. It’s really not clear that you have to order this separately when ordering an IPhone SE 202/2022 screen repair kit. Is this the case?
Frustrated, I ordered a compact package where everything was encapsulated. Useless suction tools could not separate the screen. If it is unable to decouple the screen, then why sucking suction tools you have provided.
For my kit the triangle pick was stuck inside the box with the screen not with the other tools maybe it's also there for you
Y’all are getting far, FAR too detailed with some of this stuff…. Measuring and marking the pick that you won’t actually use to open the device?!? lol that’s kinda funny. Just heat it up, grab a spudger, and the back just pops right off! The iFixit tech need to stick to the KISS method more often, you know KEEP IT SIMPLE STUPID!!! Like l, for reals, I’ve been doing this stuff for YEARS and using iFixit guides regularly and this is just ridiculous at this point!
Will the phone still work if the sensor assembly on the back of the screen is damaged?
-
-
-
Lay overlapping strips of clear packing tape over the iPhone's screen until the whole face is covered.
-
If you can't get the suction cup to stick in the next few steps, fold a strong piece of tape (such as duct tape) into a handle and lift the screen with that instead.
-
-
Ferramenta utilizada neste passo:Clampy - Anti-Clamp$24.95
-
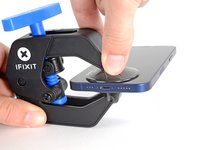
Pull the blue handle backwards to unlock the Anti-Clamp's arms.
-
Slide the arms over either the left or right edge of your iPhone.
-
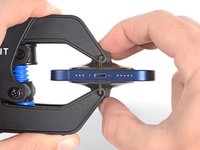
Position the suction cups near the bottom edge of the iPhone—one on the front, and one on the back.
-
Squeeze the cups together to apply suction to the desired area.
-
-
-
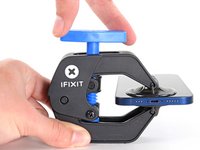
Support your iPhone on something sturdy such as a hardcover book so it rests hands-free and parallel to the ground; this makes it easier to work with in the following steps.
-
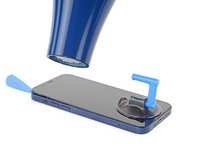
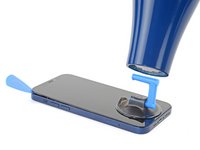
Use a hair dryer to heat along the bottom edge of the iPhone. The screen should feel slightly too hot to touch.
-
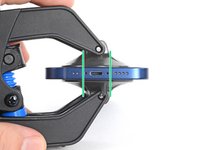
Wait one minute to give the adhesive a chance to release and present an opening gap.
-
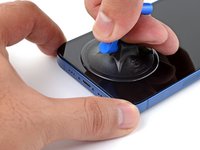
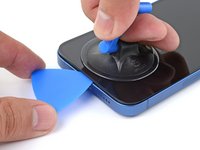
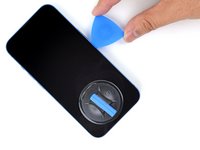
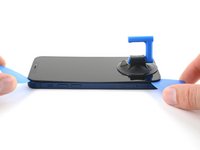
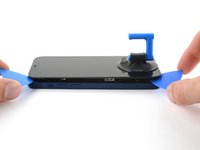
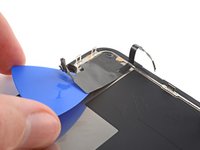
Insert an opening pick under the screen's plastic bezel when the Anti-Clamp creates a large enough gap.
-
Skip the next three steps.
-
-
-
Use a hair dryer or a heat gun to heat the bottom edge of the iPhone for 90 seconds or until the screen is slightly too hot to touch.
-
-
-
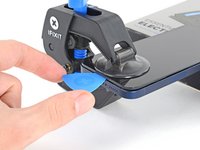
If you're using a single suction handle, apply it to the bottom edge of the phone, while avoiding the very edge of the glass.
-
-
-
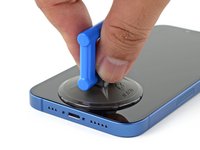
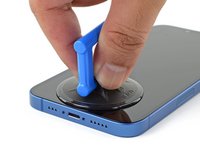
Pull up on the suction cup with firm, constant pressure to create a slight gap between the screen and the frame.
-
Insert an opening pick into the gap under the screen's plastic bezel.
The adhesive on the 13 model is certainly, "very strong." Keep this in mind when performing the repair. I had never opened up an iPhone as recent as the iPhone 13 and this adhesive that Apple uses for the water tight seal is strong. I had not been patient enough when opening my iPhone 13 that I had actually broken the screen. I was swapping the battery, but now I have to actually buy a new display assembly.
-
-
-
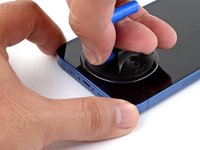
Use a hair dryer to heat the right edge of the iPhone (the edge with the power button) for 90 seconds or until the screen is slightly too hot to touch.
-
-
-
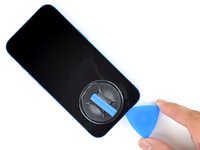
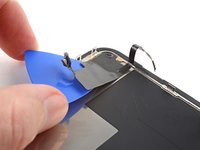
Slide the opening pick around the bottom right corner of the iPhone to separate its adhesive.
-
Continue sliding up the right edge of the iPhone until you reach the top right corner.
-
Leave the pick in the top right corner before continuing.
-
-
-
-
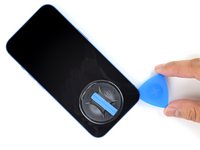
Use a hair dryer to heat the left edge of the iPhone for 90 seconds or until the screen is slightly too hot to touch.
-
-
-
Insert a second opening pick in the bottom left corner of the iPhone.
-
Twist both picks simultaneously until the left edge clips release.
-
-
-
If you haven't removed your suction handle, remove it now.
-
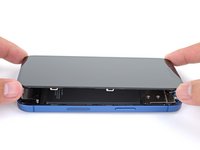
Rotate your iPhone so the right edge faces you.
-
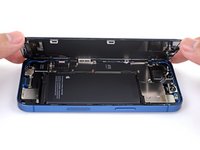
Open the iPhone by swinging the display up from the right side, like the front cover of a book.
-
Lean the display against something to keep it propped up while you're working on the phone.
-
-
Ferramenta utilizada neste passo:Magnetic Project Mat$19.95
-
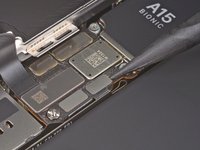
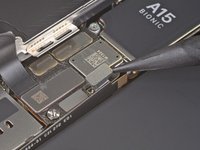
Use a Phillips screwdriver to remove the three 1.3 mm screws securing the battery and display connector cover.
-
-
-
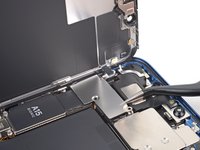
Use a spudger or a clean fingernail to pry the battery connector up from its socket on the logic board.
-
Bend the connector slightly away from the logic board to prevent it from accidentally making contact with the socket and providing power to the phone during your repair.
-
-
-
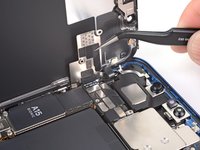
Use a spudger or a fingernail to disconnect the display cable connector.
-
-
-
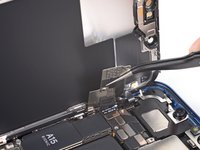
Remove three screws securing the front sensor connector cover:
-
One 1.7 mm Phillips screw
-
One 1.3 mm Phillips screw
-
One 1.8 mm Y000 screw
-
-
-
Swing the cover up from the center of the phone until the small clip by the edge of the phone unhooks.
-
-
-
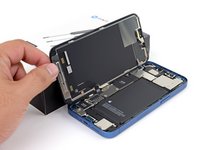
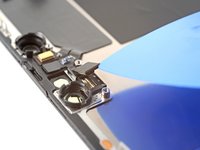
Use a spudger or a fingernail to disconnect the front sensor assembly cable connector.
-
-
-
Remove the screen.
Why is the removal of the proximity light sensor from the back of the screen not covered in this tutorial?
-
-
-
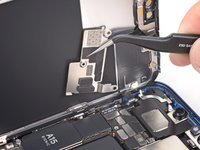
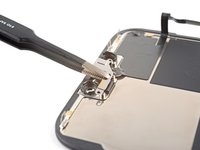
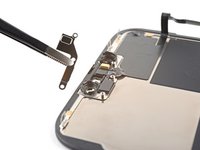
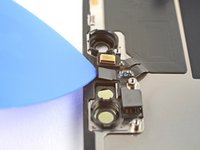
Use a Y000 screwdriver to remove the three 1.4 mm-long screws securing the sensor assembly bracket.
-
-
Ferramenta utilizada neste passo:Tweezers$4.99
-
Use tweezers, or your fingers, to remove the front sensor assembly bracket.
-
-
-
Heat an iOpener and apply it to the top edge of the screen for two minutes.
-
-
-
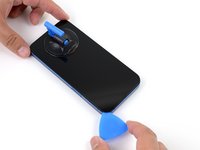
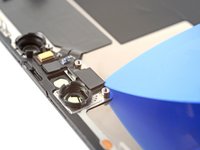
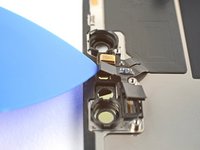
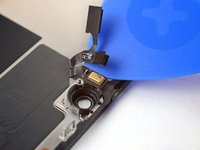
Insert an opening pick between the ambient light sensor and its recess in the screen.
-
Pry up with the pick to separate the ambient light sensor from the screen.
-
-
-
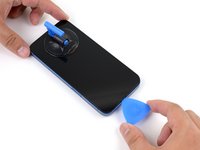
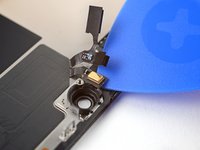
Insert an opening pick between the proximity sensor and its recess in the screen.
-
Pry up with the pick to separate the proximity sensor from the screen.
-
-
-
Use tweezers, or your fingers, to move the proximity sensor cable away from the screen.
-
-
-
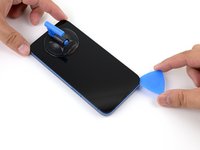
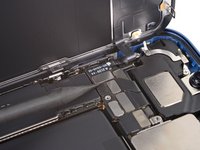
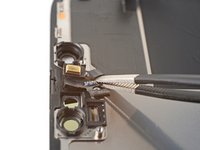
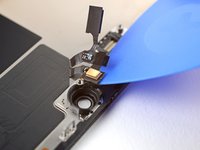
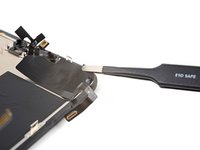
Insert an opening pick under the microphone cable, close to the microphone (the metal rectangle).
-
Slide the opening pick around the perimeter of the microphone to separate its adhesive.
-
-
-
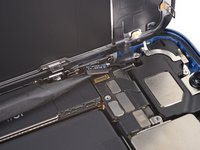
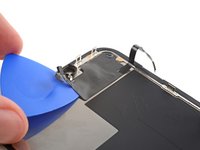
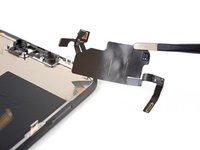
Insert an opening pick under the left side of the front sensor assembly.
-
Slide the pick under the assembly to separate it from the frame.
-


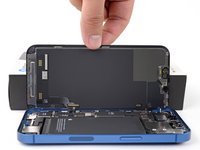


Compare your new replacement part to the original part—you may need to transfer remaining components or remove adhesive backings from the new part before installing.
To reassemble your device, follow these instructions in reverse order.
After your repair, depending on the replacement part, you may be able to calibrate it using Apple's Repair Assistant, available as of iOS 18. Update your device, navigate to Settings → General →About → Parts & Service History, tap Restart & Finish Repair, and follow the onscreen prompts.
Take your e-waste to an R2 or e-Stewards certified recycler.
Repair didn’t go as planned? Try some basic troubleshooting, or ask our iPhone 13 Answers community for help.
Cancelar: não concluí este guia.
53 outras pessoas executaram este guia.

12 comentários
Complimenti per le istruzioni ben fatte ! Potrebbe essere utile ricevere ad ogni riparazione l’elenco dei pezzi di ricambio da acquistare con i relativi codici così da quantificare anche il costo della riparazione. Utile anche per non sbagliare l’acquisto. Ciao, Roberto
Can we now change the display without FACEID issue?
Yes. You can.
Ciao ottima spiegazione, però perché con la flat sensori collegata alla scheda madre il display è scuro invece se la scollego il display torna luminoso? Io ho utilizzato un oled della GX.
Il problema è il sensore della live che si è danneggiato oppure bisogna fare qualche programmazione?
Replaced display and exchanged front assembly on iPhone 13. Screen turns on and looks good, but it doesn’t respond to touch.
defective digitizer or the cable for the display was pinched in a way probably when closing that damaged the ribbon cable
Will it fix the face ID problem
Hi,
does the Face ID still work even with third parties screens? Or only with the original / iFitx it one?