iMac G5 20" Model A1076 Power Supply Replacement

Introdução
Ir para o passo 1Keep those electrons flowing by replacing your broken power supply!
O que você precisa
Peças
Ferramentas


Exibir mais…
Vídeo de Apresentação
-
-
Lay the iMac display-side down on a flat surface (putting a cloth under the screen to protect it from bumps).
-
Loosen the three Phillips screws securing the rear panel to the iMac.
-
-
-
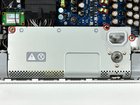
Remove the three Phillips screws securing the power supply to the chassis.
-
-
Ferramenta utilizada neste passo:Heavy-Duty Spudger$4.99
-
While depressing the connector lock, use a heavy duty spudger to pry the power supply connector away from its socket on the logic board.
-


To reassemble your device, follow these instructions in reverse order.
To reassemble your device, follow these instructions in reverse order.
Cancelar: não concluí este guia.
71 outras pessoas executaram este guia.

3 comentários
As usual, trickier than the video suggests. In addition to these notes, also check notes on similar power supply installs.
1. It is very hard to disconnect the optical sensor cable from the motherboard. There's no hidden catch, you just have to insert your spunger/thin screwdriver blade between the fittings and gently twist. I used a surgical clamp to also pull on the cable -- that did it. (The cable is being replaced, so you don't need to worry about it).
2. The top right screw is hard to remove. I had to partly remove it, then lever the power supply up as in the video while continuing to loosen it.
3. I used thin wide screwdriver blades to disconnect the power supply connect, my spudger wasn't rigid enough.
4. The supply has clearly been used before. In the context of something this old "new" means Apple refurbished. That's fine.
5. Beware the optical sensor, it's glued to the power supply. Look for it. When you insert the new supply place it first.