Ir para o conteúdo principal
Participe da comunidade de reparos - Criar conta
Yamaha Alto Saxophone Neck-piece Cork Replacement

Yamaha Alto Saxophone Neck-piece Cork Replacement

Lauren Wintermute

Lauren Wintermute e 3 outros colaboradores

Última atualização em 7 de mar de 2024

30 - 45 minutos
Moderado

Introdução

Ir para o passo 1

Through normal wear and tear or rough handling, saxophone corks can become damaged, rendering the instrument useless or operating at diminished quality. This guide will replace a Yamaha YAS-23 alto saxophone cork; however, the size for all alto saxophone neck-pieces is standard, so this repair is applicable to all alto saxophone neck-piece cork repairs.

For optimal performance, saxophones require a well fitting cork. Without this, tone quality will be sacrificed, or the saxophone will cease to function.

O que você precisa

Peças

Ferramentas

Exibir mais…

  1. Yamaha Alto Saxophone Neck-piece Cork Replacement, YAS-23 Yamaha Alto Saxophone Neck-piece Cork: passo 1, imagem 1 %32 Yamaha Alto Saxophone Neck-piece Cork Replacement, YAS-23 Yamaha Alto Saxophone Neck-piece Cork: passo 1, imagem 2 %32
    • The octave key is silver, while the rest of the neck-piece is gold.

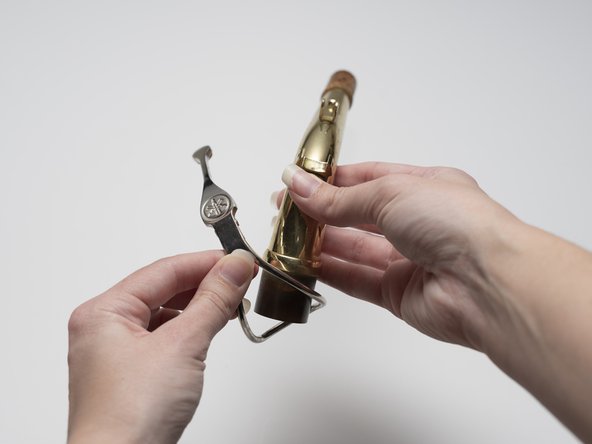
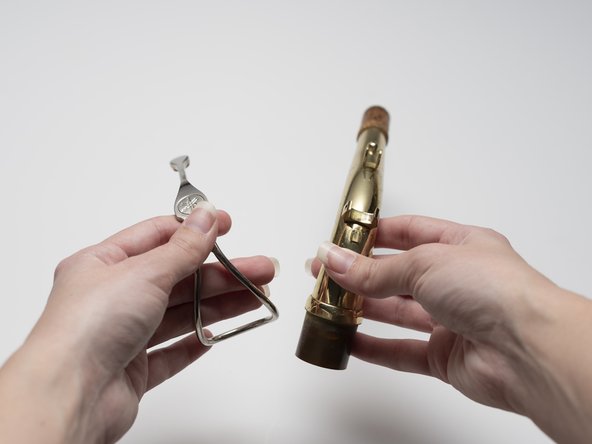
    • Locate the screw on the side of the neck-piece, connecting the octave key to the neck-piece.

    • Use a small, 2.5 mm flat head screwdriver to remove the screw.
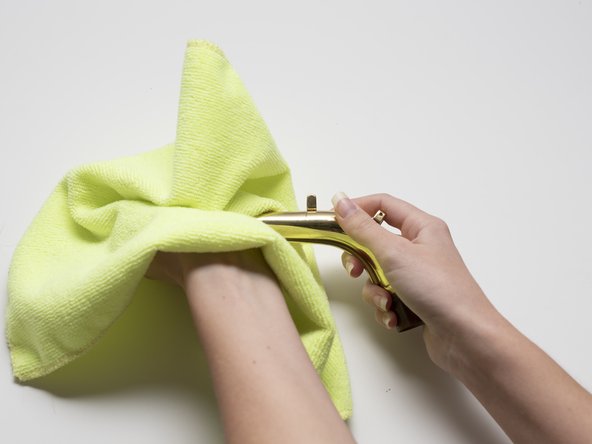
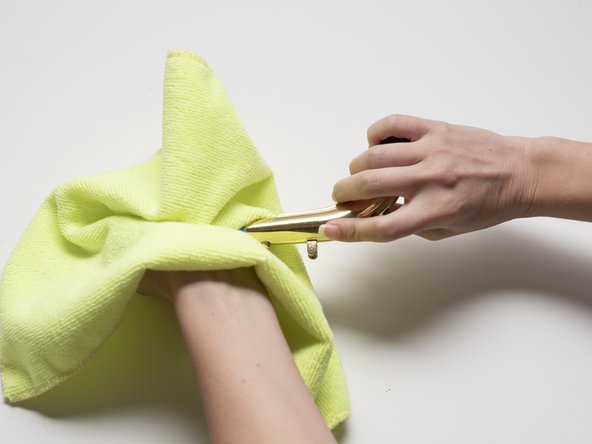
  2. Yamaha Alto Saxophone Neck-piece Cork Replacement: passo 2, imagem 1 %32 Yamaha Alto Saxophone Neck-piece Cork Replacement: passo 2, imagem 2 %32
    • Open a paperclip.

    • Push the screw out with the end of the paperclip.

  3. Yamaha Alto Saxophone Neck-piece Cork Replacement: passo 3, imagem 1 %32 Yamaha Alto Saxophone Neck-piece Cork Replacement: passo 3, imagem 2 %32 Yamaha Alto Saxophone Neck-piece Cork Replacement: passo 3, imagem 3 %32
    • Slide the octave key down off the bottom of the neck-piece.

  4. Yamaha Alto Saxophone Neck-piece Cork Replacement: passo 4, imagem 1 %32 Yamaha Alto Saxophone Neck-piece Cork Replacement: passo 4, imagem 2 %32 Yamaha Alto Saxophone Neck-piece Cork Replacement: passo 4, imagem 3 %32
    • Put on leather gloves.

    • Cut away from one's self.

    • Use the utility blade to scrape off the cork.

    • Start at the base of the cork on the neck-piece with the utility blade at a 10 to 20 degree angle.

    • In a controlled motion, drag the utility blade along the neck-piece, removing cork along the way.

    • Repeat until all of the cork is removed.

  5. Yamaha Alto Saxophone Neck-piece Cork Replacement: passo 5, imagem 1 %32 Yamaha Alto Saxophone Neck-piece Cork Replacement: passo 5, imagem 2 %32
    • Apply masking tape where there is no glue on the neck-piece to prevent damage to the finish.

  6. Yamaha Alto Saxophone Neck-piece Cork Replacement: passo 6, imagem 1 %32 Yamaha Alto Saxophone Neck-piece Cork Replacement: passo 6, imagem 2 %32
    • Remove glue and resin by rotating the neck-piece against the 220 grit sand paper.

    • Repeat until all glue is gone.

  7. Yamaha Alto Saxophone Neck-piece Cork Replacement: passo 7, imagem 1 %32 Yamaha Alto Saxophone Neck-piece Cork Replacement: passo 7, imagem 2 %32 Yamaha Alto Saxophone Neck-piece Cork Replacement: passo 7, imagem 3 %32
    Ferramenta utilizada neste passo:
    Microfiber Cleaning Cloths
    $3.99
    • New cork may not adhere correctly without completing this step.

    • With a damp microfiber cleaning cloth, wipe off any dust and glue particles.

  8. Yamaha Alto Saxophone Neck-piece Cork Replacement: passo 8, imagem 1 %32 Yamaha Alto Saxophone Neck-piece Cork Replacement: passo 8, imagem 2 %32 Yamaha Alto Saxophone Neck-piece Cork Replacement: passo 8, imagem 3 %32
    • Do not remove adhesive covering on the Valentino neck cork.

    • Make sure the shorter base of the Valentino neck cork is flush with entrance.

    • Place the Valentino neck cork flush with the entrance of the neck-piece.

    • Mark a line where the Valentino neck cork meets the masking tape.

    • Cut along the line.

  9. Yamaha Alto Saxophone Neck-piece Cork Replacement: passo 9, imagem 1 %32 Yamaha Alto Saxophone Neck-piece Cork Replacement: passo 9, imagem 2 %32 Yamaha Alto Saxophone Neck-piece Cork Replacement: passo 9, imagem 3 %32
    • Wrap Valentino neck cork around the neck-piece.

    • Make mark where the Valentino neck cork overlaps.

    • Make sure the shorter base of Valentino neck cork is flush with entrance to neck-piece.

    • If Valentino neck cork appears to be too small on one side, rotate 180 degrees.

  10. Yamaha Alto Saxophone Neck-piece Cork Replacement: passo 10, imagem 1 %32
    • Cut the Valentino neck cork along the line made in the previous step.

  11. Yamaha Alto Saxophone Neck-piece Cork Replacement: passo 11, imagem 1 %32 Yamaha Alto Saxophone Neck-piece Cork Replacement: passo 11, imagem 2 %32 Yamaha Alto Saxophone Neck-piece Cork Replacement: passo 11, imagem 3 %32
    • Remove the adhesive covering on the back of the Valentino neck cork.

    • Wrap the Valentino neck cork around the top of neck-piece.

    • Place the narrow end of the Valentino neck cork flush with the tip of the neck-piece.

  12. Yamaha Alto Saxophone Neck-piece Cork Replacement: passo 12, imagem 1 %32
    • Remove the masking tape.

  13. Yamaha Alto Saxophone Neck-piece Cork Replacement: passo 13, imagem 1 %32 Yamaha Alto Saxophone Neck-piece Cork Replacement: passo 13, imagem 2 %32
    • Sand the seam of the Valentino neck cork until it is even with the rest of the Valentino neck cork.

  14. Yamaha Alto Saxophone Neck-piece Cork Replacement: passo 14, imagem 1 %32
    • Apply a generous amount of cork grease on the whole Valentino neck cork.

  15. Yamaha Alto Saxophone Neck-piece Cork Replacement: passo 15, imagem 1 %32 Yamaha Alto Saxophone Neck-piece Cork Replacement: passo 15, imagem 2 %32 Yamaha Alto Saxophone Neck-piece Cork Replacement: passo 15, imagem 3 %32
    • Place the octave key on the neck-piece.

  16. Yamaha Alto Saxophone Neck-piece Cork Replacement: passo 16, imagem 1 %32 Yamaha Alto Saxophone Neck-piece Cork Replacement: passo 16, imagem 2 %32 Yamaha Alto Saxophone Neck-piece Cork Replacement: passo 16, imagem 3 %32
    • Re-insert the screw.

    • Tighten the screw with a small, 2.5 mm flat head screwdriver.

    • The replacement is complete.

    • When applying a mouthpiece to the neck-piece for the first time, it will be difficult and require force. This is normal.

Linha de Chegada

2 outras pessoas executaram este guia.

Gear Up For Future Repairs

Shop all

1Comentário do guia

I’m usually here for computer guides, I couldn’t believe a sax guide was here! Was overjoyed! Can someone make a Alto Sax full pad replacement guide? I know it’s a big ask! But I have a YAS-23 and it needs all new pads, getting it serviced by a pro is between $700-$850!! But buying pads yourself is as low as $50 or on the high end $200. This seems like a tutorial the world needs to have! Thank you to anyone that even took the time to read this.

Cameron - Responder

Comentar

Visualizações:

Últimas 24 horas: 1

Últimos 7 dias: 11

Últimos 30 dias: 46

Ao todo: 2,132