Ir para o conteúdo principal
Whirlpool Refrigerator Freezer Thermistor Replacement

Whirlpool Refrigerator Freezer Thermistor Replacement

nicO

nicO e 2 outros colaboradores

Última atualização em April 21, 2023

15 - 30 minutos
Moderada

Use this guide to replace the freezer thermistor or temperature sensor in your Whirlpool Refrigerator.

The freezer thermistor measures the air temperature in your freezer and signals temperature regulatory processes. If your freezer doesn't cool properly, your freezer thermistor might be broken.

This guide will work for most Whirlpool refrigerators. This guide is written with a model WRS315SDHW refrigerator. If you have a different model, you may encounter some minor disassembly differences, but the overall repair process will be the same.

To replace the refrigerator thermistor, follow this guide instead.

Note: Some photos show the doors removed for clarity purposes. Removing them is not required and will not change the procedure.

O que você precisa

A iFixit ganha comissão quando você compra por estes links.
  1. Whirlpool Refrigerator Freezer Thermistor Replacement, Safety precautions: passo 1, imagem 1 %32
    • Before you begin your repair, perform the following:

    • Turn off your main water supply

    • Unplug your device

  2. Whirlpool Refrigerator Freezer Thermistor Replacement, Open the doors: passo 2, imagem 1 %32 Whirlpool Refrigerator Freezer Thermistor Replacement, Open the doors: passo 2, imagem 2 %32 Whirlpool Refrigerator Freezer Thermistor Replacement, Open the doors: passo 2, imagem 3 %32
    • Depending on your repair, open one or both doors.

  3. Whirlpool Refrigerator Freezer Thermistor Replacement, Remove the drawers: passo 3, imagem 1 %32 Whirlpool Refrigerator Freezer Thermistor Replacement, Remove the drawers: passo 3, imagem 2 %32
    • Remove the drawers and shelves from the freezer section.

  4. Whirlpool Refrigerator Freezer Thermistor Replacement: passo 4, imagem 1 %32 Whirlpool Refrigerator Freezer Thermistor Replacement: passo 4, imagem 2 %32
    • Remove the screw(s) securing the evaporator cover.

  5. Whirlpool Refrigerator Freezer Thermistor Replacement, Unclip the evaporator cover: passo 5, imagem 1 %32 Whirlpool Refrigerator Freezer Thermistor Replacement, Unclip the evaporator cover: passo 5, imagem 2 %32 Whirlpool Refrigerator Freezer Thermistor Replacement, Unclip the evaporator cover: passo 5, imagem 3 %32
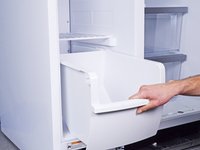
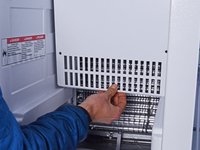
    • Lift the bottom of the evaporator cover up and over its lip in the chassis.

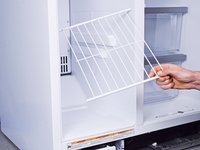
    • Pull the cover toward yourself to release its top clips.

  6. Whirlpool Refrigerator Freezer Thermistor Replacement, Remove the evaporator cover: passo 6, imagem 1 %32 Whirlpool Refrigerator Freezer Thermistor Replacement, Remove the evaporator cover: passo 6, imagem 2 %32 Whirlpool Refrigerator Freezer Thermistor Replacement, Remove the evaporator cover: passo 6, imagem 3 %32
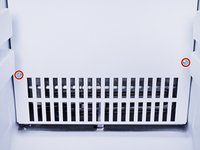
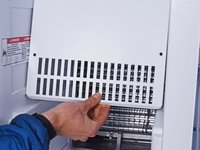
    • Continue pulling the evaporator cover towards yourself to unclip its metal prongs from the chassis.

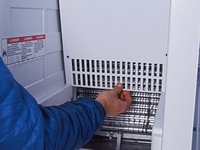
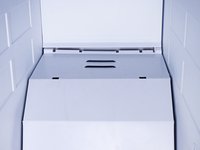
    • Remove the evaporator cover.

  7. Whirlpool Refrigerator Freezer Thermistor Replacement, Unclip the thermistor: passo 7, imagem 1 %32 Whirlpool Refrigerator Freezer Thermistor Replacement, Unclip the thermistor: passo 7, imagem 2 %32 Whirlpool Refrigerator Freezer Thermistor Replacement, Unclip the thermistor: passo 7, imagem 3 %32
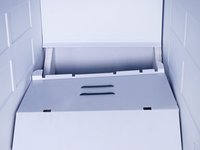
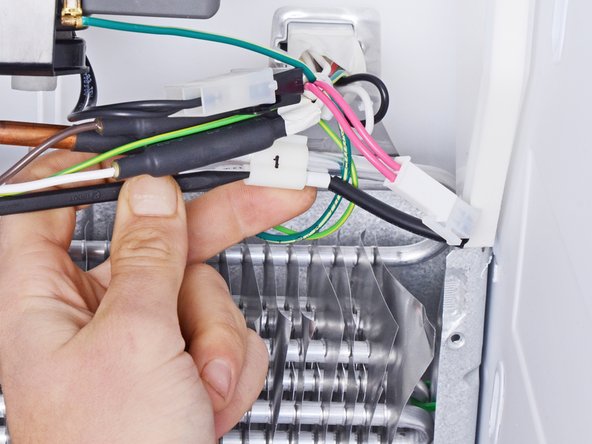
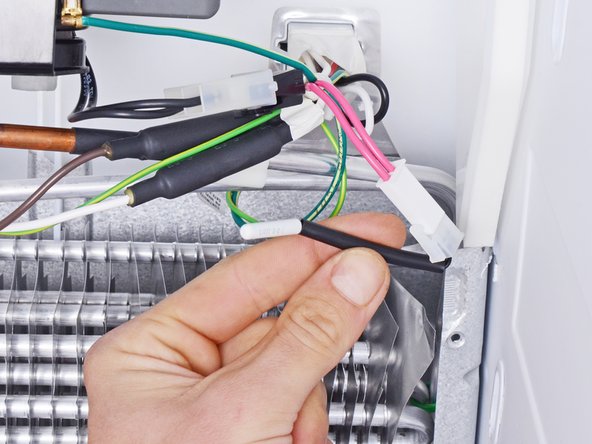
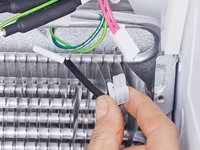
    • Use a spudger to push the tip of the thermistor through its slot in the wire harness.

  8. Whirlpool Refrigerator Freezer Thermistor Replacement, Disconnect the thermistor: passo 8, imagem 1 %32 Whirlpool Refrigerator Freezer Thermistor Replacement, Disconnect the thermistor: passo 8, imagem 2 %32
    • Disconnect any connectors attached to the thermistor.

  9. Whirlpool Refrigerator Freezer Thermistor Replacement, Remove the thermistor: passo 9, imagem 1 %32
    • Remove the thermistor.

  10. Whirlpool Refrigerator Freezer Thermistor Replacement, Meter the thermistor: passo 10, imagem 1 %32
    • If you own a multimeter, you can test your thermistor's resistance.

    • A range between 2-220KΩ is acceptable. Check the specifications for your specific thermistor since there is such a large variance, and make sure you test at the appropriate temperature.

Conclusão

To reassemble your device, follow these instructions in reverse order.

Take your e-waste to an R2 or e-Stewards certified recycler.

Repair didn’t go as planned? Ask our Answers community for help.

Uma outra pessoa concluiu este guia.

nicO

Membro desde: 04/14/15

15.927 Reputação

Autoria de 89 guias

Equipe

Global Fixers Membro de Global Fixers

Community

Membros da 45

Autoria de 702 guias

Um comentário

Does anyone know the thermistor part number it’s not listed on the parts breakdown

Tony - Responder

Adicione um comentário

Exibir estatísticas:

Últimas 24 horas: 0

Últimos 7 dias: 20

Últimos 30 dias: 86

Duração total: 2,581