Ir para o conteúdo principal

Toshiba Satellite CL15t-B1204X Power Connector Replacement

O que você precisa

  1. Toshiba Satellite CL15t-B1204X Power Connector Replacement, Battery: passo 1, imagem 1 %32
    • Flip the laptop over so the bottom of the device is facing upward.

  2. Toshiba Satellite CL15t-B1204X Power Connector Replacement: passo 2, imagem 1 %32
    • Unscrew the 10 5mm Phillips screws, located on the bottom side of the notebook using the PH1 bit and the Magnetic Driver.

  3. Toshiba Satellite CL15t-B1204X Power Connector Replacement: passo 3, imagem 1 %32
    • Pry open the bottom cover of the notebook with the plastic spudger tools. Slide a thin tool along the edges without ports to pop open the latches.

    • Be careful not to bend or crack the plastic back cover.

  4. Toshiba Satellite CL15t-B1204X Power Connector Replacement: passo 4, imagem 1 %32
    • Remove the 1" yellow tape on top of the battery. This piece of tape is holding down the battery connection cable.

  5. Toshiba Satellite CL15t-B1204X Power Connector Replacement: passo 5, imagem 1 %32
    • Lightly grip the battery on the two longest sides. Gently pull up until the adhesive on the notebook is separated from the battery.

  6. Toshiba Satellite CL15t-B1204X Power Connector Replacement: passo 6, imagem 1 %32
    • Carefully unplug the battery from the device motherboard.

  7. Toshiba Satellite CL15t-B1204X Power Connector Replacement, Power Connector: passo 7, imagem 1 %32 Toshiba Satellite CL15t-B1204X Power Connector Replacement, Power Connector: passo 7, imagem 2 %32 Toshiba Satellite CL15t-B1204X Power Connector Replacement, Power Connector: passo 7, imagem 3 %32
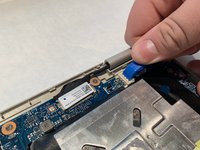
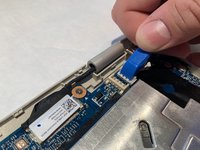
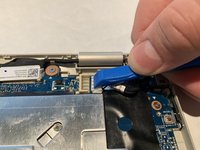
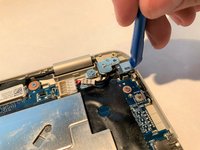
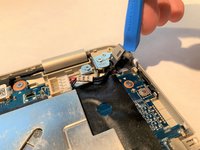
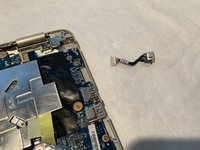
    • Disconnect the charging connector from the motherboard using the blue iFixIt opening tool by sliding it away from the connector.

  8. Toshiba Satellite CL15t-B1204X Power Connector Replacement: passo 8, imagem 1 %32 Toshiba Satellite CL15t-B1204X Power Connector Replacement: passo 8, imagem 2 %32 Toshiba Satellite CL15t-B1204X Power Connector Replacement: passo 8, imagem 3 %32
    • Pry the power connector upwards from the side of the laptop using the opening tool, then remove the part from the laptop.

Conclusão

To reassemble your device, follow these instructions in reverse order.

Uma outra pessoa concluiu este guia.

Matthew Hook

Membro desde: 03/25/19

439 Reputação

Autoria de 4 guias

Equipe

IUPUI, Team S1-G6, Hovde Fall 2019 Membro de IUPUI, Team S1-G6, Hovde Fall 2019

IUPUI-HOVDE-F19S1G6

Membros da 4

Autoria de 6 guias

0 comentários

Adicione um comentário

Exibir estatísticas:

Últimas 24 horas: 0

Últimos 7 dias: 2

Últimos 30 dias: 10

Duração total: 283