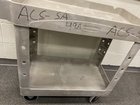
Tool Cart Wheel Replacement
5 minutos
Fácil
Introdução
Vá para o passo 1If you would like to replace the wheel on a utility cart, or even rearrange the wheels, use this step by step guide to do so. This guide can be useful if a wheel on your utility cart breaks or if you simply want to replace your wheels.
O que você precisa
Peças
Ferramentas

A iFixit ganha comissão quando você compra por estes links.


Quase terminado!
Linha de Chegada
Cancelar: não concluí este guia.
Uma outra pessoa concluiu este guia.
Equipe

Texas Tech, Team S3-G11, Cowan Spring 2021 Membro de Texas Tech, Team S3-G11, Cowan Spring 2021
TTU-COWAN-S21S3G11
1 Membro
Autoria de 3 guias