Ir para o conteúdo principal

Sony Handycam DCR-DVD103 Outer Cover Replacement

O que você precisa

  1. Sony Handycam DCR-DVD103 Outer Cover Replacement, Battery: passo 1, imagem 1 %32
    • Images do not show the camera's battery.

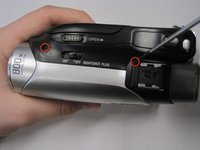
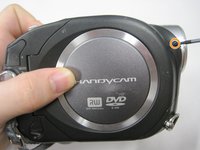
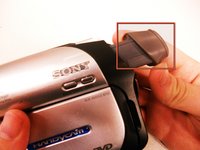
    • On the back of the camera beneath the viewfinder, locate the battery pack.

    • Press the small button.

    • Slide the switch forward.

  2. Sony Handycam DCR-DVD103 Outer Cover Replacement: passo 2, imagem 1 %32
    • Remove the battery from the camera.

    • To reinsert the battery, slide the battery into the camera.

  3. Sony Handycam DCR-DVD103 Outer Cover Replacement, Outer Cover: passo 3, imagem 1 %32
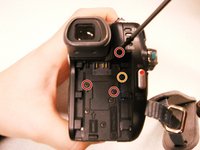
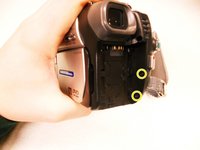
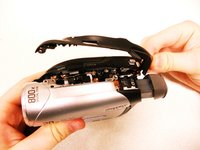
    • Using a #00 Phillips screwdriver, remove the six 4.5 mm screws from the camera's bottom.

  4. Sony Handycam DCR-DVD103 Outer Cover Replacement: passo 4, imagem 1 %32 Sony Handycam DCR-DVD103 Outer Cover Replacement: passo 4, imagem 2 %32
    • Remove the three 4.5 mm screws beneath the battery.

    • Remove the 2.9 mm screw from the right corner.

    • Remove the two 4.5 mm screws from the battery's right wall.

    • Images do not show the battery.

  5. Sony Handycam DCR-DVD103 Outer Cover Replacement: passo 5, imagem 1 %32
    • Remove the 4.5 mm screw under the output flap on the front of the camera below the lens.

  6. Sony Handycam DCR-DVD103 Outer Cover Replacement: passo 6, imagem 1 %32 Sony Handycam DCR-DVD103 Outer Cover Replacement: passo 6, imagem 2 %32
    • Remove the two 4.5 mm screws at the top of the camera.

    • Remove the 4.5 mm screw from the disk side of the camera (next to the lens).

  7. Sony Handycam DCR-DVD103 Outer Cover Replacement: passo 7, imagem 1 %32 Sony Handycam DCR-DVD103 Outer Cover Replacement: passo 7, imagem 2 %32
    • Extend the gray viewfinder, then gently remove the black plastic casing.

    • Caution: Plastic pieces are fragile.

  8. Sony Handycam DCR-DVD103 Outer Cover Replacement: passo 8, imagem 1 %32
    • Remove the two 2.9 mm screws under the black plastic casing.

  9. Sony Handycam DCR-DVD103 Outer Cover Replacement: passo 9, imagem 1 %32
    • Gently pull apart the outer silver case and screen.

    • Remove the copper wire strip to detach the case from the camera.

Conclusão

To reassemble your device, follow these instructions in reverse order.

Uma outra pessoa concluiu este guia.

kaitlin

Membro desde: 01/11/11

342 Reputação

Autoria de 3 guias

Equipe

Cal Poly, Team 7-44, Regan Winter 2011 Membro de Cal Poly, Team 7-44, Regan Winter 2011

CPSU-REGAN-W11S7G44

Membros da 5

Autoria de 10 guias

0 comentários

Adicione um comentário

Exibir estatísticas:

Últimas 24 horas: 0

Últimos 7 dias: 0

Últimos 30 dias: 0

Duração total: 2,438