Ir para o conteúdo principal
Shark Ultimate Professional Heat Plate Replacement

Shark Ultimate Professional Heat Plate Replacement

Drew Carff

Drew Carff e 6 outros colaboradores

Última atualização em October 11, 2024

Nenhuma estimativa
Moderada
Faltando detalhes

This guide will show you how to replace the heat plate of your Shark Ultimate Professional clothes iron. If your heat plate is damaged or worn out, it may affect the iron's performance and cause problems with your clothes. Some signs of a faulty heat plate are as follows.

-Uneven heating or cold spots

-low steam output or lack of steam

-stains on clothes

-corrosion on heat plate

If any of these signs are occuring, you may need to replace the heat plate with a new one. To do this you will simply need a phillips screwdriver and a new heat plate. Now before starting make sure that the iron is unpluged and cooled down . By following this guide you will be able to fix your Shark Ultimate Professional Clothes Iron.

O que você precisa

Ferramentas

  1. Shark Ultimate Professional Heat Plate Replacement, Heat Plate: passo 1, imagem 1 %32 Shark Ultimate Professional Heat Plate Replacement, Heat Plate: passo 1, imagem 2 %32 Shark Ultimate Professional Heat Plate Replacement, Heat Plate: passo 1, imagem 3 %32
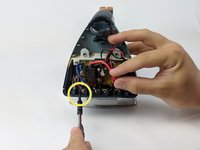
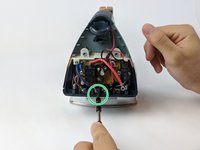
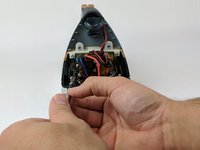
    • Remove the two screws at the back of the iron.

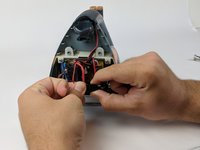
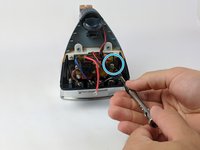
    • Remove the back cover piece.

    • Make sure iron is unplugged and cooled off.

  2. Shark Ultimate Professional Heat Plate Replacement: passo 2, imagem 1 %32 Shark Ultimate Professional Heat Plate Replacement: passo 2, imagem 2 %32
    • Remove the two screws holding the white clamp to the iron.

    • Remove the two screws holding the black wires to the body of the iron.

    • Removing the left black wire will also free the red wire, attached by the same screw.

  3. Shark Ultimate Professional Heat Plate Replacement: passo 3, imagem 1 %32
    • Pull the split end of the power cord upward through the ball joint of the iron.

    • Set aside power cord.

  4. Shark Ultimate Professional Heat Plate Replacement: passo 4, imagem 1 %32 Shark Ultimate Professional Heat Plate Replacement: passo 4, imagem 2 %32 Shark Ultimate Professional Heat Plate Replacement: passo 4, imagem 3 %32
    • Remove remaining screws that hold a wire on the bottom (brown and blue).

    • Unscrew from left to right.

    • Unclip the black adapter piece on the bottom right.

    • Wires order (from left to right): Brown, Blue, Red, Black

  5. Shark Ultimate Professional Heat Plate Replacement: passo 5, imagem 1 %32 Shark Ultimate Professional Heat Plate Replacement: passo 5, imagem 2 %32
    • Remove two screws (left and right) affixed to circuit board.

Conclusão

To reassemble your device, follow these instructions in reverse order.

3 outras pessoas executaram este guia.

Drew Carff

Membro desde: 10/23/17

868 Reputação

Autoria de 5 guias

Equipe

USF Tampa, Team S1-G4, Leahy Fall 2017 Membro de USF Tampa, Team S1-G4, Leahy Fall 2017

USFT-LEAHY-F17S1G4

Membros da 3

Autoria de 10 guias

3 comentários

This is an incomplete guide. Why even put it up. So silly and ridiculous. Not Good at all.

Muhammad Ahmad - Responder

Where is the part about the heat plate?

Nealy Moxam - Responder

Adicione um comentário

Exibir estatísticas:

Últimas 24 horas: 1

Últimos 7 dias: 2

Últimos 30 dias: 12

Duração total: 2,452