
Samsung Series 9 NP900X3A RAM Replacement

Introdução
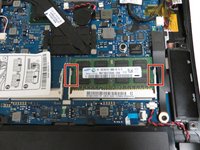
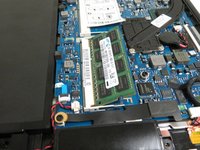
Vá para o passo 1Random Access Memory, or RAM (pronounced as ramm), is the physical hardware inside a computer that temporarily stores data, serving as the computer's "working" memory. It it held in by 2 clips on the sides of the unit, and will pop upward when released.
O que você precisa
Ferramentas


-
-
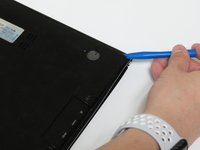
Locate the rubber feet at every corner of the laptop back panel. Use the ifixit prying tool, and break the adhesive between the rubber feet, and the case.
-


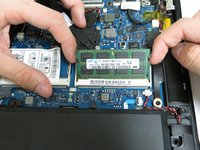

To insert the replacement RAM unit, follow these instructions in reverse. If RAM unit replacement does not solve your issue, you may have a defective motherboard.
To insert the replacement RAM unit, follow these instructions in reverse. If RAM unit replacement does not solve your issue, you may have a defective motherboard.
Cancelar: não concluí este guia.
4 outras pessoas executaram este guia.

Equipe

University of North Texas, Team S2-G4, Thomas Spring 2018 Membro de University of North Texas, Team S2-G4, Thomas Spring 2018
UNT-THOMAS-S18S2G4
Membros da 3
Autoria de 5 guias