
PSP 2000 Front Casing Replacement

Introdução
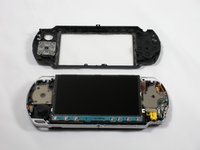
Ir para o passo 1Paint job scratched? Going custom? Change out your faceplate assembly!
O que você precisa


-
-
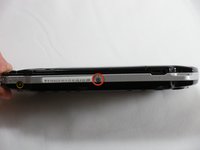
Place PSP face down, so that the UMD Drive is facing upwards.
-
Locate the battery door and open.
-
Remove the battery from inside.
-
-
-
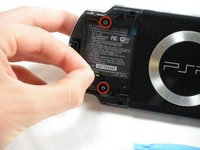
Locate the sticker in the battery compartment labeled: "En: Warranty Void if Seal Damaged."
-
Remove the sticker using the PSP Opening Tools.
-
-
-
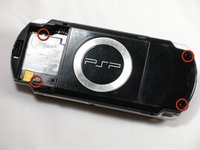
Remove the following screws from around the bezel:
-
Two 4 mm Phillips
-
One 5 mm Phillips
Beware that some models of PSP 2000 (mine is a limited edition Crisis Core FF7 silver version, so I suppose it is related to it being a japanese PSP) have 2 minute TORX screws (T1? T2?) instead of the 2x 4mm Phillips pointed in orange around the USB port.
-


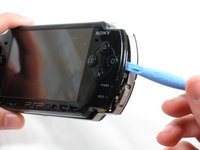
To reassemble your device, follow these instructions in reverse order.
To reassemble your device, follow these instructions in reverse order.
Cancelar: não concluí este guia.
16 outras pessoas executaram este guia.

Equipe

Cal Poly, Team 6-3, Maness Fall 2009 Membro de Cal Poly, Team 6-3, Maness Fall 2009
CPSU-MANESS-F09S6G3
5 Membros
Autoria de 37 guias