
Nintendo Game Boy Advance SP Motherboard Replacement
Introdução
Vá para o passo 1The motherboard is the green electrical plate that runs the device. Without the motherboard, the device will not function. This is why we advise against removing the motherboard from the system. Any accidental tug can tear the golden ribbon cable. If that happens you now have more problems then you came here with in the first place!
O que você precisa
Ferramentas


Exibir mais…
-
-
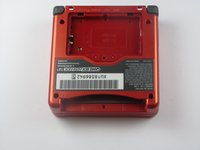
Use a standard Phillips #00 screwdriver to loosen the 4 mm screw that keeps the battery cover attached to the device.
-
-
-
Remove four 6.5 mm screws from the corners of the back cover using a tri-point Y00 screwdriver.
-
Remove two 4.6mm screws from the top-center and bottom-center of the device using a tri-point Y00 screwdriver.
-
-
-
Using a Phillips #00 screwdriver, remove the three Phillips #00 4 mm long screws that hold the motherboard to the button panel.
-


To reassemble your device, follow these instructions in reverse order.
To reassemble your device, follow these instructions in reverse order.
Cancelar: não concluí este guia.
26 outras pessoas executaram este guia.
Equipe

Cal Poly, Team 17-22, Forte Winter 2013 Membro de Cal Poly, Team 17-22, Forte Winter 2013
CPSU-FORTE-W13S17G22
Membros da 4
Autoria de 41 guias
4 comentários
I just bought one at a garage sale. Everything works fine, but the screen does not display properly. when you turn the unit on, all you get is vertical lines on the screen. They are random each time you turn it on. Is the ribbon ripped? If so, can you get a new one??? If so - where?
picked up Gameboy advanced sp 101 model when you go to charge it the light comes on but then shuts off so I thought maybe its either the battery or a fuse on the motherboard how can I change that or fix it
I think this would be a good idea, one day i will have a new GBA SP LCD screen and then, disassemble it and replace the screen
I dropped it once , now half of the games do not run, what should I do?