Ir para o conteúdo principal
How to Repair a Bra Underwire

How to Repair a Bra Underwire

Cody Gunderson

Cody Gunderson e 4 outros colaboradores

Última atualização em June 23, 2017

10 minutos
Fácil

Introdução

Ir para o passo 1

Everyone has that favorite bra that provides great support, perfect shaping, and full coverage. However, years of use, repeated washing, and constant chafing can lead to a bra underwire poking its way out of its cloth tubing. Exposed bra underwires can potentially injure the wearer and cause the bra to lose its support and structure. Happily, exposed bra underwires can easily be fixed in a matter of minutes, needing nothing more than a needle, colored thread of your choice, and a pair of scissors. Having good lighting while performing this repair is recommended.

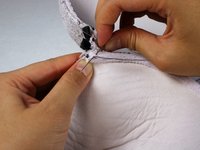
  1. How to Repair a Bra Underwire, How to Repair a Bra Underwire: passo 1, imagem 1 %32 How to Repair a Bra Underwire, How to Repair a Bra Underwire: passo 1, imagem 2 %32 How to Repair a Bra Underwire, How to Repair a Bra Underwire: passo 1, imagem 3 %32
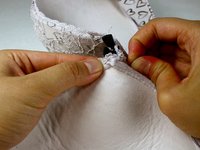
    • Push the underwire into the hole until it is no longer visible.

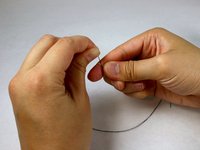
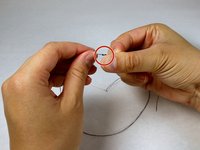
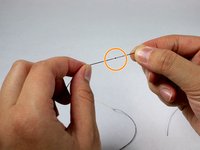
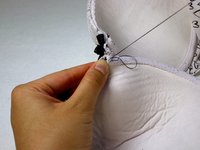
  2. How to Repair a Bra Underwire: passo 2, imagem 1 %32 How to Repair a Bra Underwire: passo 2, imagem 2 %32 How to Repair a Bra Underwire: passo 2, imagem 3 %32
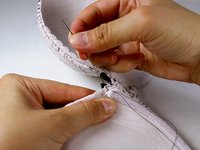
    • Thread the needle.

    • Pull the thread to a length of about 8 inches.

    • Match the length of the thread on each side of the loop and cut with the scissors.

    • Doubling up the thread in this way allows for stronger and longer-lasting stitches.

  3. How to Repair a Bra Underwire: passo 3, imagem 1 %32 How to Repair a Bra Underwire: passo 3, imagem 2 %32 How to Repair a Bra Underwire: passo 3, imagem 3 %32
    • Loop both ends of the thread around your index finger.

    • Pinch the ends of the thread between your index finger and thumb and roll your index finger downwards until the loop slips off.

    • Carefully take hold of the loop and pull to create a knot.

    • Sometimes the knot created the first time may not be large enough. Repeat the last three instructions a second time to make a larger knot.

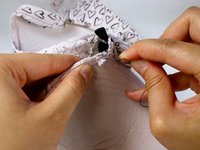
  4. How to Repair a Bra Underwire: passo 4, imagem 1 %32 How to Repair a Bra Underwire: passo 4, imagem 2 %32 How to Repair a Bra Underwire: passo 4, imagem 3 %32
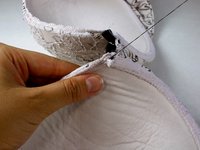
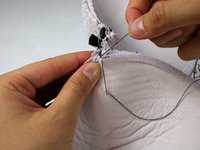
    • Insert the needle just above the tear in the bra where the underwire came out.

    • This ensures that the hole will not expand any further and provides extra stability in the stitches.

    • Handle the needle with care to not accidentally injure yourself!

  5. How to Repair a Bra Underwire: passo 5, imagem 1 %32 How to Repair a Bra Underwire: passo 5, imagem 2 %32
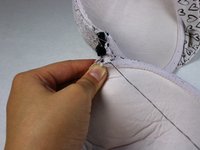
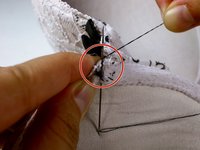
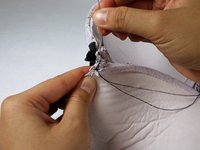
    • Use a whip stitch to mend the tear.

    • Pull the needle through the fabric until the knot at the end of the thread approaches the incision.

    • On the opposite side, insert the needle again at a point just after the first incision and pull it through the fabric.

    • Continue this pattern two or three stitches below the tear.

  6. How to Repair a Bra Underwire: passo 6, imagem 1 %32 How to Repair a Bra Underwire: passo 6, imagem 2 %32
    • Repeat the process from Step 4 going back upwards towards the tear, over your current stitching.

    • This gives your stitches extra reinforcement to make sure the tear is not reopened or pushes through the stitches.

  7. How to Repair a Bra Underwire: passo 7, imagem 1 %32 How to Repair a Bra Underwire: passo 7, imagem 2 %32 How to Repair a Bra Underwire: passo 7, imagem 3 %32
    • Close the stitch.

    • Near your first incision, where the knot is, insert the needle into the fabric halfway through.

    • Wind the leftover thread around the sharp end of the needle 3-4 times, then pull the needle through completely.

    • Tug on the needle upwards to tighten the knot created.

  8. How to Repair a Bra Underwire: passo 8, imagem 1 %32 How to Repair a Bra Underwire: passo 8, imagem 2 %32 How to Repair a Bra Underwire: passo 8, imagem 3 %32
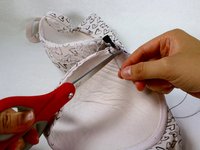
    • Trim the thread with scissors. Leave a few millimeters of thread leftover to ensure that the knot does not come loose.

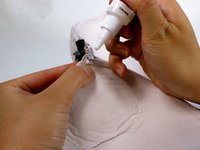
    • Optional: use a small amount of fabric adhesive over the stitching to fully reinforce it and seal the tear.

    • Leave it without glue and you are done.

Conclusão

Wear your bra a few times to make sure the underwire doesn't force its way out again. If it does, use tighter stitches and sew them a little closer together.

Cody Gunderson

Membro desde: 04/28/17

107 Reputação

Autoria de 1 guia

Equipe

UC Davis, Team S1-G2, Coad Spring 2017 Membro de UC Davis, Team S1-G2, Coad Spring 2017

UCD-COAD-S17S1G2

4 Membros

1 Guia de autoria

0 comentários

Comentar

Exibir estatísticas:

Últimas 24 horas: 1

Últimos 7 dias: 7

Últimos 30 dias: 21

Ao todo: 4,584