Ir para o conteúdo principal
Hover-1 Nomad Gyroscope Sensor Boards Replacement

Hover-1 Nomad Gyroscope Sensor Boards Replacement

Samuel Frazee

Samuel Frazee e 5 outros colaboradores

Última atualização em October 2, 2019

10 - 15 minutos
Moderado

Introdução

Ir para o passo 1

If your Hover-1 Nomad has major electrical issues, one of the gyroscope sensor boards may be damaged. You can follow this guide to remove and replace the two circuit boards in your Nomad. The circuit boards control the sensors, motors, lights, and speaker in the hoverboard.

For your safety, discharge your battery below 25% before disassembling your hoverboard. This reduces the risk of a dangerous thermal event if the battery is accidentally damaged during the repair.

O que você precisa

A iFixit ganha comissão quando você compra por estes links.
  1. Hover-1 Nomad Gyroscope Sensor Boards Replacement, Outer Shell: passo 1, imagem 1 %32 Hover-1 Nomad Gyroscope Sensor Boards Replacement, Outer Shell: passo 1, imagem 2 %32 Hover-1 Nomad Gyroscope Sensor Boards Replacement, Outer Shell: passo 1, imagem 3 %32
    • Break the two warranty stickers by poking a screwdriver through them or peeling them off.

    • Remove the following twenty screws by rotating the screwdriver counterclockwise:

    • Eight 16.2mm Phillips #2 screws

    • Eight 15mm Phillips #2 screws

    • Four 19.1mm Phillips #2 screws

    • The holes containing most of the screws are deep and narrow. A screwdriver with interchangable bits will not be able to reach them.

    • Do not over-tighten the screws during reassembly. Over-tightened screws can crack the plastic channels holding the shell to the frame of the hoverboard.

  2. Hover-1 Nomad Gyroscope Sensor Boards Replacement: passo 2, imagem 1 %32 Hover-1 Nomad Gyroscope Sensor Boards Replacement: passo 2, imagem 2 %32 Hover-1 Nomad Gyroscope Sensor Boards Replacement: passo 2, imagem 3 %32
    • Use a nylon spudger to pry the metal handle away from the outer shell.

    • Rotate the metal handle toward the center of the hoverboard to unlock the plate from the retaining clips.

    • Lift the hoverboard off the metal handle.

    • Repeat for the handle on the other side of the hoverboard.

  3. Hover-1 Nomad Gyroscope Sensor Boards Replacement: passo 3, imagem 1 %32
    • Lift the plastic cover on each side up and away from the device.

    • Multiple wires connect the circuit boards to the outer shell. Remove the shell gently to avoid damaging the wires or components.

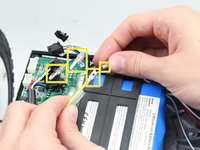
  4. Hover-1 Nomad Gyroscope Sensor Boards Replacement: passo 4, imagem 1 %32 Hover-1 Nomad Gyroscope Sensor Boards Replacement: passo 4, imagem 2 %32
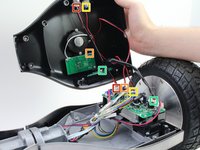
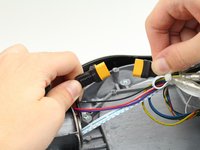
    • Disconnect the following wires by pinching the connector tabs and pulling the plugs out of the connectors:

    • Charging port wires

    • Speaker assembly wires

    • Power button wires

    • Headlight wires

    • Only the headlight wires need to be disconnected from the other circuit board.

    • Ensure the wires are connected to the correct ports on the circuit board during reassembly.

  5. Hover-1 Nomad Gyroscope Sensor Boards Replacement, Gyroscope Sensor Boards: passo 5, imagem 1 %32
    • Cut the two zip ties around the bundle of wires with cutting pliers.

    • The zip tie is secured tightly around the wires. Be careful not to nick or cut any of the wires while removing the zip tie.

    • Do not puncture or cut the lithium-ion battery. Especially with a battery this large, the battery can catch fire or explode if damaged.

  6. Hover-1 Nomad Gyroscope Sensor Boards Replacement: passo 6, imagem 1 %32 Hover-1 Nomad Gyroscope Sensor Boards Replacement: passo 6, imagem 2 %32
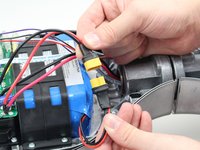
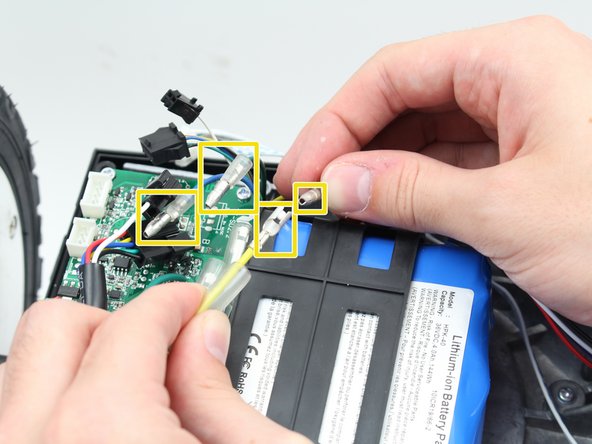
    • Disconnect the circuit boards from the battery by pulling both battery connectors apart.

  7. Hover-1 Nomad Gyroscope Sensor Boards Replacement: passo 7, imagem 1 %32 Hover-1 Nomad Gyroscope Sensor Boards Replacement: passo 7, imagem 2 %32 Hover-1 Nomad Gyroscope Sensor Boards Replacement: passo 7, imagem 3 %32
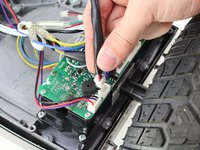
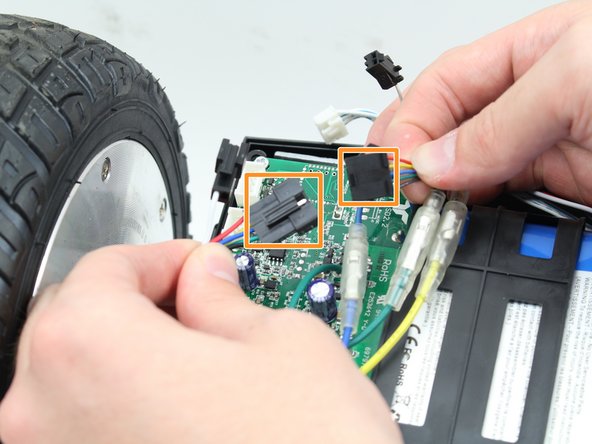
    • Disconnect the following wires connecting the circuit boards to the sensors and motors:

    • Disconnect the white connectors by pinching the tab and pulling up on the connectors.

    • Disconnect the black connectors by pulling the two sides apart.

    • Disconnect the green, yellow, and blue cables by pulling back the plastic shielding and pulling the ends apart.

  8. Hover-1 Nomad Gyroscope Sensor Boards Replacement: passo 8, imagem 1 %32
    • Remove the four 14mm Phillips #1 screws in the corners of each circuit board by turning the screwdriver counterclockwise.

  9. Hover-1 Nomad Gyroscope Sensor Boards Replacement: passo 9, imagem 1 %32
    • Remove the circuit board by pulling it up and out of the hoverboard.

Conclusão

To reassemble your device, follow these instructions in reverse order.

4 outras pessoas executaram este guia.

Samuel Frazee

Membro desde: 10/08/18

1.015 Reputação

Autoria de 7 guias

Equipe

Cal Poly, Team S15-G1, White Fall 2018 Membro de Cal Poly, Team S15-G1, White Fall 2018

CPSU-WHITE-F18S15G1

4 Membros

Autoria de 7 guias

3Comentários do guia

Any idea were can i buy the motherboard for this hover.thanks

visan florin mihai - Responder

Hey, do you know where I can find the gyroscope motherboard for the Nomad 1? Thanks

Angie M - Responder

Where can I buy these

Kyle noble - Responder

Comentar

Visualizações:

Últimas 24 horas: 2

Últimos 7 dias: 12

Últimos 30 dias: 37

Ao todo: 2,267