Ir para o conteúdo principal
Participe da comunidade de reparos - Criar conta

Google Pixel 6a Motherboard Replacement

O que você precisa

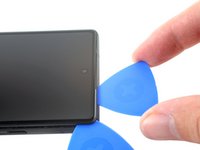
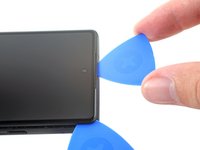
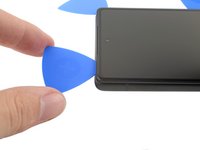
  1. Google Pixel 6a Motherboard Replacement, Safety Precautions: passo 1, imagem 1 %32 Google Pixel 6a Motherboard Replacement, Safety Precautions: passo 1, imagem 2 %32
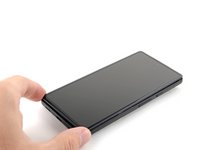
    • Allow your battery to drain below 25% before starting this repair. A charged battery may catch fire if damaged.

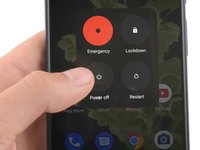
    • Fully power off your phone and unplug any cables.

    Pergunte ao FixBot
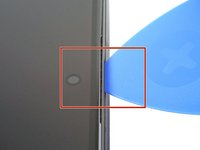
  2. Google Pixel 6a Motherboard Replacement, Remove the SIM card tray: passo 2, imagem 1 %32 Google Pixel 6a Motherboard Replacement, Remove the SIM card tray: passo 2, imagem 2 %32 Google Pixel 6a Motherboard Replacement, Remove the SIM card tray: passo 2, imagem 3 %32
    • Insert a SIM eject tool, bit, or straightened paper clip into the SIM card tray hole.

    • Press the SIM eject tool into the SIM card tray hole to eject the SIM card tray.

    • Remove the SIM card tray.

    Pergunte ao FixBot
  3. Google Pixel 6a Motherboard Replacement, Screen removal information: passo 3, imagem 1 %32 Google Pixel 6a Motherboard Replacement, Screen removal information: passo 3, imagem 2 %32 Google Pixel 6a Motherboard Replacement, Screen removal information: passo 3, imagem 3 %32
    • Before starting your repair, take note of the following:

    • Screen seam: This seam separates the screen from the rest of the phone. Do not pry at this seam.

    • Bezel seam: This is where the plastic bezel designed to protect the screen meets the frame. It's held in place by plastic clips. This is where you should pry.

    Pergunte ao FixBot
  4. Google Pixel 6a Motherboard Replacement, Anti-Clamp instructions: passo 4, imagem 1 %32 Google Pixel 6a Motherboard Replacement, Anti-Clamp instructions: passo 4, imagem 2 %32 Google Pixel 6a Motherboard Replacement, Anti-Clamp instructions: passo 4, imagem 3 %32
    Ferramenta utilizada neste passo:
    Clampy - Anti-Clamp
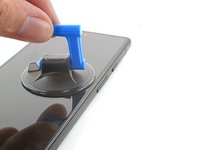
    $24.95
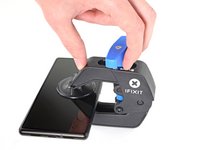
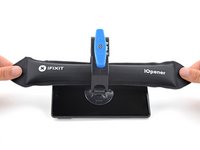
    • The next three steps demonstrate the Anti-Clamp, a tool we designed to make the opening procedure easier. If you aren't using the Anti-Clamp, skip down three steps for an alternate method.

    • For complete instructions on how to use the Anti-Clamp, check out this guide.

    • If your screen is cracked, cover it with a layer of clear packing tape to help the suction cup adhere.

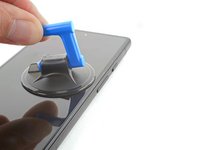
    • Pull the blue handle backwards to unlock the Anti-Clamp's arms.

    • Slide the arms over the right edge of your phone.

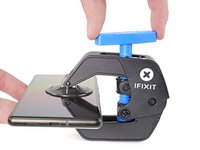
    • Position the suction cups near the middle of the right edge of the phone—one on the front, and one on the back.

    • Squeeze the cups together to apply suction.

    • If you find that the surface of your phone is too slippery for the Anti-Clamp to hold onto, you can use tape to create a grippier surface.

    Pergunte ao FixBot
  5. Google Pixel 6a Motherboard Replacement: passo 5, imagem 1 %32 Google Pixel 6a Motherboard Replacement: passo 5, imagem 2 %32 Google Pixel 6a Motherboard Replacement: passo 5, imagem 3 %32
    • Pull the blue handle forward to lock the arms.

    • Turn the handle clockwise 360 degrees or until the cups start to stretch.

    • Make sure the suction cups remain aligned with each other. If they begin to slip out of alignment, loosen the suction cups slightly and realign the arms.

    Pergunte ao FixBot
  6. Google Pixel 6a Motherboard Replacement: passo 6, imagem 1 %32 Google Pixel 6a Motherboard Replacement: passo 6, imagem 2 %32
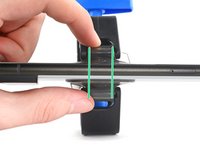
    • Heat an iOpener and thread it through the arms of the Anti-Clamp so it lays on the right edge of the phone.

    • You can also use a hair dryer or heat gun—but extreme heat can damage the display and/or internal battery, so proceed with care.

    • Wait one minute to give the adhesive a chance to release and present an opening gap.

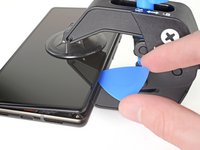
    • Insert an opening pick under the screen frame when the Anti-Clamp creates a large enough gap.

    • If the Anti-Clamp doesn't create a sufficient gap, apply more heat to the area and rotate the handle clockwise half a turn.

    • Don't crank more than a half a turn at a time, and wait one minute between turns. Let the Anti-Clamp and time do the work for you.

    • Skip the next two steps.

    Pergunte ao FixBot
  7. Google Pixel 6a Motherboard Replacement, Heat the right edge: passo 7, imagem 1 %32
    • Heat an iOpener and apply it to the right edge of the screen for two minutes.

    • A hair dryer, heat gun, or hot plate may also be used, but be careful not to overheat the phone—the display and internal battery are both susceptible to heat damage.

    Pergunte ao FixBot
  8. Google Pixel 6a Motherboard Replacement, Insert an opening pick: passo 8, imagem 1 %32 Google Pixel 6a Motherboard Replacement, Insert an opening pick: passo 8, imagem 2 %32 Google Pixel 6a Motherboard Replacement, Insert an opening pick: passo 8, imagem 3 %32
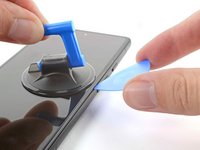
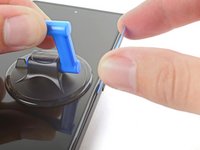
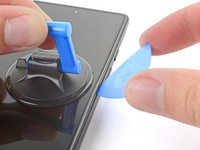
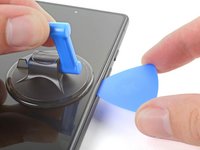
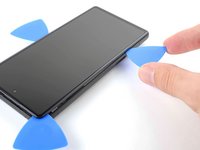
    • Apply a suction cup to the screen, as close to the center of the right edge as possible.

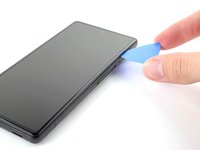
    • Pull up on the suction cup with strong, steady force to create a gap between the bezel and the frame.

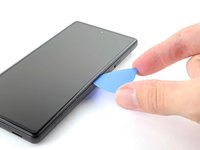
    • Insert an opening pick into the gap.

    • Depending on the age of your phone, this may be difficult. If you're having trouble, apply more heat to the edge and try again.

    • If your display is badly cracked, covering it with a layer of clear packing tape may allow the suction cup to adhere. Alternatively, very strong tape may be used instead of the suction cup. If all else fails, you can superglue the suction cup to the broken screen.

    Pergunte ao FixBot
  9. Google Pixel 6a Motherboard Replacement, Reposition the opening pick: passo 9, imagem 1 %32 Google Pixel 6a Motherboard Replacement, Reposition the opening pick: passo 9, imagem 2 %32 Google Pixel 6a Motherboard Replacement, Reposition the opening pick: passo 9, imagem 3 %32
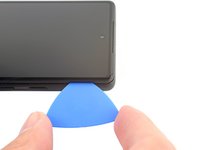
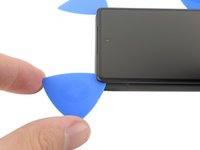
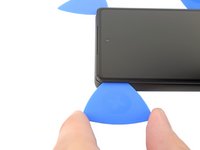
    • While still applying suction, pivot the pick upwards to a steep angle.

    • Carefully push the pick in while prying to reposition the opening pick into the bezel seam.

    • Only insert the pick up to 3.5 mm to avoid damaging the internals.

    Pergunte ao FixBot
  10. Google Pixel 6a Motherboard Replacement, Release the right clips: passo 10, imagem 1 %32 Google Pixel 6a Motherboard Replacement, Release the right clips: passo 10, imagem 2 %32 Google Pixel 6a Motherboard Replacement, Release the right clips: passo 10, imagem 3 %32
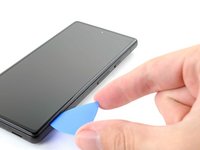
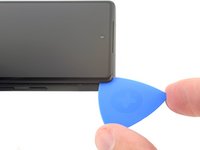
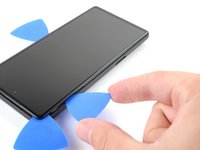
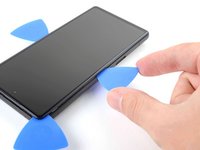
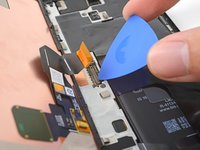
    • Slide the pick along the right edge to release the plastic clips securing the bezel to the frame.

    • Position the pick at the top-right edge before moving to the next step.

    Pergunte ao FixBot
  11. Google Pixel 6a Motherboard Replacement, Release the top right clips: passo 11, imagem 1 %32 Google Pixel 6a Motherboard Replacement, Release the top right clips: passo 11, imagem 2 %32 Google Pixel 6a Motherboard Replacement, Release the top right clips: passo 11, imagem 3 %32
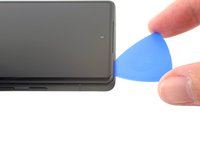
    • Rotate the opening pick around the top-right corner of the phone to release the clips.

    • Leave the opening pick in the top-right corner to prevent the clips from re-locking.

    • Only insert the pick up to 4 mm to avoid damaging the internals.

    Pergunte ao FixBot
  12. Google Pixel 6a Motherboard Replacement, Release the top clips: passo 12, imagem 1 %32 Google Pixel 6a Motherboard Replacement, Release the top clips: passo 12, imagem 2 %32 Google Pixel 6a Motherboard Replacement, Release the top clips: passo 12, imagem 3 %32
    • Insert a new opening pick into the gap you just created.

    • Slide the pick along the top edge to release the clips.

    • When slicing around the front camera, only insert the pick up to 3 mm to avoid damaging the lens.

    Pergunte ao FixBot
  13. Google Pixel 6a Motherboard Replacement, Release the top left clips: passo 13, imagem 1 %32 Google Pixel 6a Motherboard Replacement, Release the top left clips: passo 13, imagem 2 %32 Google Pixel 6a Motherboard Replacement, Release the top left clips: passo 13, imagem 3 %32
    • Rotate the opening pick around the top-left corner of the phone to release the clips.

    • Leave the opening pick in the top-left corner to prevent the clips from re-locking.

    Pergunte ao FixBot
  14. Google Pixel 6a Motherboard Replacement, Release the left clips: passo 14, imagem 1 %32 Google Pixel 6a Motherboard Replacement, Release the left clips: passo 14, imagem 2 %32 Google Pixel 6a Motherboard Replacement, Release the left clips: passo 14, imagem 3 %32
    • Insert a new opening pick into the gap you just created.

    • Slide the pick along the left edge to release the clips.

    • Only insert the pick up to 3 mm to avoid damaging the internals.

    • Repeat the rotating and sliding procedure for the remaining edge.

    • At this point, the screen should be separated from the frame. If there's still resistance around the edges of the screen, use an opening pick to release any remaining clips.

    Pergunte ao FixBot
  15. Google Pixel 6a Motherboard Replacement, Reposition the screen: passo 15, imagem 1 %32 Google Pixel 6a Motherboard Replacement, Reposition the screen: passo 15, imagem 2 %32 Google Pixel 6a Motherboard Replacement, Reposition the screen: passo 15, imagem 3 %32
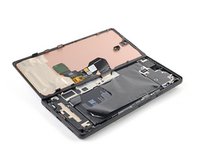
    • Don't try to remove the screen all the way yet. It's still connected to the frame by a flex cable.

    • Lift the right edge of the screen up and towards the left side of the device, like opening a book.

    • Rest the screen upside down and parallel to the frame before continuing.

    • Don't twist the screen or move it too far away from the frame to avoid damaging the flex cable.

    Pergunte ao FixBot
  16. Google Pixel 6a Motherboard Replacement, Remove the display cable bracket: passo 16, imagem 1 %32 Google Pixel 6a Motherboard Replacement, Remove the display cable bracket: passo 16, imagem 2 %32 Google Pixel 6a Motherboard Replacement, Remove the display cable bracket: passo 16, imagem 3 %32
    Ferramenta utilizada neste passo:
    Tweezers
    $4.99
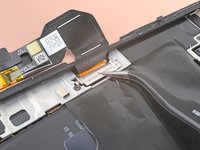
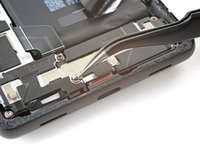
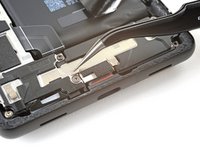
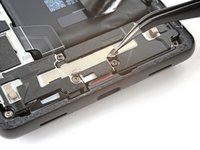
    • The display cable bracket is secured with metal clips.

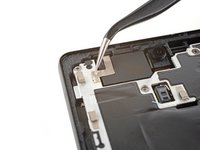
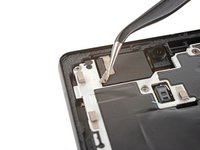
    • Use tweezers to bend the bottom side of the bracket upwards, releasing the metal clip.

    • Remove the display cable bracket.

    • During reassembly, insert the top side of the bracket first before pressing down the other side. Failure to do so could result in sparks and logic board damage.

    Pergunte ao FixBot
  17. Google Pixel 6a Motherboard Replacement, Disconnect the display cable: passo 17, imagem 1 %32 Google Pixel 6a Motherboard Replacement, Disconnect the display cable: passo 17, imagem 2 %32 Google Pixel 6a Motherboard Replacement, Disconnect the display cable: passo 17, imagem 3 %32
    • Be very careful performing this step, as you risk damaging tiny components around the press connector.

    • Insert the tip of an opening pick under the bottom right edge of the display cable press connector, right above the nearby screw hole.

    • Pry up and disconnect the display cable press connector.

    • To re-attach press connectors like this one, carefully align and press down on one side until it clicks into place, then repeat on the other side. Do not press down on the middle. If the connector is misaligned, the pins can bend, causing permanent damage.

    Pergunte ao FixBot
  18. Google Pixel 6a Motherboard Replacement, Screen information: passo 18, imagem 1 %32
    • The back of the Pixel's screen is very fragile. Even a small scratch or dent can damage the screen.

    • To prevent damaging your screen or replacement screen:

    • When handling your screen, grip it by its edges.

    • When placing the screen on your work area, make sure nothing is touching the bottom of the screen. Consider placing it on a soft, lint-free cloth.

    Pergunte ao FixBot
  19. Google Pixel 6a Motherboard Replacement, Reassembly information: passo 19, imagem 1 %32 Google Pixel 6a Motherboard Replacement, Reassembly information: passo 19, imagem 2 %32
    • Remove the screen.

    • During reassembly:

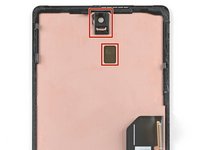
    • If you replaced your screen, check the front-facing camera hole and the sensor cutout on your replacement screen, and remove any remaining liners.

    • Check your phone if the proximity sensor's rubber gasket is missing—it might be stuck to the back of your old screen. Replace it if necessary.

    • This is a good point to test your phone before sealing it up. Temporarily connect your screen, power on your phone, and make sure it works as expected. Before continuing with reassembly, power off your phone.

    • Remember to reinstall the display cable bracket.

    • Follow this guide to replace the screen adhesive.

    • If you're installing a new screen, follow this guide to calibrate the fingerprint sensor.

    Pergunte ao FixBot
  20. Google Pixel 6a Motherboard Replacement, Remove the silver tape: passo 20, imagem 1 %32 Google Pixel 6a Motherboard Replacement, Remove the silver tape: passo 20, imagem 2 %32
    Ferramenta utilizada neste passo:
    Tweezers
    $4.99
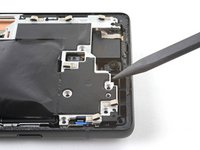
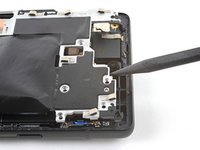
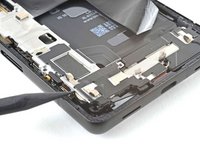
    • Use tweezers to peel back the silver tape connecting the midframe and the top speaker.

    • Don't completely remove the tape. You only need to remove the bridge between the midframe and the top speaker.

    Pergunte ao FixBot
  21. Google Pixel 6a Motherboard Replacement: passo 21, imagem 1 %32 Google Pixel 6a Motherboard Replacement: passo 21, imagem 2 %32 Google Pixel 6a Motherboard Replacement: passo 21, imagem 3 %32
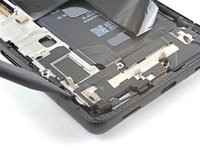
    • Use tweezers to peel back the tape covering the two screws on both sides of the USB-C port.

    Pergunte ao FixBot
  22. Google Pixel 6a Motherboard Replacement, Unfasten the midframe: passo 22, imagem 1 %32 Google Pixel 6a Motherboard Replacement, Unfasten the midframe: passo 22, imagem 2 %32
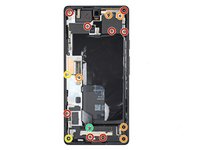
    • Use a T3 Torx screwdriver to remove the 16 screws securing the midframe to the frame:

    • Eight 4.3 mm screws

    • Five 2.9 mm screws

    • Two 4.9 mm screws

    • One 4.6 mm screw

    Pergunte ao FixBot
  23. Google Pixel 6a Motherboard Replacement, Release the midframe clips: passo 23, imagem 1 %32 Google Pixel 6a Motherboard Replacement, Release the midframe clips: passo 23, imagem 2 %32
    • Insert a spudger between the top of the midframe and the frame, near the front camera.

    • Pry up with the spudger to release the top of the midframe from its clips.

    Pergunte ao FixBot
  24. Google Pixel 6a Motherboard Replacement: passo 24, imagem 1 %32 Google Pixel 6a Motherboard Replacement: passo 24, imagem 2 %32
    • Insert a spudger between the bottom left of the midframe and the frame.

    • Pry up with the spudger to release the bottom of the midframe from its clips.

    Pergunte ao FixBot
  25. Google Pixel 6a Motherboard Replacement, Remove the midframe: passo 25, imagem 1 %32 Google Pixel 6a Motherboard Replacement, Remove the midframe: passo 25, imagem 2 %32
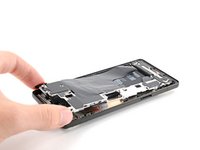
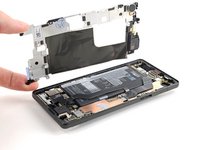
    • Remove the midframe.

    • You may feel a bit of resistance. This is normal since the midframe is slightly bonded to the heat sink with thermal paste.

    • During reassembly, this is a good point to power on your phone and test all functions before sealing it up. Be sure to power your phone back down completely before you continue working.

    Pergunte ao FixBot
  26. Google Pixel 6a Motherboard Replacement, Remove the thermal paste: passo 26, imagem 1 %32 Google Pixel 6a Motherboard Replacement, Remove the thermal paste: passo 26, imagem 2 %32 Google Pixel 6a Motherboard Replacement, Remove the thermal paste: passo 26, imagem 3 %32
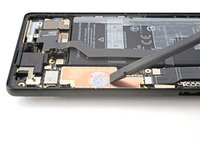
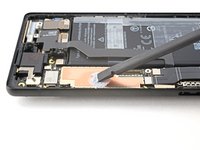
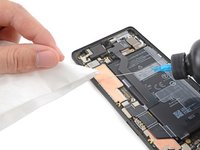
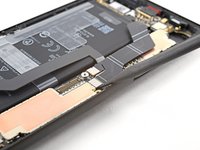
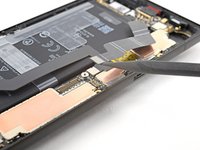
    • Use the flat end of a spudger to scrape off the thermal paste.

    • Clean any remaining thermal paste with isopropyl alcohol and either a coffee filter or a lint-free cloth.

    • Repeat the cleaning process for the thermal paste on the midframe.

    • During reassembly, follow this guide for reapplying thermal paste to your device.

    Pergunte ao FixBot
  27. Google Pixel 6a Motherboard Replacement, Disconnect the battery: passo 27, imagem 1 %32 Google Pixel 6a Motherboard Replacement, Disconnect the battery: passo 27, imagem 2 %32
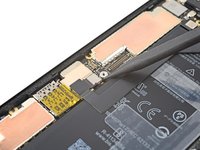
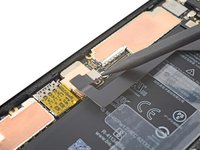
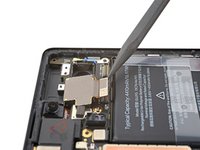
    • Use a spudger to pry up and disconnect the battery's press connector.

    Pergunte ao FixBot
  28. Google Pixel 6a Motherboard Replacement, Unfasten the 5G mmWave antenna bracket: passo 28, imagem 1 %32 Google Pixel 6a Motherboard Replacement, Unfasten the 5G mmWave antenna bracket: passo 28, imagem 2 %32
    • If your device doesn't have a 5G mmWave antenna, skip the next four steps.

    • Use a T3 Torx screwdriver to remove the 2.9 mm screw securing the 5G mmWave antenna bracket.

    Pergunte ao FixBot
  29. Google Pixel 6a Motherboard Replacement, Remove the 5G mmWave antenna bracket: passo 29, imagem 1 %32 Google Pixel 6a Motherboard Replacement, Remove the 5G mmWave antenna bracket: passo 29, imagem 2 %32 Google Pixel 6a Motherboard Replacement, Remove the 5G mmWave antenna bracket: passo 29, imagem 3 %32
    Ferramenta utilizada neste passo:
    Tweezers
    $4.99
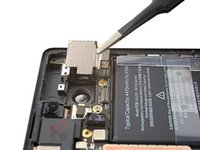
    • Use tweezers, or your fingers, to pull the bracket towards the right edge of the phone and disconnect its clip.

    • Remove the 5G mmWave antenna bracket.

    Pergunte ao FixBot
  30. Google Pixel 6a Motherboard Replacement, Disconnect the 5G mmWave antenna: passo 30, imagem 1 %32 Google Pixel 6a Motherboard Replacement, Disconnect the 5G mmWave antenna: passo 30, imagem 2 %32
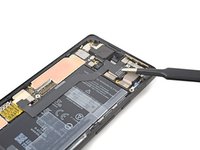
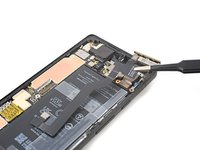
    • Use a spudger to pry up and disconnect the 5G mmWave antenna's press connector.

    Pergunte ao FixBot
  31. Google Pixel 6a Motherboard Replacement: passo 31, imagem 1 %32 Google Pixel 6a Motherboard Replacement: passo 31, imagem 2 %32
    • Use tweezers, or your fingers, to remove the 5G mmWave antenna.

    Pergunte ao FixBot
  32. Google Pixel 6a Motherboard Replacement, Remove the ultrawide rear camera: passo 32, imagem 1 %32 Google Pixel 6a Motherboard Replacement, Remove the ultrawide rear camera: passo 32, imagem 2 %32 Google Pixel 6a Motherboard Replacement, Remove the ultrawide rear camera: passo 32, imagem 3 %32
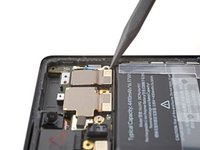
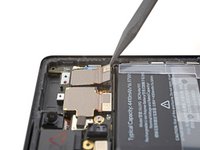
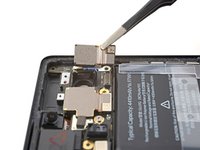
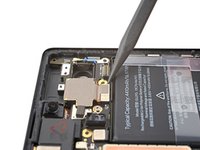
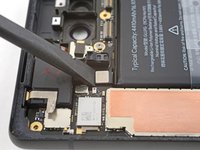
    • Use a spudger to pry up and disconnect the ultrawide rear camera's press connector.

    • Remove the ultrawide rear camera.

    Pergunte ao FixBot
  33. Google Pixel 6a Motherboard Replacement, Remove the wide rear camera: passo 33, imagem 1 %32 Google Pixel 6a Motherboard Replacement, Remove the wide rear camera: passo 33, imagem 2 %32 Google Pixel 6a Motherboard Replacement, Remove the wide rear camera: passo 33, imagem 3 %32
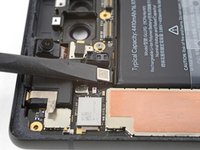
    • Use a spudger to pry up and disconnect the wide rear camera's press connector.

    • Remove the wide rear camera.

    Pergunte ao FixBot
  34. Google Pixel 6a Motherboard Replacement, Disconnect the volume and power button: passo 34, imagem 1 %32 Google Pixel 6a Motherboard Replacement, Disconnect the volume and power button: passo 34, imagem 2 %32
    • Use the flat end of a spudger to pry up the volume and power button press connector near the top left corner of the motherboard.

    Pergunte ao FixBot
  35. Google Pixel 6a Motherboard Replacement, Unfasten the motherboard: passo 35, imagem 1 %32 Google Pixel 6a Motherboard Replacement, Unfasten the motherboard: passo 35, imagem 2 %32
    • Use a T3 Torx screwdriver to remove the 2.9 mm screw securing the motherboard.

    Pergunte ao FixBot
  36. Google Pixel 6a Motherboard Replacement, Remove the motherboard: passo 36, imagem 1 %32 Google Pixel 6a Motherboard Replacement, Remove the motherboard: passo 36, imagem 2 %32 Google Pixel 6a Motherboard Replacement, Remove the motherboard: passo 36, imagem 3 %32
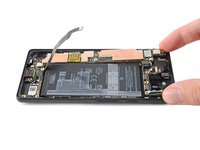
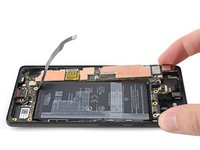
    • Insert a spudger between the top of the motherboard and the frame, near the front camera.

    • Pry up to lift the motherboard until you can grip it with your fingers.

    Pergunte ao FixBot
  37. Google Pixel 6a Motherboard Replacement: passo 37, imagem 1 %32 Google Pixel 6a Motherboard Replacement: passo 37, imagem 2 %32 Google Pixel 6a Motherboard Replacement: passo 37, imagem 3 %32
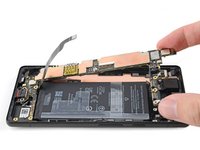
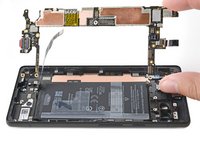
    • Tilt the top of the motherboard upwards to release its plastic clips.

    • Remove the motherboard.

    Pergunte ao FixBot
  38. Google Pixel 6a Motherboard Replacement, Remove the front camera: passo 38, imagem 1 %32 Google Pixel 6a Motherboard Replacement, Remove the front camera: passo 38, imagem 2 %32 Google Pixel 6a Motherboard Replacement, Remove the front camera: passo 38, imagem 3 %32
    • Use a spudger to pry up and disconnect the front camera's press connector located on the bottom of the logic board.

    • Remove the front camera.

    Pergunte ao FixBot
  39. Google Pixel 6a Motherboard Replacement, Only the motherboard remains: passo 39, imagem 1 %32
    • You're now left with only the motherboard.

    Pergunte ao FixBot
Conclusão

Compare your new replacement part to the original part—you may need to transfer remaining components or remove adhesive backings from the new part before you install it.

To reassemble your device, follow these instructions in reverse order.

To run a diagnostics test with the built-in Pixel Diagnostic tool, click here.

Repair didn’t go as planned? Try some basic troubleshooting, or ask our Google Pixel 6a Answers community for help.

6 outras pessoas executaram este guia.

Alex Diaz-Kokaisl

Membro desde: 01/16/22

237.828 Reputação

Autoria de 1.171 guias

Equipe

iFixit Membro de iFixit

Staff

123 Membros

Autoria de 25.718 guias

3Comentários do guia

As of right now, is it possible to get a replacement motherboard for the Pixel 6a? I spoke with a repair shop and they said the phone would need to be under warranty (which in the case of my wife's phone, it is not due to getting smashed in a car door) to get a replacement motherboard.

Tanner Davis - Responder Compartilhar
Hello. Do you have a schematic diagram of the pixel 6A? Thanks in advance

Leigh Catalan - Responder Compartilhar

Great guide! Quick question. Where do I get the motherboard???

Sebastian Meckovski - Responder Compartilhar
Comentar

Visualizações:

Últimas 24 horas: 6

Últimos 7 dias: 70

Últimos 30 dias: 367

Ao todo: 16,444