Ir para o conteúdo principal
Eyelash Extensions Replacement

Eyelash Extensions Replacement

April Pantaleon

April Pantaleon e 2 outros colaboradores

Última atualização em May 7, 2024

1 - 3 horas
Difícil

Every person has a natural growth cycle, just like hair. Natural lashes shed anywhere from 60-90 days, replacing themselves with new ones.

Fixing grown-out eyelash extensions is necessary every 2-3 weeks to keep your eyelashes looking full.

This repair guide is necessary for eyelash technicians to ensure a safe and proper eyelash extension fill procedure. Eyelash extension fills are a great opportunity to refine the client’s look based on what look they are going for. It is also a great opportunity for the lash technician to express their creativity.

  1. Eyelash Extensions Replacement, Eyelash Extensions: passo 1, imagem 1 %32
    • Wash hands thoroughly and make sure that the station and tools are cleaned and disinfected.

  2. Eyelash Extensions Replacement: passo 2, imagem 1 %32
    • Place the medical-grade tape under each eye, making sure that all the lower lashes are secured.

  3. Eyelash Extensions Replacement: passo 3, imagem 1 %32
    • Make sure that the client feels comfortable with the tape on with their eyes closed.

  4. Eyelash Extensions Replacement: passo 4, imagem 1 %32
    • Brush the eyelashes thoroughly using a mascara wand to remove the eyelashes that are ready to shed.

  5. Eyelash Extensions Replacement: passo 5, imagem 1 %32 Eyelash Extensions Replacement: passo 5, imagem 2 %32
    Ferramenta utilizada neste passo:
    Tweezers
    $4.99
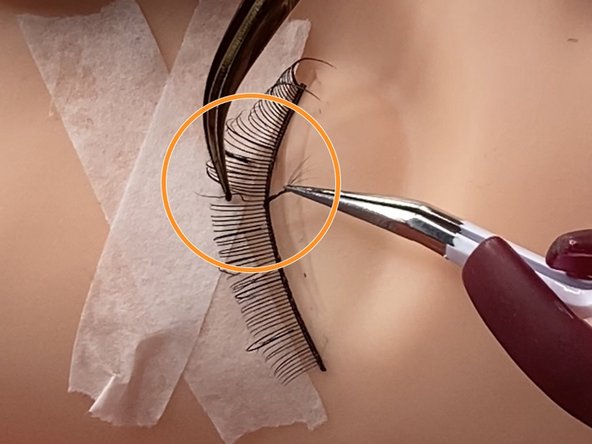
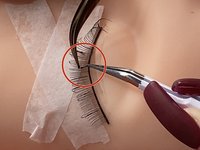
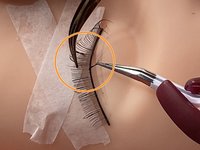
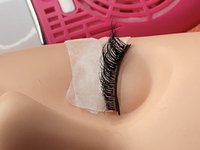
    • Remove all the grown-out lashes using the banana peel method.

    • Hold the natural lash in one clean tweezer and the eyelash extension in the other set of clean tweezers.

    • Gently pull the natural lash and the lash extension in opposite directions and peel the lashes apart like a banana.

  6. Eyelash Extensions Replacement: passo 6, imagem 1 %32
    • Brush the eyelashes again using a mascara wand after removing all the grown-out lashes.

  7. Eyelash Extensions Replacement: passo 7, imagem 1 %32 Eyelash Extensions Replacement: passo 7, imagem 2 %32 Eyelash Extensions Replacement: passo 7, imagem 3 %32
    • Put a drop or two of the eyelash primer on the micro swabs.

    • Dab the micro swabs on the eyelashes while making sure that it does not touch the eyelids as it can sting the client’s eyes.

  8. Eyelash Extensions Replacement: passo 8, imagem 1 %32
    • Let it air dry or use a fan for a faster dry time.

  9. Eyelash Extensions Replacement: passo 9, imagem 1 %32
    • Place a new lash extension using the eyelash extension adhesive of choice onto the natural eyelash, making sure that the eyelashes are isolated.

  10. Eyelash Extensions Replacement: passo 10, imagem 1 %32 Eyelash Extensions Replacement: passo 10, imagem 2 %32
    • Repeat Step 9 for both eyes until you are completely satisfied with your work.

  11. Eyelash Extensions Replacement: passo 11, imagem 1 %32
    • Inspect, separate, and brush the lashes to make sure that there are no upper lashes stuck on the lower lashes.

  12. Eyelash Extensions Replacement: passo 12, imagem 1 %32
    • Use a fan for 5-10 minutes to make sure that the adhesive is cured.

  13. Eyelash Extensions Replacement: passo 13, imagem 1 %32
    • Gently remove the tape from under each eye.

Linha de Chegada

April Pantaleon

Membro desde: 09/20/20

349 Reputação

Autoria de 2 guias

0 comentários

Adicione um comentário

Exibir estatísticas:

Últimas 24 horas: 1

Últimos 7 dias: 4

Últimos 30 dias: 10

Duração total: 402